crwdns2915892:0crwdne2915892:0
The Asus Q200E has its battery inside the casing, but the battery is still fairly easy to replace.
crwdns2942213:0crwdne2942213:0
-
-
Turn off the computer and unplug the charge cable.
-
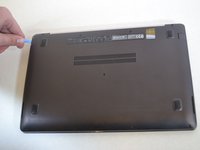
Turn the computer upside down.
-
-
-
Remove the nine Philips #00 screws holding the back panel in place (four 5.6mm, four 7.7mm, and one 9.2mm).
The four 7.7mm mm screws are on the edge near the labels (top of photo).
The 9.2 mm screw is in the center.
-
-
-
-
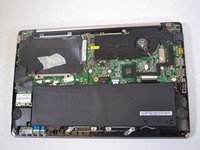
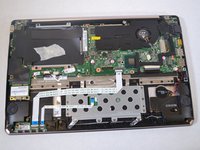
Use a plastic opening tool to gently remove the back panel.
-
-
-
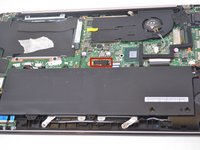
Remove the eight 4.7mm Philips #00 screws holding the battery in place.
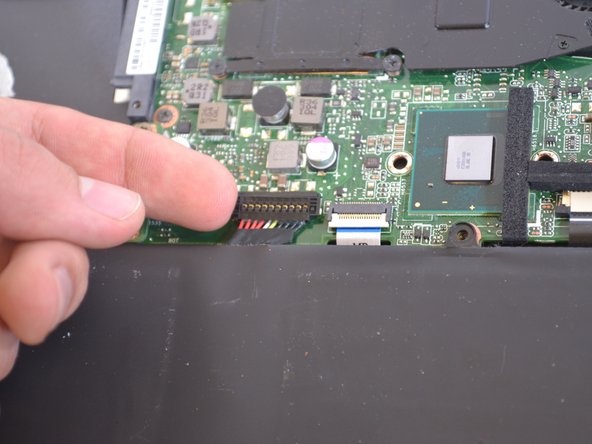
I would recommend removing the battery first, or at least disconnecting if from the rest of the system to prevent any unwanted electric discharge. Think of it as the equivalent of opening your PC where the first thing you do is disconnect the plug from the power supply.
You can disconnect the battery by lifting the ten wire connection running from the battery to the board. In the image above it appears just above the middle of the battery at the top (almost square in the middle of the laptop). In my system it has (from left to right) four red wires, one white wire, one yellow wire, and then four black wires. This connection can be removed by placing a finger-nail or small screwdriver underneath either side of the terminal (black plastic piece) and gently prying it upward.
Again, I highly recommend against removing any other components before ensuring that the power supply (battery) is disconnected.
-
-
-
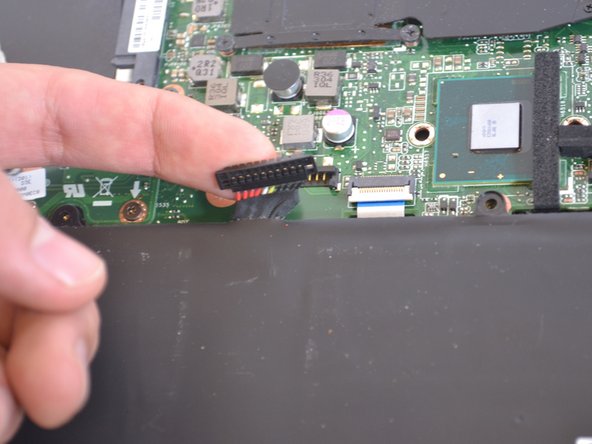
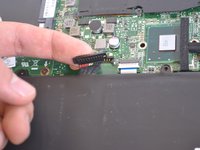
The battery is attached by a set of wires.
-
Use your finger to disconnect the set of wires. It should come off very easily.
-
-
-
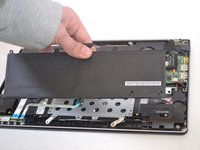
Now just lift the battery out of place.
I just changed new battery. How can i fix if still not charge?
-


To reassemble your device, follow these instructions in reverse order.
To reassemble your device, follow these instructions in reverse order.
crwdns2935221:0crwdne2935221:0
crwdns2935229:014crwdne2935229:0
crwdns2915084:0crwdne2915084:0

UWT Liner: Group 6 crwdns2935289:0UWT Liner: Group 6crwdne2935289:0
Community
crwdns2931471:03crwdne2931471:0
crwdns2935303:01crwdne2935303:0
crwdns2947412:02crwdne2947412:0
Super helpful instructions. Especially mentioning which screws were different sizes, so I knew to keep the 3 different sizes for the back cover separated and noted which sizes went back where. Many thanks!
Great guide. Thanks!