crwdns2933423:0crwdne2933423:0

Asus VivoBook Q200E-BSI3T08 Battery Replacement

crwdns2942213:0crwdne2942213:0

  1. Asus VivoBook Q200E-BSI3T08 Battery Replacement, Back Panel: crwdns2935265:01crwdnd2935265:01crwdnd2935265:01crwdne2935265:0
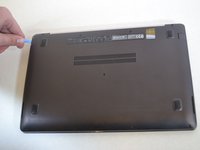
    • Turn off the computer and unplug the charge cable.

    • If the computer is on or plugged in, it could cause electric shock.

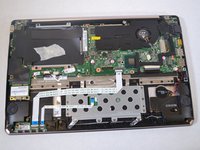
    • Turn the computer upside down.

  2. Asus VivoBook Q200E-BSI3T08 Battery Replacement: crwdns2935265:02crwdnd2935265:01crwdnd2935265:01crwdne2935265:0
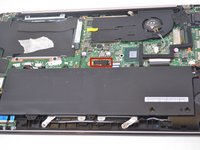
    • Remove the nine Philips #00 screws holding the back panel in place (four 5.6mm, four 7.7mm, and one 9.2mm).

  3. Asus VivoBook Q200E-BSI3T08 Battery Replacement: crwdns2935265:03crwdnd2935265:01crwdnd2935265:02crwdne2935265:0 Asus VivoBook Q200E-BSI3T08 Battery Replacement: crwdns2935265:03crwdnd2935265:02crwdnd2935265:02crwdne2935265:0
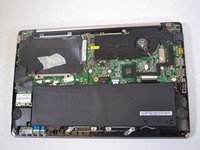
    • Use a plastic opening tool to gently remove the back panel.

  4. Asus VivoBook Q200E-BSI3T08 Battery Replacement, Battery: crwdns2935265:04crwdnd2935265:01crwdnd2935265:01crwdne2935265:0
    • Remove the eight 4.7mm Philips #00 screws holding the battery in place.

  5. Asus VivoBook Q200E-BSI3T08 Battery Replacement: crwdns2935265:05crwdnd2935265:01crwdnd2935265:03crwdne2935265:0 Asus VivoBook Q200E-BSI3T08 Battery Replacement: crwdns2935265:05crwdnd2935265:02crwdnd2935265:03crwdne2935265:0 Asus VivoBook Q200E-BSI3T08 Battery Replacement: crwdns2935265:05crwdnd2935265:03crwdnd2935265:03crwdne2935265:0
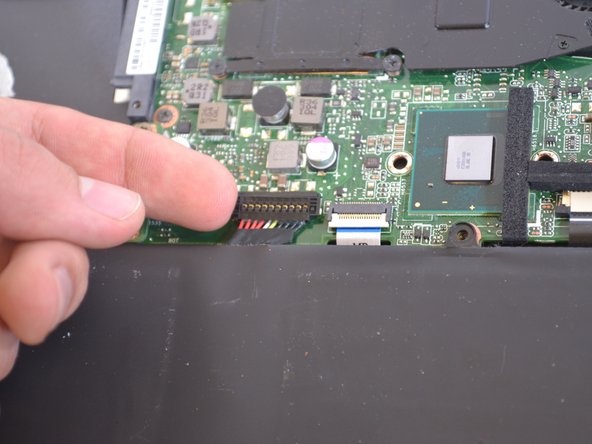
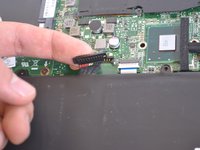
    • The battery is attached by a set of wires.

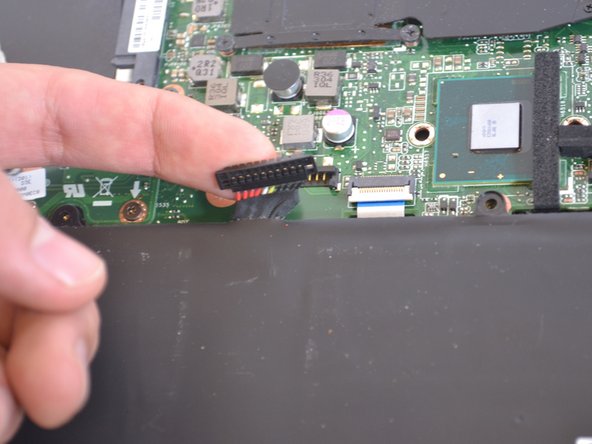
    • Use your finger to disconnect the set of wires. It should come off very easily.

  6. Asus VivoBook Q200E-BSI3T08 Battery Replacement: crwdns2935265:06crwdnd2935265:01crwdnd2935265:02crwdne2935265:0 Asus VivoBook Q200E-BSI3T08 Battery Replacement: crwdns2935265:06crwdnd2935265:02crwdnd2935265:02crwdne2935265:0
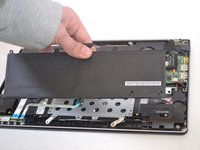
    • Now just lift the battery out of place.

crwdns2915888:0crwdne2915888:0

To reassemble your device, follow these instructions in reverse order.

crwdns2935229:014crwdne2935229:0

Maxim

crwdns2935283:001/21/15crwdne2935283:0

462 crwdns2915208:0crwdne2915208:0

crwdns2935295:0crwdne2935295:0

crwdns2915084:0crwdne2915084:0

UWT Liner: Group 6 crwdns2935289:0UWT Liner: Group 6crwdne2935289:0

Community

crwdns2931471:03crwdne2931471:0

crwdns2935303:01crwdne2935303:0

crwdns2944067:02crwdne2944067:0

Super helpful instructions. Especially mentioning which screws were different sizes, so I knew to keep the 3 different sizes for the back cover separated and noted which sizes went back where. Many thanks!

Albert Einstein - crwdns2934203:0crwdne2934203:0

crwdns2917038:0crwdne2917038:0

crwdns2936625:0crwdne2936625:0:

crwdns2936751:024crwdne2936751:0 0

crwdns2936753:07crwdne2936753:0 1

crwdns2936753:030crwdne2936753:0 16

crwdns2942667:0crwdne2942667:0 7,349