crwdns2915892:0crwdne2915892:0
Due to its location on the outside of the Asus VivoBook E203MA-TBCL432B, the back panel must be removed to access most of the components within the laptop. This guide will help you take off the back panel without damaging any of the components underneath.
crwdns2942213:0crwdne2942213:0
-
-
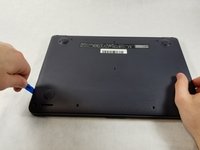
Position the laptop so that the bottom panel is facing upwards, the hinge is away from you, and the ASUS logo is against the table.
-
-
-
-
Use a Phillips #0 screwdriver to remove the eight 5 mm screws on the back panel.
-
Remove the two 7 mm Phillips #0 screws.
-
-
-
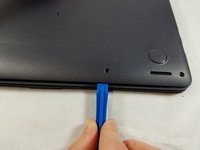
Insert the iFixit opening tool in between the back panel and the rest of the laptop.
-
With the iFixit opening tool, lift the panel from the laptop body. Work your way around the device creating separation with the tool.
-
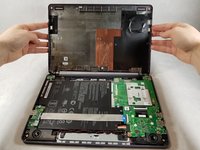
Once there is enough separation between the back panel and the device, gently pull off the back panel with your hands and completely remove it.
-


To reassemble your device, follow these instructions in reverse order. The plastic opening tool is not required to reattach the panel. Place the panel in its proper position, then push it firmly down. Do this on all sides of the panel until you hear a click.
crwdns2935221:0crwdne2935221:0
crwdns2935229:02crwdne2935229:0
crwdns2935287:0crwdne2935287:0

UMass Dartmouth, Team S8-G1, Bailey Spring 2019 crwdns2935289:0UMass Dartmouth, Team S8-G1, Bailey Spring 2019crwdne2935289:0
UMASSD-BAILEY-S19S8G1
crwdns2931471:03crwdne2931471:0
crwdns2935297:06crwdne2935297:0