crwdns2915892:0crwdne2915892:0
This guide demonstrates how to replace the keyboard. It is one solid piece with Three ZIF connectors.
crwdns2942213:0crwdne2942213:0
-
-
Remove 9 screws from bottom of notebook using PH00 bit + 1 under hard drive bay.
-
Remove 3 screws from bottom of notebook using PH00 bit. 1 is same screw spec as the other 9, and 2 are shorter.
-
-
-
Using the black spudger, insert its flat end between the crevice where the color changes from grey to black.
-
Carefully ease the spudger's end along the crevice, going around the entire frame.
-
-
-
-
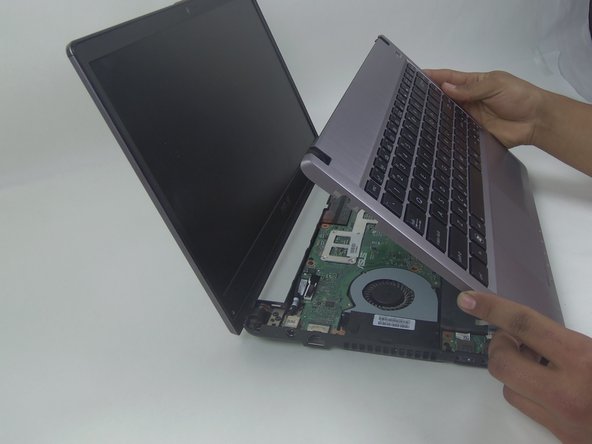
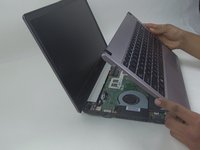
Lift the keyboard from the front where it is closest to the screen.
-
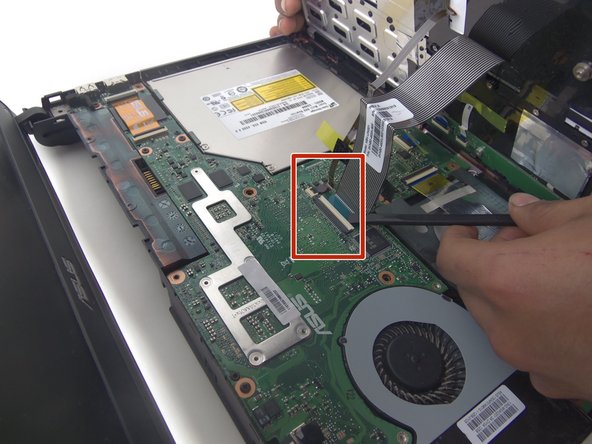
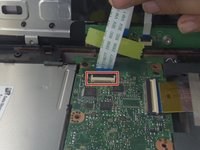
Disconnect the large and small ZIF connectors attached to the motherboard by flipping the light-colored part of the switch.
-
-
-
Remove the third and last ZIF connector on the motherboard by flipping up the dark-colored part of the switch.
-
Now, the component should come completely free.
-
To reassemble your device, follow these instructions in reverse order.
crwdns2947412:03crwdne2947412:0
You need to remove a total of 12 screws from the bottom of the laptop BEFORE prying the keyboard section off the laptop. See pics https://imgur.com/a/cNv12A6
My keyboard was not removable. I followed all of your instructions, until the last step and when I arrived at the step of removing the old keyboard it was welded at multiple places (lots of places). The original keyboard is not made to be removed and changed. I lost the laptop mouse in the process. Not very happy with this : ( I even thought my laptop was good for garbage, because when I reconnected the connectors, one of them would come apart even after several tries (and I’m very patient). So there.
The keyboard itself does not come off. But the entire top of the chassis with the keyboard and touchpad come off and can be replaced.


