crwdns2915892:0crwdne2915892:0
Is your Asus Transformer Pad (TF103C) display not doing what it should be? Is the LCD screen black or not working correctly? This guide will walk you through the steps of replacing the LCD screen of the Asus Transformer Pad.
Replacing the screen is complicated, and has more than 25 steps to achieve. Removal of multiple small electronic parts and chips are required to get access to the LCD display.
Remember, punctured batteries can cause dangerous fires, so use caution when handling the battery.
crwdns2942213:0crwdne2942213:0
-
-
Make sure the power is off.
-
Insert the plastic opening tool into a crack on side of the tablet.
-
Carefully pull the tool upwards to and pry open the Transformer pad.
-
-
-
Slide the tool in the gap along all four sides, continually pulling the tool upwards.
-
-
-
Remove the back cover once it is loose and set it aside.
-
Rotate the tablet so it matches the picture.
-
-
-
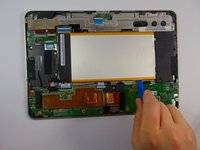
Carefully unplug the battery cable from the motherboard by grabbing the wires close to the black piece and pulling it out of the housing.
-
-
-
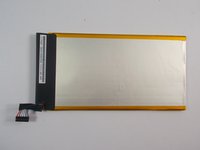
Carefully pry the battery out of the tablet with the opening tool.
-
-
-
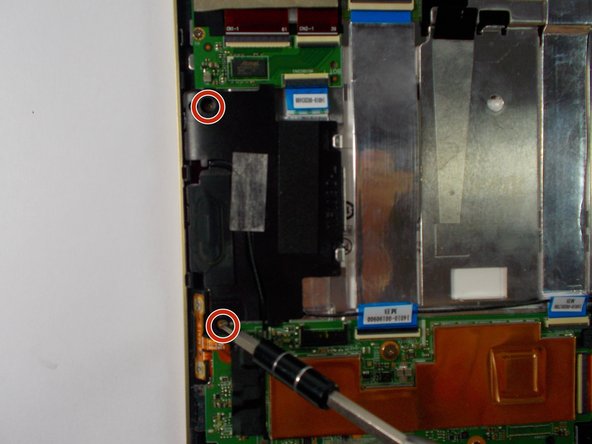
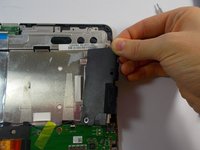
Remove two screws from each speaker with the +J000 screwdriver.
-
-
-
Unplug the wire from the top of the left speaker.
-
-
-
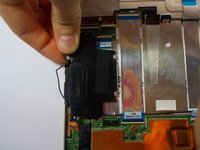
Remove the yellow tape and unplug the wire that attaches the speakers to the soundboard.
-
-
-
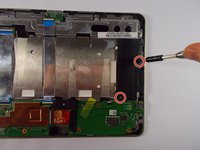
Remove the two speakers from the device's frame
-
-
-
-
Use the +J000 screwdriver to remove the screw pictured. Then, remove the plastic cover that is labeled "M2".
-
Note: You will break the seal sticker on the screw.
-
-
-
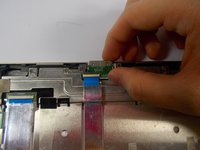
Remove the black tape from the ribbon cable and separate the cable from the soundboard.
-
-
-
Remove the screws from the soundboard with the +J000 screwdriver.
-
-
-
Remove the black tape from the motherboard. Unplug the ribbon cable from the volume and power buttons.
-
-
-
Remove the three screws from the motherboard with the +J000 screwdriver.
-
-
-
Unplug all three ribbon cables from the motherboard.
-
-
-
Unhook the camera's ribbon cable from the underside of the motherboard and then remove the motherboard.
-
-
-
Remove the two keyboard connector screws with the +J000 screwdriver.
-
-
-
Remove the tape from the charging port chip.
-
-
-
Unplug the two ribbon cables from the charging port chip.
-
-
-
Remove the two charging port screws with the +J000 screwdriver.
-
-
-
Remove the charging port chip and the keyboard connector chip.
-
-
-
Remove all eight screws from the metal frame with the +J000 screwdriver.
-
-
-
Carefully unpeel the metallic tape from the left side of the frame.
-
-
-
Carefully remove the frame and avoid getting it caught in the wires.
-
-
-
Use the plastic opening tool to pry the display screen from the front panel.
-
For better results, use opening picks and glide them around the screen tape. Note: you may need to replace the tape.
-


To reassemble your device, follow these instructions in reverse order.
crwdns2935221:0crwdne2935221:0
crwdns2935229:09crwdne2935229:0
crwdns2935287:0crwdne2935287:0

UMass Dartmouth, Team 3-6, Shastany Fall 2015 crwdns2935289:0UMass Dartmouth, Team 3-6, Shastany Fall 2015crwdne2935289:0
UMASSD-SHASTANY-F15S3G6
crwdns2931471:04crwdne2931471:0
crwdns2935297:05crwdne2935297:0
crwdns2947412:02crwdne2947412:0
For step 5 it said to replace with a new battery. Is that necessary? Will the battery life of the tablet be affected if the battery is taken out and that same battery is placed back?
I was wondering if you could tell me which ribbon cable connects the screen, and in particular the touch input to the main board. I would guess that it is the one labeled 14010-00190900.
I am having the problem with intermittent touch input failure, and since my device is not on warranty, I thought I might try replacing the ribbon cable.