crwdns2915892:0crwdne2915892:0
The CD drive is a component that is susceptible to fail overtime. Generally, a failing CD drive makes clicking sounds, and the disks inserted cannot be read by the computer. If your CD drive is no longer reading the CD disk or making clicking sounds, it might be time to replace the CD drive. This guide will walk you through the steps needed to remove the CD drive from your device.
crwdns2942213:0crwdne2942213:0
-
-
Remove the 9 mm and 16 mm screws on the back panel using the Philips #1 screw driver.
-
-
-
Use the metal spudger to pry the back panel off.
-
-
-
-
Remove the four 9 mm screws from the hard drive and use the black pull tab to remove it.
-
Remove the five 1.6 mm screws and three 9 mm screws from perimeter of the laptop's base.
-
Remove the 9 mm screw next to the RAM.
-
Flip the computer right-side up.
-
-
-
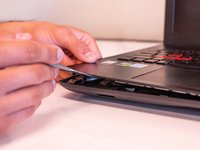
Gently pry the keyboard off being careful not to tug at any of the inner ribbons.
-
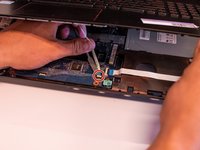
Detach the three ribbons connecting the motherboard and the keyboard. Do this by flipping up the white latch and pulling the ribbon out. There should be one latch per ribbon.
-
-
-
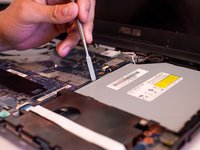
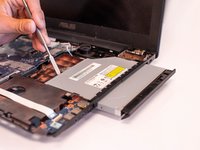
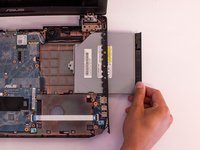
Use the metal spudger to push out the CD drive in the same direction it ejects.
-


To reassemble your device, follow these instructions in reverse order.
To reassemble your device, follow these instructions in reverse order.
crwdns2915084:0crwdne2915084:0

Embry-Riddle Aeronautical University, Team S15-G3, Lamothe Fall 2019 crwdns2935289:0Embry-Riddle Aeronautical University, Team S15-G3, Lamothe Fall 2019crwdne2935289:0
ERAU-LAMOTHE-F19S15G3
crwdns2931471:04crwdne2931471:0
crwdns2935297:06crwdne2935297:0