crwdns2915892:0crwdne2915892:0
The motherboard is a critical part of any computer, housing the central processor unit that data flows through. The Asus ROG Strix GL702VM-BHI7N09 gaming laptop is no exception and cannot function without a working motherboard. The guide below displays how to properly replace this component. Before starting the replacement of the motherboard, it is important to have some prior background knowledge about the components of a gaming laptop. It is also vital to power off the device, remove it from any external charging cable and disconnect or remove the battery prior to beginning the repair.
crwdns2942213:0crwdne2942213:0
-
-
Flip the laptop over to the back panel, with the serial numbers facing up.
-
Using a Phillips #1 screwdriver, remove the ten 12 mm screws from the back panel.
-
-
-
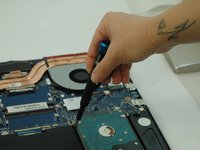
Wedge the sharp edge of the plastic opening tool into the seam between the back panel and the rest of the laptop, then gently pry the panel up.
-
Continue breaking the seals by sliding the plastic opening tool around the entire laptop under the seam until the back panel is free.
-
Once you have broken all the seals, carefully lift the panel off.
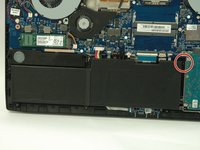
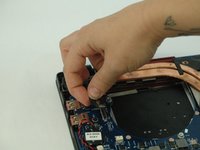
To make sure you don’t damage your board it’s necessary to unplug the main battery
-
-
-
Unplug the battery from the motherboard.
It’s not always a simple matter of pulling. Some connectors have clips that engage and you can break the connector pulling it without pressing on the release points… It would be helpful if you had a video showing the various types of connectors you might run into and demonstrated the proper way to disconnect them.
Agreed just broke mine
You also want to make sure you don't pull up on the connector. You want to pull straight back. I lifted up on mine and broke the connector. My battery no longer charges.
It's poorly designed and more than likely on purpose.
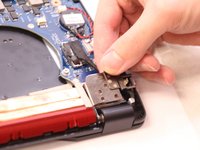
VERY IMPORTANT:
The battery connection on the motherboard has a small metal sheath that slides back, which will allow you to remove the connector without breaking anything. The metal piece slides back and forth to secure the battery connector, so to remove and insert the new battery, the metal sliding piece has to be slid back, then you can gently remove the connector without breaking the plastic part attached to the motherboard. Mine didn't move that much, maybe a millimeter or so, just enough to give clearance to remove the connector from the interlocked plastic parts.
-
-
-
Unscrew the 3.8 mm Phillips #1 screw on the top right hand corner of the battery.
-
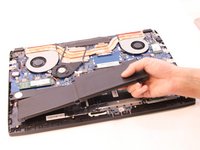
Lift battery from laptop frame.
-
-
-
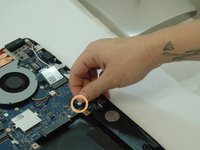
Using a Phillips #1 screwdriver, remove the four 4 mm screws holding the hard drive.
-
-
-
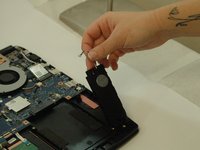
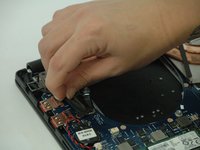
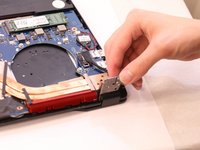
Pull the hard drive directly away from the fan just above it.
-
-
-
-
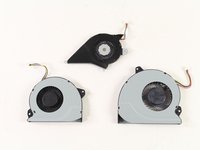
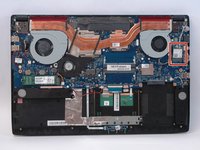
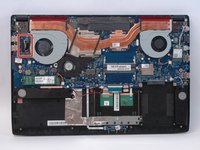
Using a Phillips #1 screwdriver, remove the four indicated 4 mm screws that hold the black fan and the silver one adjacent to it.
-
-
-
To remove the black fan, pull gently on the connecting cables outlined.
-
-
-
Unplug the white connector by gently pulling the cables.
-
Lift off the gray fan.
-
-
-
Using a Phillips #1 screwdriver, remove the two indicated 4 mm screws from the other gray fan.
-
-
-
Unplug the white connector by gently pulling it towards the center of the computer.
-
Lift the fan out of the body of the laptop to remove it.
-
-
-
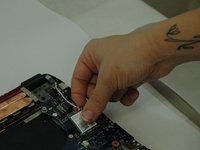
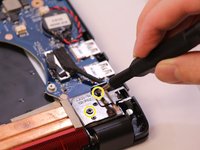
Disconnect the speakers connectors located in each of the bottom corners.
-
Gently pull the wire up from the motherboard.
-
Once the wire is disconnected, pull the speaker out.
-
-
-
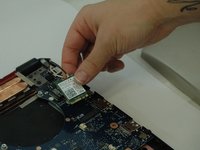
Gently lift the graphics card from the motherboard.
-
-
-
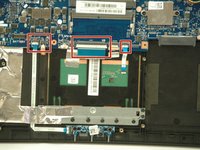
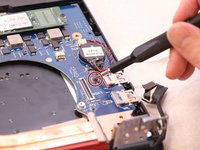
Use reverse pliers to detach ribbon connectors from the motherboard.
-
-
-
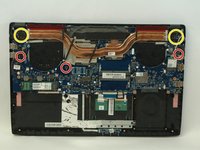
Remove each of the 4.7 mm Phillips #1 screws marked by a white arrow on the motherboard.
-
Remove the 6.7 mm Phillips #1 screws from the metal latches on the hinge-side corners.
-
-
-
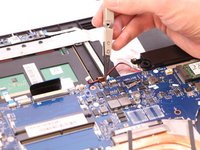
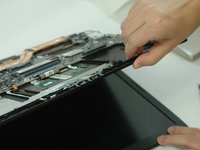
Gently pull on black connecting wire to disconnect the monitor screen from the motherboard.
-
-
-
Lift the metal latches on both sides.
-
This can be easily done by opening the laptop after the metal latch screws have been removed.
-
-
-
Remove the motherboard from the laptop frame.
-


To reassemble your device, follow these instructions in reverse order.
To reassemble your device, follow these instructions in reverse order.

crwdns2915084:0crwdne2915084:0

Idaho State University, Team S1-G5, Watkins Fall 2019 crwdns2935289:0Idaho State University, Team S1-G5, Watkins Fall 2019crwdne2935289:0
ISU-WATKINS-F19S1G5
crwdns2931471:04crwdne2931471:0
crwdns2935297:02crwdne2935297:0
crwdns2947410:01crwdne2947410:0
OK but where can I actually buy the replacement motherboard?