crwdns2933423:0crwdne2933423:0

Asus Q525U Hard Drive Replacement

crwdns2942213:0crwdne2942213:0

  1. Asus Q525U Hard Drive Replacement, Back Cover: crwdns2935265:01crwdnd2935265:01crwdnd2935265:03crwdne2935265:0 Asus Q525U Hard Drive Replacement, Back Cover: crwdns2935265:01crwdnd2935265:02crwdnd2935265:03crwdne2935265:0 Asus Q525U Hard Drive Replacement, Back Cover: crwdns2935265:01crwdnd2935265:03crwdnd2935265:03crwdne2935265:0
    • Begin by powering off the device and flipping the device over.

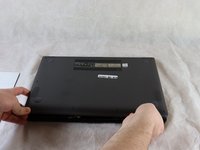
    • Carefully remove the two longer 9.5 mm screws on the corners with a Phillips #1 screwdriver.

    • Remove the eight 7.5 mm Phillips #1 screws on the back of the device.

  2. Asus Q525U Hard Drive Replacement: crwdns2935265:02crwdnd2935265:01crwdnd2935265:03crwdne2935265:0 Asus Q525U Hard Drive Replacement: crwdns2935265:02crwdnd2935265:02crwdnd2935265:03crwdne2935265:0 Asus Q525U Hard Drive Replacement: crwdns2935265:02crwdnd2935265:03crwdnd2935265:03crwdne2935265:0
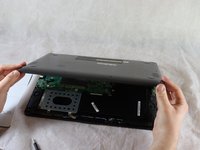
    • Use an opening pick to separate the back cover from the device.

    • For easiest removal, begin by prying at one of the front corners and sliding the tool under the cover in a counter-clockwise motion (to the left) toward the laptop hinge.

  3. Asus Q525U Hard Drive Replacement: crwdns2935265:03crwdnd2935265:01crwdnd2935265:03crwdne2935265:0 Asus Q525U Hard Drive Replacement: crwdns2935265:03crwdnd2935265:02crwdnd2935265:03crwdne2935265:0 Asus Q525U Hard Drive Replacement: crwdns2935265:03crwdnd2935265:03crwdnd2935265:03crwdne2935265:0
    • Once the cover has been separated from the device, carefully lift the back cover off the device (begin by lifting from the front of the cover first).

    • The back cover should be easily removable, allowing full access to all of the internal components.

  4. Asus Q525U Hard Drive Replacement, Hard Drive: crwdns2935265:04crwdnd2935265:01crwdnd2935265:01crwdne2935265:0
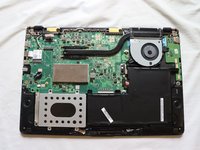
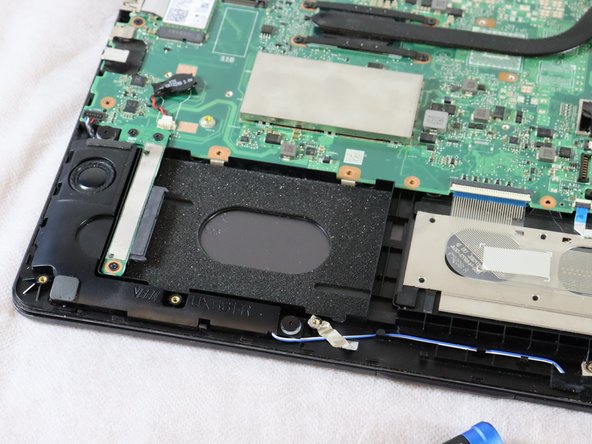
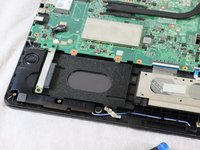
    • The hard drive is located to the left of the battery and below the motherboard.

  5. Asus Q525U Hard Drive Replacement: crwdns2935265:05crwdnd2935265:01crwdnd2935265:02crwdne2935265:0 Asus Q525U Hard Drive Replacement: crwdns2935265:05crwdnd2935265:02crwdnd2935265:02crwdne2935265:0
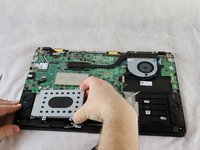
    • Remove the two 4 mm Phillips #1 screws which are holding the hard drive cover in place.

  6. Asus Q525U Hard Drive Replacement: crwdns2935265:06crwdnd2935265:01crwdnd2935265:02crwdne2935265:0 Asus Q525U Hard Drive Replacement: crwdns2935265:06crwdnd2935265:02crwdnd2935265:02crwdne2935265:0
    • The hard drive cover is now easily accessible.

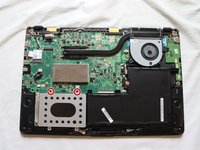
    • Lift the cover off, exposing the hard drive underneath [this laptop is missing its hard drive].

    • If replacing the hard drive, lift it up on the right side slightly and pull it from the connecter on the left.

crwdns2915888:0crwdne2915888:0

To reassemble your device, follow these instructions in reverse order.

crwdns2935227:0crwdne2935227:0

Stewart Crandall

crwdns2935283:002/22/22crwdne2935283:0

550 crwdns2915208:0crwdne2915208:0

crwdns2935297:05crwdne2935297:0

crwdns2915084:0crwdne2915084:0

Clemson, Team 2-5, Hunter Spring 2022 crwdns2935289:0Clemson, Team 2-5, Hunter Spring 2022crwdne2935289:0

CLEM-HUNTER-S22S2G5

crwdns2931471:04crwdne2931471:0

crwdns2935297:08crwdne2935297:0

crwdns2944067:00crwdne2944067:0

crwdns2917038:0crwdne2917038:0

crwdns2936625:0crwdne2936625:0:

crwdns2936751:024crwdne2936751:0 3

crwdns2936753:07crwdne2936753:0 9

crwdns2936753:030crwdne2936753:0 52

crwdns2942667:0crwdne2942667:0 1,887