crwdns2915892:0crwdne2915892:0
The ASUS Q503UA-BSI5T17 is a 2-in-1 portable PC with a 15.6-inch screen. This guide is designed to help you replace the battery of an ASUS Q503UA-BSI5T17 laptop. A battery that is in need of replacement may result in the laptop not holding a charge as long as it used to, or no longer having the capability of being charged. These are two of the symptoms that would suggest you to replace your ASUS’s battery.
Be sure to power off your device prior to starting the guide.
crwdns2942213:0crwdne2942213:0
-
-
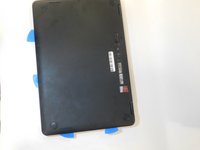
Flip the computer upside down. In order to ensure that the correct side is up, you should be able to read the sticker that indicates the serial number on the bottom.
-
-
-
Remove the ten circled screws along the perimeter of the laptop with a Phillips #0 screwdriver.
-
-
-
-
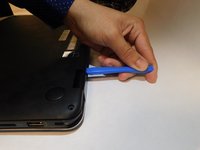
Starting from the top right corner, use a plastic prying tool to separate the cover from the laptop. Use light pressure to prevent the plastic from breaking.
-
Repeat the above step around the laptop until you are able to lift the cover.
-
-
-
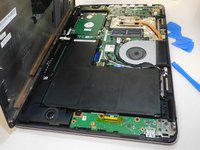
Remove the five screws holding the battery in place using a Phillips #0 screwdriver.
-
-
-
Grab and lift the battery from the top right-hand side.
-
To reassemble your device, follow these instructions in reverse order.
To reassemble your device, follow these instructions in reverse order.
crwdns2935221:0crwdne2935221:0
crwdns2935229:03crwdne2935229:0
crwdns2947410:01crwdne2947410:0
Great Instruction. Too bad reasonably priced replacements are no longer available new. I spent hours on the net using numerous search engines, The only new ones were in the hundreds of dollars, and who wants to buy used ones?


