crwdns2915892:0crwdne2915892:0
This guide will show you the steps to replace the motherboard in an ASUS Q325U.
crwdns2942213:0crwdne2942213:0
-
-
Remove the ten 5mm screws using a T5 Torx screwdriver.
-
-
-
Lift the back panel upward using the suction tool.
-
-
-
Remove one 2mm screw on top of the SSD using a Phillips #1 screwdriver.
-
-
-
Carefully slide and lift the SSD to remove it.
-
-
-
Remove the seven 5mm screws around the battery using a Phillips #00 screwdriver.
-
-
-
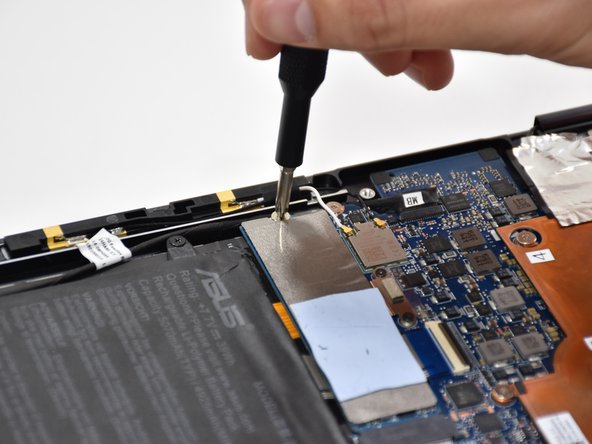
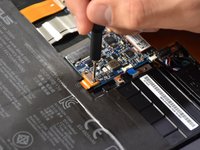
Using a Phillips #000 screwdriver, remove the two 3mm screws on top of the orange battery connector.
-
-
-
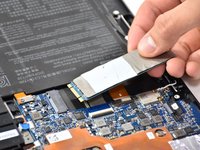
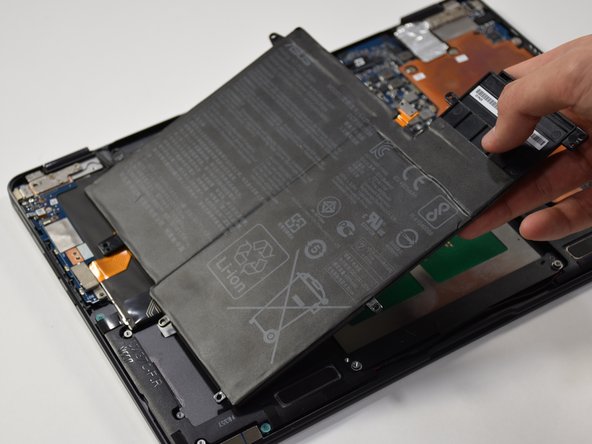
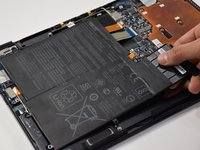
Lift the battery out from the laptop.
-
-
-
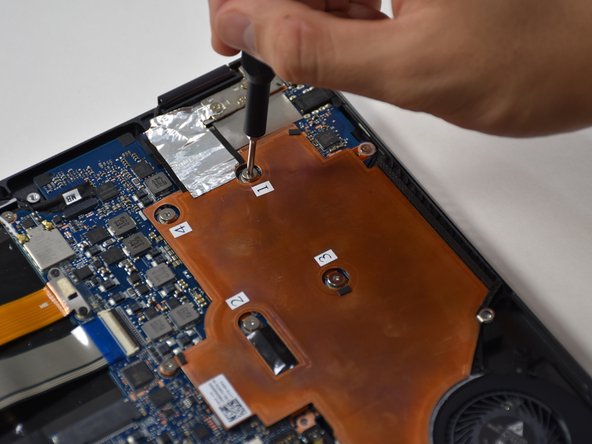
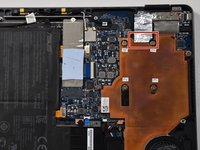
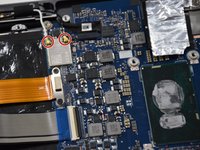
Remove the six 3mm screws using a Phillips #00.
-
-
-
-
Use the plastic opening tool to lift up the edge. Pull upward on the edge.
-
-
-
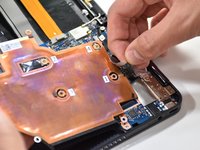
On the other side of the plate, remove the tape.
-
-
-
Remove the three 3.7 mm screws using a Phillips #00 screwdriver.
-
-
-
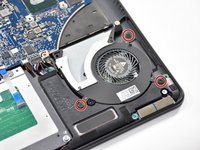
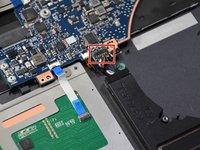
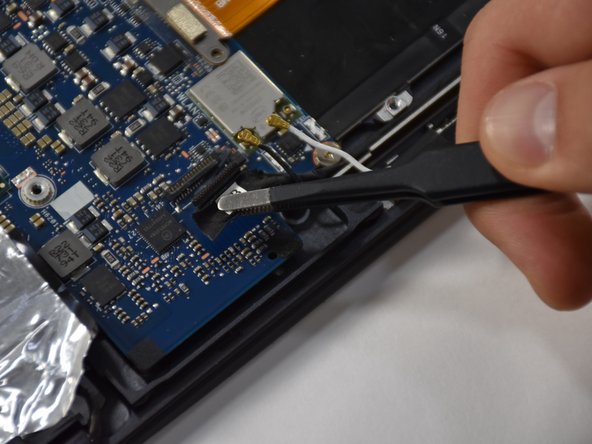
Detach the black wire and plug shown using a tweezer.
-
-
-
Grab CPU fan by its edge and gently pull upwards to remove.
-
-
crwdns2935267:0crwdne2935267:0Halberd Spudger$2.99
-
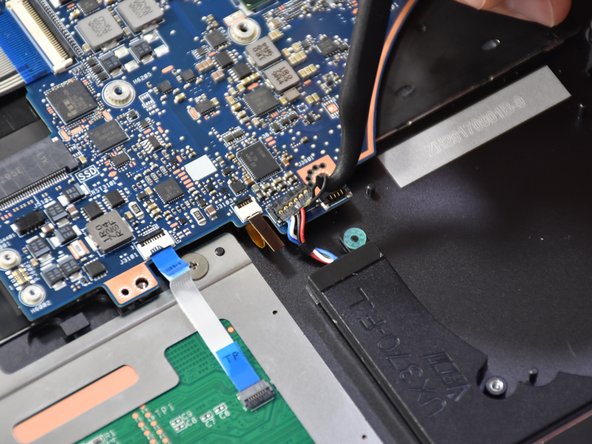
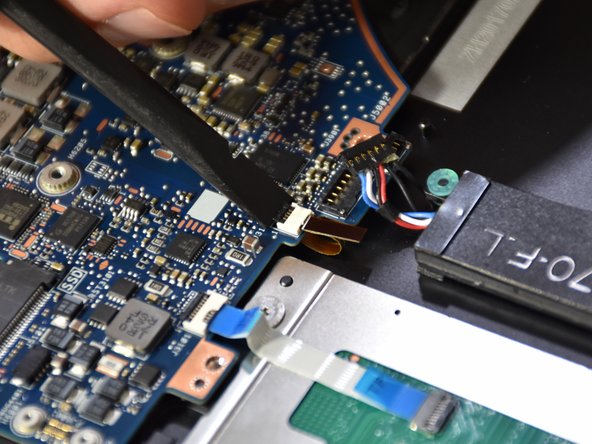
Remove the first connection wire by pulling the small back loop with the Halberd Spudger.
-
-
crwdns2935267:0crwdne2935267:0Tweezers$4.99
-
Lift the small black tab of the orange connector with your fingers or a plastic opening tool.
-
Remove the orange connector by pulling with tweezers.
-
-
-
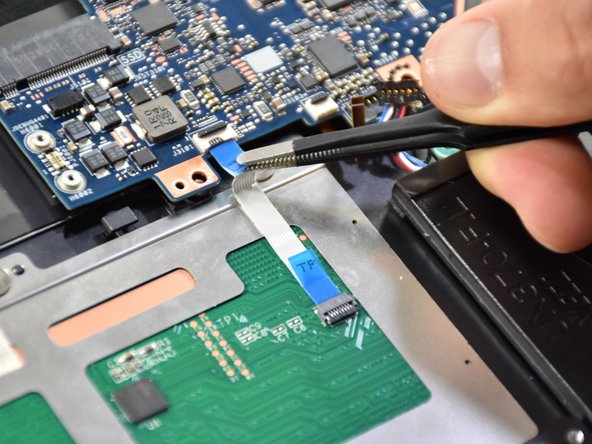
Lift the small black tab on the white plastic piece of the touch pad connector with a spudger.
-
Remove the touch pad connector by pulling with tweezers.
-
-
-
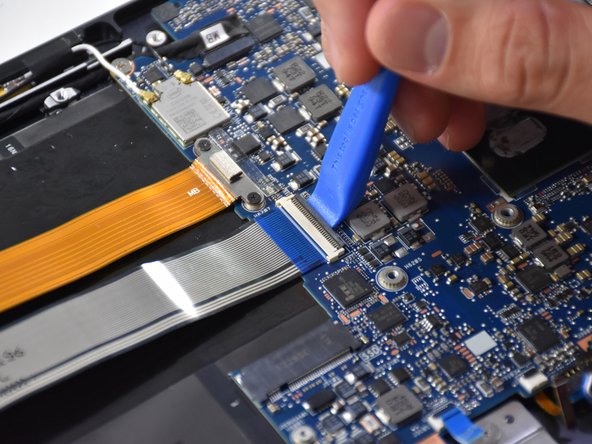
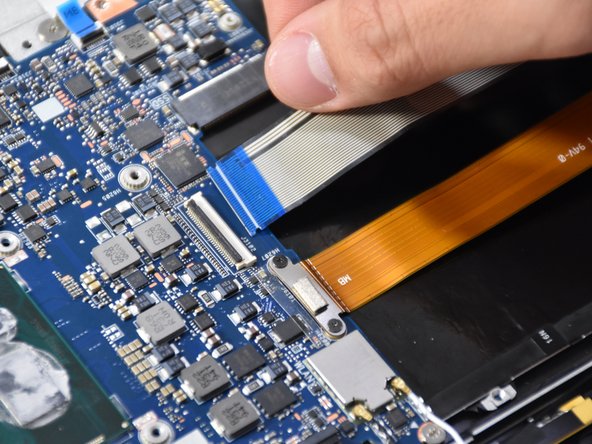
Lift the black tab on the long white plastic piece of the thick blue band.
-
Remove the thick blue band by pulling.
-
-
-
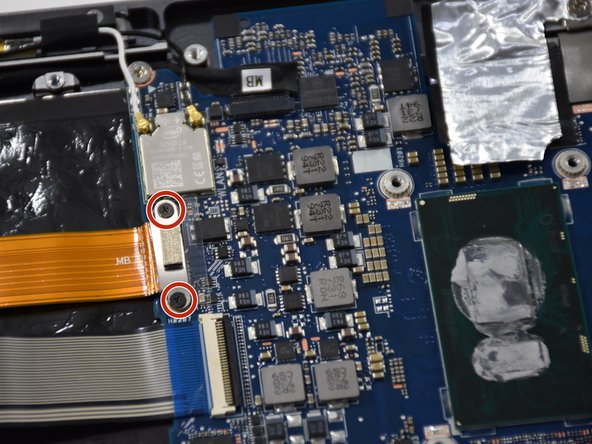
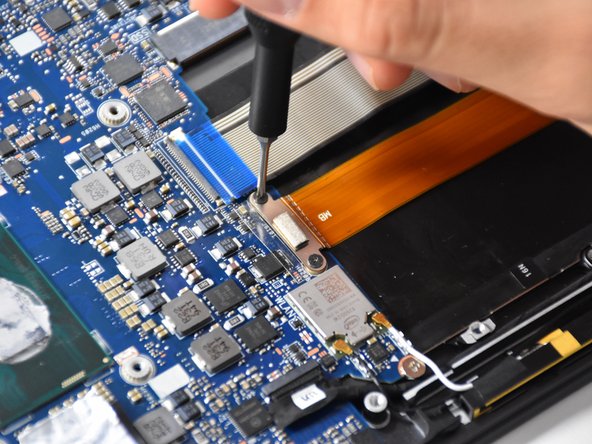
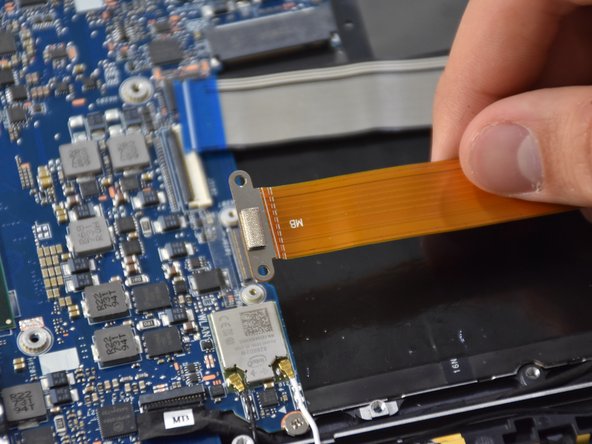
Remove the two Phillips #000 screws on the metal connector above the thick orange band.
-
Lift up the thick orange band.
-
-
-
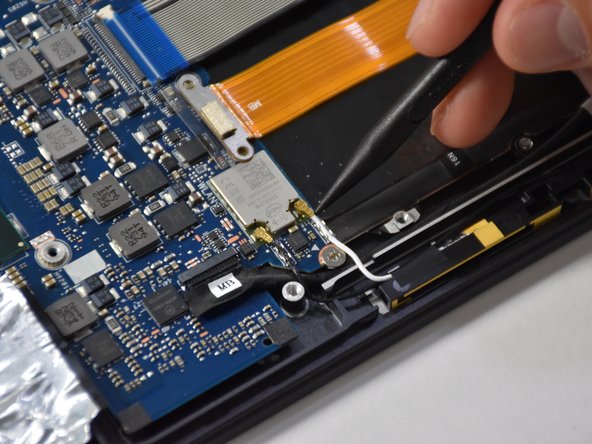
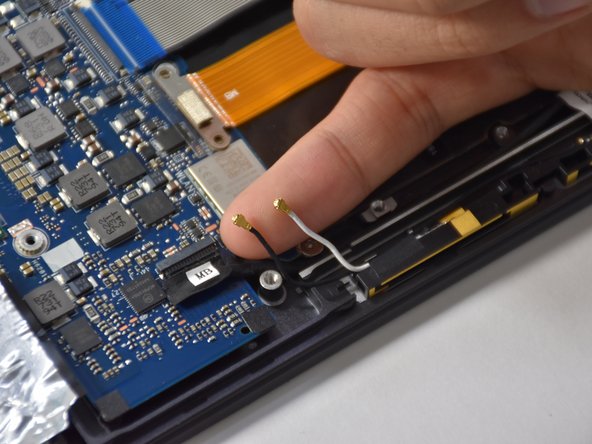
Gently lift up the two smallest connectors using your fingers or a plastic opening tool.
-
-
-
Lift up the black hinge of the connector using a plastic opening tool.
-
Remove the connector using a tweezer.
-
-
-
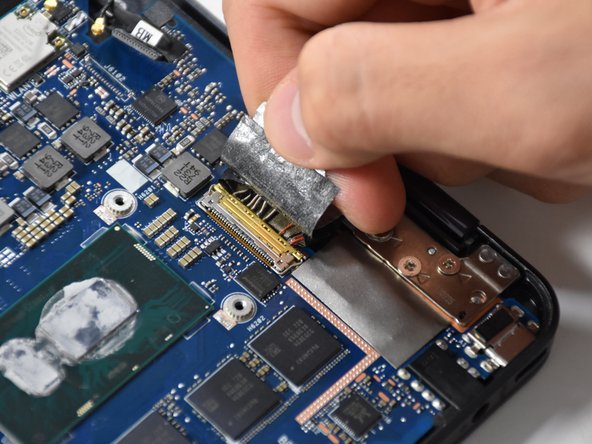
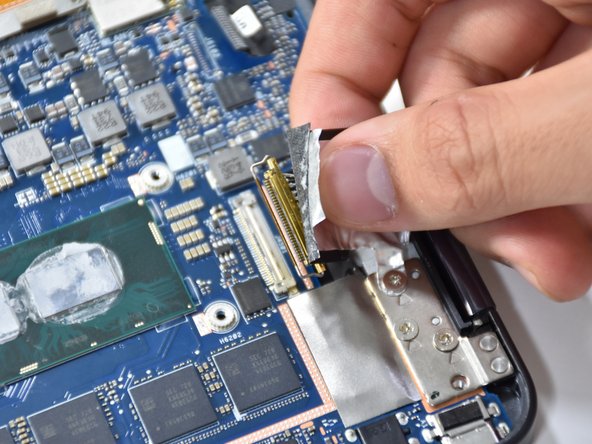
Pull up the tap of the biggest connector using your fingers.
-
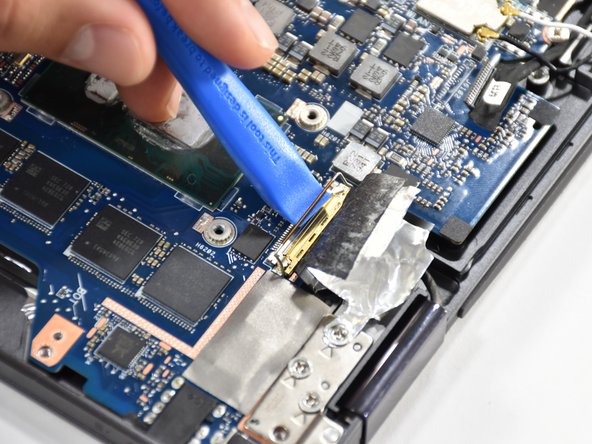
Lift the gold hinge using a plastic opening tool.
-
Lift the connector up with your fingers to remove.
-
-
-
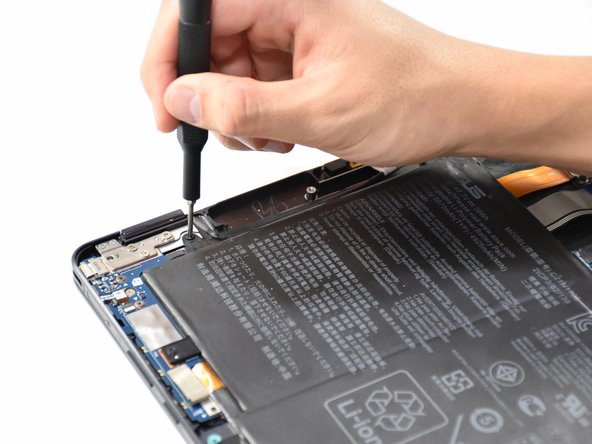
Remove the four 4.8 mm screws using a Phillips #00 screwdriver.
-
-
-
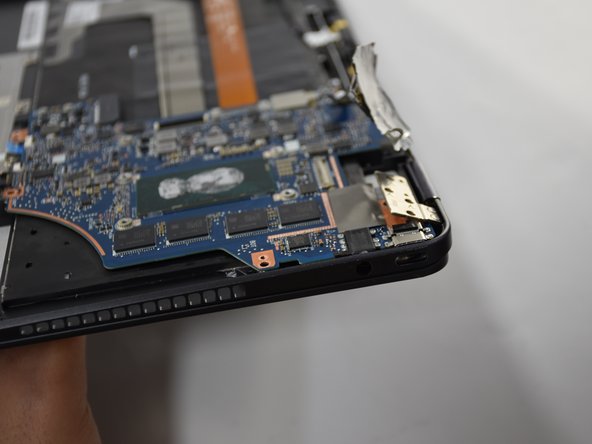
Slightly open up the laptop. This will lift up the hinge at the corner and free the motherboard.
-
-
-
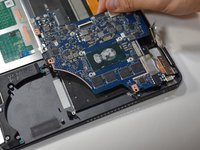
Pull the motherboard away from the corner to remove.
-


To reassemble your device, follow these instructions in reverse order.
crwdns2947410:01crwdne2947410:0
Can you help me identify which of those is the webcam conector? I hava a faulty webcam and my guess is that it is a physical conection problem.