crwdns2915892:0crwdne2915892:0
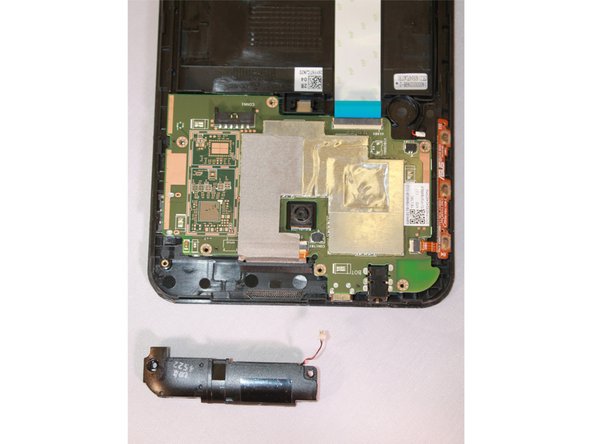
The speaker is where sound comes out. When videos or music are played too loudly, it can cause the speaker to blow. This is a component of the Memo Pad that needs to be replaced when this problem occurs.
crwdns2942213:0crwdne2942213:0
-
-
Using the Jimmy tool, gently wedge it into the seam of the device at the side.
-
Pry the Jimmy tool gently all around the seam. Use up and down motions until the back panel is detached.
-
-
-
From the top of the tablet, locate the white cable connector.
-
Use the blue plastic opening tool to push the white cable connector out of the port.
-
-
-
-
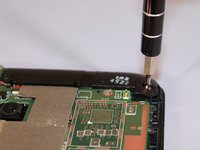
Use the Phillips #000 screwdriver to remove the seven screws.
-
There should be two silver and five black screws for a total of seven screws.
-
-
-
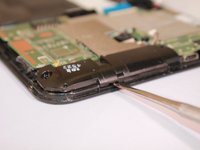
Use the slender, metal spudger tool to gently lift up the edge of the speaker to remove the device.
-


To reassemble your device, follow these instructions in reverse order.
crwdns2935221:0crwdne2935221:0
crwdns2935227:0crwdne2935227:0

crwdns2935287:0crwdne2935287:0

Eastern Washington University, Team 2-3, Plummer Fall 2015 crwdns2935289:0Eastern Washington University, Team 2-3, Plummer Fall 2015crwdne2935289:0
EWU-PLUMMER-F15S2G3
crwdns2931471:05crwdne2931471:0
crwdns2935297:09crwdne2935297:0