crwdns2915892:0crwdne2915892:0
Hello everyone, in this guide Ill be showing you how to open the laptop in order to change the thermal paste and possibly upgrade the RAM and SSD inside.
crwdns2942213:0crwdne2942213:0
-
-
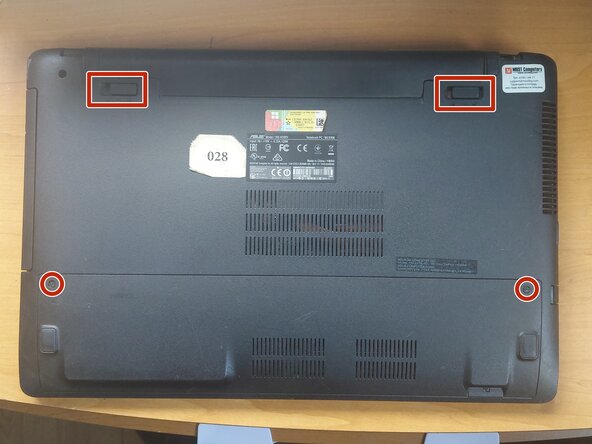
Remove the battery and unscrew the 2 screws that hold the back panel in place.
-
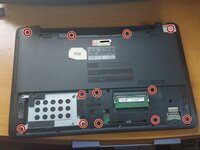
Remove the SSD and the rest of the screws that hold the palmrest.
-
Here you can upgrade the SSD and RAM before finishing the reassembly.
-
-
-
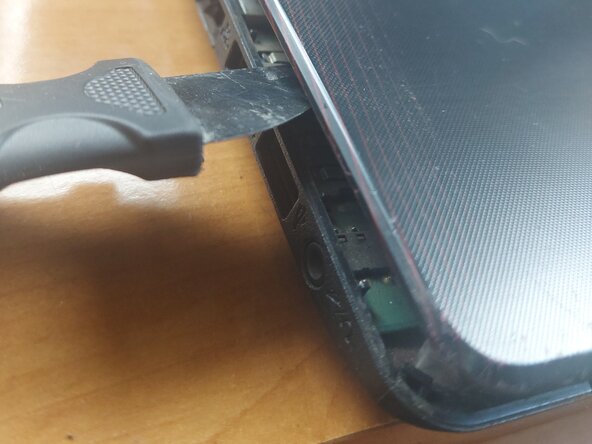
Use a prying tool to release all the clips of the palmrest.
-
Carefully disconnect the keyboard, touchpad and power button connectors.
-
Remove the palmrest to reveal the motherboard.
-
-
-
-
Unscrew and remove the Wi-Fi module (BLUE). The anthennas do not need to be disconnected as it can be tucked away, but if you feel more comfortable, disconnect them.
-
Unscrew and remove the DVD drive (YELLOW).
-
Disconnect all the connectors (GREEN).
-
Unscrew all the other screws and carefully lift the motherboard from the DVD connector, flip it, disconnect the power connector (ORANGE) and slide the motherboard out.
-
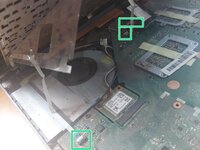
Unscrew the heatsink (RED) and disconnect the fan connector (PINK).
-
To clean the fan, the black tape (BLACK) has to be removed so it can be separated from the heatsink. You can use electrical tape to replace it after that. I highly recommend doing this, because there can be a lot of dust and dirt hiding between the two.
-
It is also recommended to use compressed air to remove any dust in the laptop case itself.
-
-
-
Clean the old thermal paste both from the cooler and the CPU+GPU. It is best to use isopropyl alcohol and cotton swabs or paper towel, but be careful not to go too hard on the CPU+GPU.
-
Don`t use too much thermal paste, just enough to cover some portion of the pad. If you have a spreader, use it. The thermal paste will apply evenly after you tighten the heatsink.
-
Last, put the heatsink back carefully and tighten the screws in order to ensure even pressure.
-
Don`t forget to plug in the fan connector!
-


To reassemble your device, follow these instructions in reverse order.
To reassemble your device, follow these instructions in reverse order.
crwdns2935221:0crwdne2935221:0
crwdns2935227:0crwdne2935227:0
