crwdns2933423:0crwdne2933423:0

Asus GL551JW-AH71 Upper Assembly Replacement

crwdns2942213:0crwdne2942213:0

  1. Asus GL551JW-AH71 Upper Assembly Replacement, Battery: crwdns2935265:01crwdnd2935265:01crwdnd2935265:01crwdne2935265:0
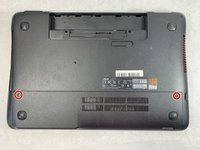
    • Close the device and lay it upside down.

    • Unplug the device and make sure the device is powered off before removing the battery.

  2. Asus GL551JW-AH71 Upper Assembly Replacement: crwdns2935265:02crwdnd2935265:01crwdnd2935265:02crwdne2935265:0 Asus GL551JW-AH71 Upper Assembly Replacement: crwdns2935265:02crwdnd2935265:02crwdnd2935265:02crwdne2935265:0
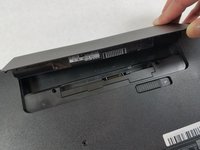
    • Move the battery eject button to the right. The battery will be ejected.

  3. Asus GL551JW-AH71 Upper Assembly Replacement: crwdns2935265:03crwdnd2935265:01crwdnd2935265:02crwdne2935265:0 Asus GL551JW-AH71 Upper Assembly Replacement: crwdns2935265:03crwdnd2935265:02crwdnd2935265:02crwdne2935265:0
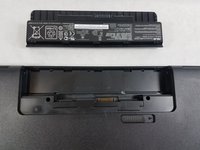
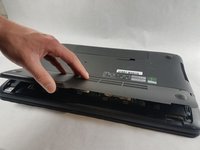
    • Grab the battery and remove it from the device.

  4. Asus GL551JW-AH71 Upper Assembly Replacement, Optical Drive: crwdns2935265:04crwdnd2935265:01crwdnd2935265:02crwdne2935265:0 Asus GL551JW-AH71 Upper Assembly Replacement, Optical Drive: crwdns2935265:04crwdnd2935265:02crwdnd2935265:02crwdne2935265:0
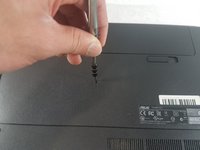
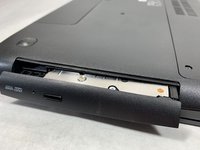
    • Use a Phillips #000 screwdriver to remove the single 10mm optical drive screw.

  5. Asus GL551JW-AH71 Upper Assembly Replacement: crwdns2935265:05crwdnd2935265:01crwdnd2935265:03crwdne2935265:0 Asus GL551JW-AH71 Upper Assembly Replacement: crwdns2935265:05crwdnd2935265:02crwdnd2935265:03crwdne2935265:0 Asus GL551JW-AH71 Upper Assembly Replacement: crwdns2935265:05crwdnd2935265:03crwdnd2935265:03crwdne2935265:0
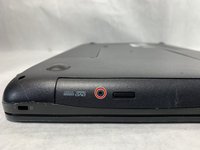
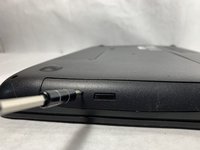
    • Insert a probe or paperclip gently into the eject pin hole to eject the optical drive tray.

  6. Asus GL551JW-AH71 Upper Assembly Replacement: crwdns2935265:06crwdnd2935265:01crwdnd2935265:02crwdne2935265:0 Asus GL551JW-AH71 Upper Assembly Replacement: crwdns2935265:06crwdnd2935265:02crwdnd2935265:02crwdne2935265:0
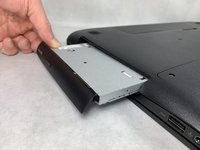
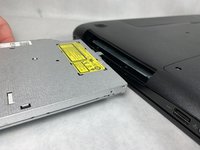
    • Gently grasp the optical drive assembly and slide it out of the laptop body.

  7. Asus GL551JW-AH71 Upper Assembly Replacement, Upper Assembly: crwdns2935265:07crwdnd2935265:01crwdnd2935265:02crwdne2935265:0 Asus GL551JW-AH71 Upper Assembly Replacement, Upper Assembly: crwdns2935265:07crwdnd2935265:02crwdnd2935265:02crwdne2935265:0
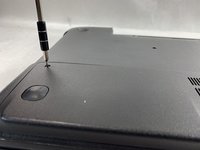
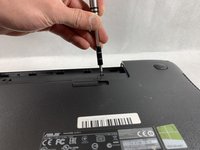
    • Using a Phillips #000 screwdriver, remove the two 11mm screws that hold the access panel in place.

  8. Asus GL551JW-AH71 Upper Assembly Replacement: crwdns2935265:08crwdnd2935265:01crwdnd2935265:02crwdne2935265:0 Asus GL551JW-AH71 Upper Assembly Replacement: crwdns2935265:08crwdnd2935265:02crwdnd2935265:02crwdne2935265:0
    • Carefully remove the access panel.

  9. Asus GL551JW-AH71 Upper Assembly Replacement: crwdns2935265:09crwdnd2935265:01crwdnd2935265:02crwdne2935265:0 Asus GL551JW-AH71 Upper Assembly Replacement: crwdns2935265:09crwdnd2935265:02crwdnd2935265:02crwdne2935265:0
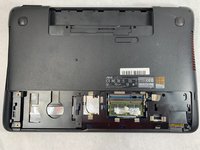
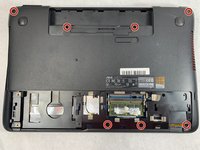
    • Using a Phillips #000 screwdriver, remove the seven 11mm screws holding lower case to the laptop.

  10. Asus GL551JW-AH71 Upper Assembly Replacement: crwdns2935265:010crwdnd2935265:01crwdnd2935265:01crwdne2935265:0
    • Turn the laptop over and open the screen.

  11. Asus GL551JW-AH71 Upper Assembly Replacement: crwdns2935265:011crwdnd2935265:01crwdnd2935265:03crwdne2935265:0 Asus GL551JW-AH71 Upper Assembly Replacement: crwdns2935265:011crwdnd2935265:02crwdnd2935265:03crwdne2935265:0 Asus GL551JW-AH71 Upper Assembly Replacement: crwdns2935265:011crwdnd2935265:03crwdnd2935265:03crwdne2935265:0
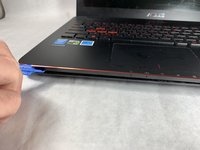
    • Gently pry open the case with an iFixit opening tool.

    • The upper and lower assembly are connected with a display cable that will be removed in the next step. Do not pull the parts apart more than a few inches.

  12. Asus GL551JW-AH71 Upper Assembly Replacement: crwdns2935265:012crwdnd2935265:01crwdnd2935265:03crwdne2935265:0 Asus GL551JW-AH71 Upper Assembly Replacement: crwdns2935265:012crwdnd2935265:02crwdnd2935265:03crwdne2935265:0 Asus GL551JW-AH71 Upper Assembly Replacement: crwdns2935265:012crwdnd2935265:03crwdnd2935265:03crwdne2935265:0
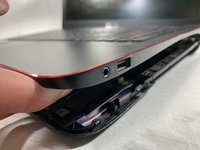
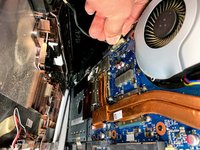
    • Flip the laptop on the right side while still holding the upper and lower assemblies close together.

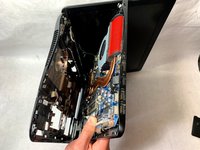
    • Unplug the display connector from the motherboard.

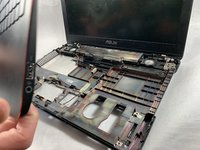
    • Remove the upper assembly.

crwdns2915888:0crwdne2915888:0

To reassemble your device, follow these instructions in reverse order.

crwdns2935227:0crwdne2935227:0

William Kelley

crwdns2935283:003/20/19crwdne2935283:0

1,035 crwdns2915208:0crwdne2915208:0

crwdns2935297:07crwdne2935297:0

crwdns2915084:0crwdne2915084:0

UMass Dartmouth, Team S8-G3, Bailey Spring 2019 crwdns2935289:0UMass Dartmouth, Team S8-G3, Bailey Spring 2019crwdne2935289:0

UMASSD-BAILEY-S19S8G3

crwdns2931471:04crwdne2931471:0

crwdns2935297:016crwdne2935297:0

crwdns2944067:00crwdne2944067:0

crwdns2917038:0crwdne2917038:0

crwdns2936625:0crwdne2936625:0:

crwdns2936751:024crwdne2936751:0 2

crwdns2936753:07crwdne2936753:0 3

crwdns2936753:030crwdne2936753:0 6

crwdns2942667:0crwdne2942667:0 470