crwdns2933423:0crwdne2933423:0
crwdns2947577:0crwdnd2947577:0crwdne2947577:0

Asus F6A-X2 Hard Drive Replacement

crwdns2942213:0crwdne2942213:0

    1. Asus F6A-X2 Hard Drive Replacement, Battery: crwdns2935265:01crwdnd2935265:01crwdnd2935265:01crwdne2935265:0
      • Remove any power cords and turn the laptop off. Attempting to replace part of the laptop while power is running through it may cause electrocution or damage to the device.

      • Flip laptop face down and rotate so the battery is facing toward you.

      • The battery is not shown in this picture.

      • To remove the battery, place one finger on each of the two black slide tabs. Push each tab toward the center of the laptop to release the lock.

      • Slide the battery toward you and lift it out of the laptop.

      crwdns2952109:0crwdne2952109:0

      crwdns2917038:0crwdne2917038:0

    1. Asus F6A-X2 Hard Drive Replacement, Back Access Panel: crwdns2935265:02crwdnd2935265:01crwdnd2935265:02crwdne2935265:0 Asus F6A-X2 Hard Drive Replacement, Back Access Panel: crwdns2935265:02crwdnd2935265:02crwdnd2935265:02crwdne2935265:0
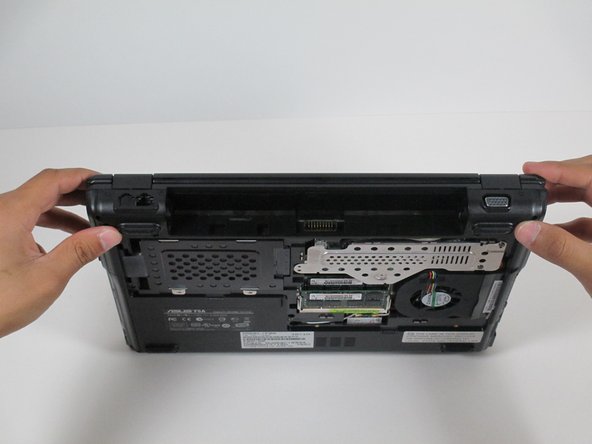
      • With the laptop facing down, rotate it so the battery pack is facing away from you.

      • Remove the six 1.5 mm Phillips #1 screws on the back panel of the laptop.

      crwdns2952109:0crwdne2952109:0

      crwdns2917038:0crwdne2917038:0

    2. Asus F6A-X2 Hard Drive Replacement: crwdns2935265:03crwdnd2935265:01crwdnd2935265:03crwdne2935265:0 Asus F6A-X2 Hard Drive Replacement: crwdns2935265:03crwdnd2935265:02crwdnd2935265:03crwdne2935265:0 Asus F6A-X2 Hard Drive Replacement: crwdns2935265:03crwdnd2935265:03crwdnd2935265:03crwdne2935265:0
      • Insert a finger into one of the slots on the bottom panel.

      • Gently lift the upwards, and the back panel of the laptop will come off easily.

      crwdns2952109:0crwdne2952109:0

      crwdns2917038:0crwdne2917038:0

    1. Asus F6A-X2 Hard Drive Replacement, Hard Drive: crwdns2935265:04crwdnd2935265:01crwdnd2935265:02crwdne2935265:0 Asus F6A-X2 Hard Drive Replacement, Hard Drive: crwdns2935265:04crwdnd2935265:02crwdnd2935265:02crwdne2935265:0
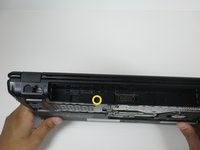
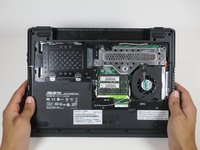
      • Rotate the laptop 90 degrees towards you so that you are looking at the empty battery compartment.

      crwdns2952109:0crwdne2952109:0

      crwdns2917038:0crwdne2917038:0

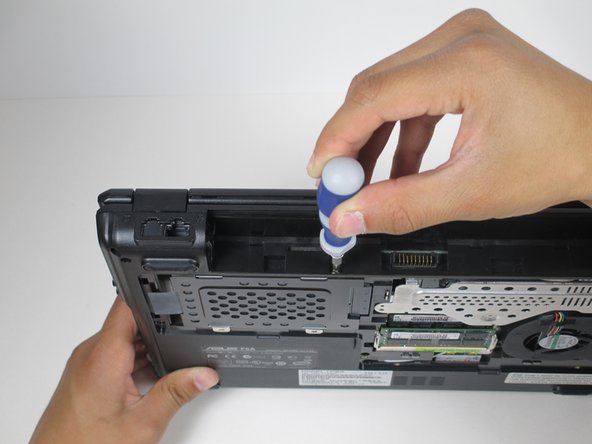
    2. Asus F6A-X2 Hard Drive Replacement: crwdns2935265:05crwdnd2935265:01crwdnd2935265:02crwdne2935265:0 Asus F6A-X2 Hard Drive Replacement: crwdns2935265:05crwdnd2935265:02crwdnd2935265:02crwdne2935265:0
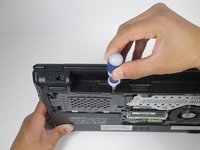
      • Remove the 2.0 mm Phillips #3 screw located beneath the battery compartment.

      crwdns2952109:0crwdne2952109:0

      crwdns2917038:0crwdne2917038:0

    3. Asus F6A-X2 Hard Drive Replacement: crwdns2935265:06crwdnd2935265:01crwdnd2935265:03crwdne2935265:0 Asus F6A-X2 Hard Drive Replacement: crwdns2935265:06crwdnd2935265:02crwdnd2935265:03crwdne2935265:0 Asus F6A-X2 Hard Drive Replacement: crwdns2935265:06crwdnd2935265:03crwdnd2935265:03crwdne2935265:0
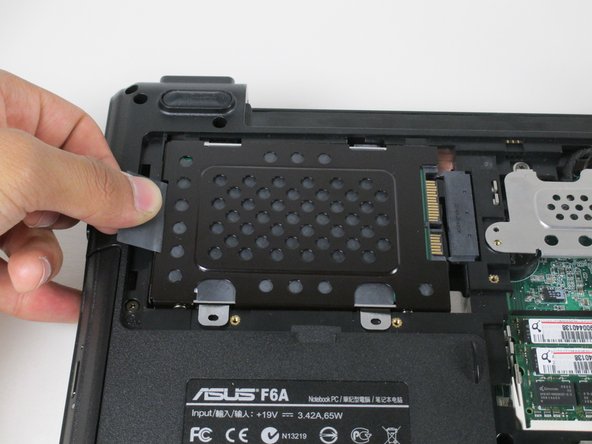
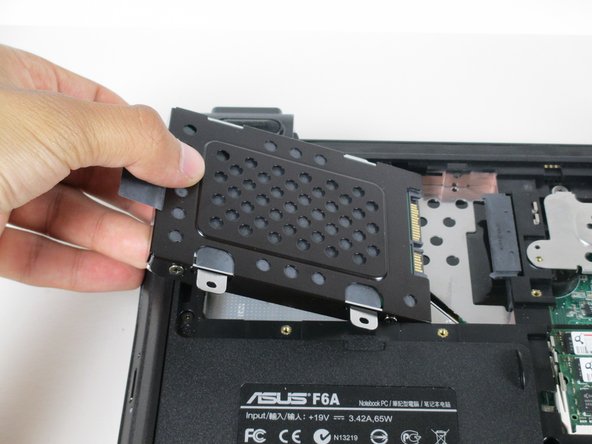
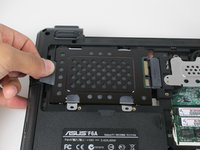
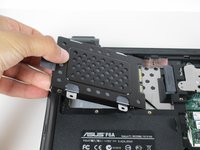
      • Lay the laptop flat on its back.

      • Gently pull left on the black tab, located on the left side of the hard drive, until it pops out.

      • Slowly lift the tab up and pull the hard drive out of the laptop.

      crwdns2952109:0crwdne2952109:0

      crwdns2917038:0crwdne2917038:0

crwdns2915888:0crwdne2915888:0

To reassemble your device, follow these instructions in reverse order.

crwdns2935221:0crwdne2935221:0

crwdns2935227:0crwdne2935227:0

Jonathan

crwdns2935283:004/24/14crwdne2935283:0

1,174 crwdns2915208:0crwdne2915208:0

crwdns2935297:011crwdne2935297:0

crwdns2935287:0crwdne2935287:0

Cal Poly, Team 10-56, Amido Spring 2014 crwdns2935289:0Cal Poly, Team 10-56, Amido Spring 2014crwdne2935289:0

CPSU-AMIDO-S14S10G56

crwdns2931471:04crwdne2931471:0

crwdns2935297:0108crwdne2935297:0

crwdns2947412:00crwdne2947412:0

crwdns2917038:0crwdne2917038:0

crwdns2936625:0crwdne2936625:0:

crwdns2936751:024crwdne2936751:0 2

crwdns2936753:07crwdne2936753:0 6

crwdns2936753:030crwdne2936753:0 33

crwdns2942667:0crwdne2942667:0 1,242