crwdns2933423:0crwdne2933423:0

Asus F6A-X2 Base Replacement

crwdns2862623:0crwdne2862623:0
crwdns2942641:0crwdne2942641:0

crwdns2942213:0crwdne2942213:0

  1. Asus F6A-X2 Base Replacement, Base: crwdns2935265:01crwdnd2935265:01crwdnd2935265:02crwdne2935265:0 Asus F6A-X2 Base Replacement, Base: crwdns2935265:01crwdnd2935265:02crwdnd2935265:02crwdne2935265:0
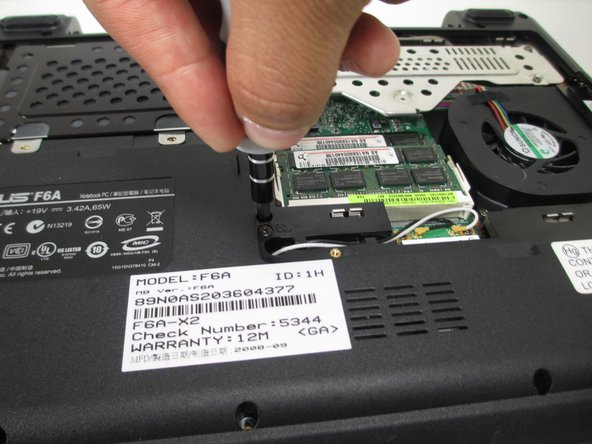
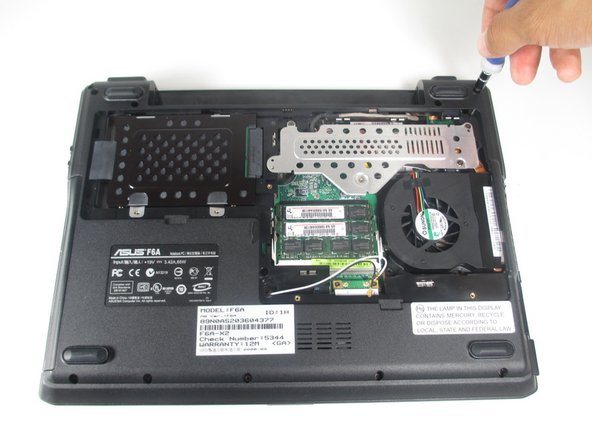
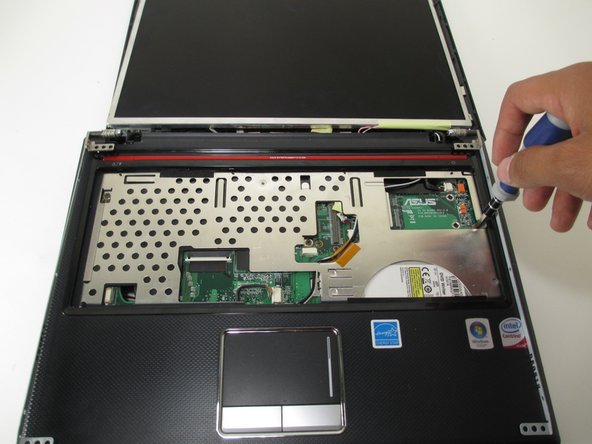
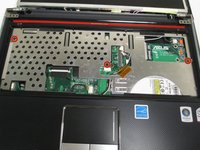
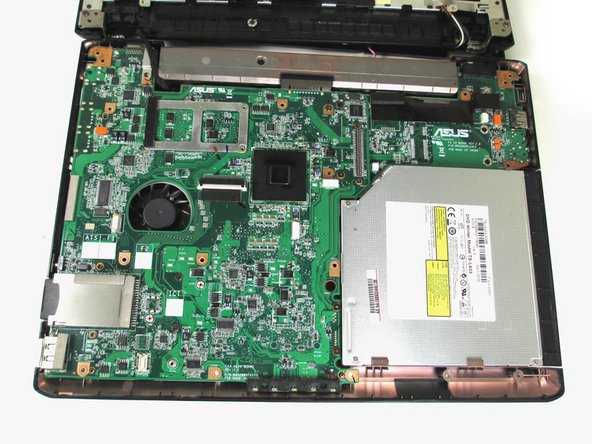
    • Remove the following four screws that hold the base to the motherboard:

    • One 1.5 mm Phillips #1 screw located near the center of the laptop.

    • One 1.5 mm Phillips #1 screw located at the top, center, next to the metal guard.

    • This screw is concealed by a black wire running across the top of the laptop. You will have to move the wire to the right in order to remove the screw.

    • Two 1.5 mm Phillips #1 screws located next to the fan.

  2. Asus F6A-X2 Base Replacement: crwdns2935265:02crwdnd2935265:01crwdnd2935265:01crwdne2935265:0
    crwdns2935267:0crwdne2935267:0
    Tweezers
    $4.99
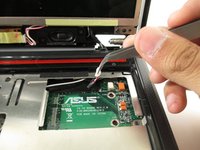
    • Next, remove the white and black cables located on the graphics card with a pair of tweezers. Grab onto the gold node on each wire and gently pull up, and the node will pop out of its socket.

    • This will give slack when disassembling the base from the motherboard.

    • Remember that the black wire goes to 1 and the white wire goes to 2 on the graphics card.

    • There is a hole on the motherboard the black and white wire will need to pass through when reassembling your laptop.

  3. Asus F6A-X2 Base Replacement: crwdns2935265:03crwdnd2935265:01crwdnd2935265:02crwdne2935265:0 Asus F6A-X2 Base Replacement: crwdns2935265:03crwdnd2935265:02crwdnd2935265:02crwdne2935265:0
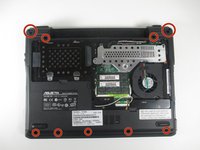
    • Remove the eleven 1.5 mm Phillips #1 screws around the perimeter of the laptop.

    • There are two screws inside the big circles in the top corners of the laptop.

  4. Asus F6A-X2 Base Replacement: crwdns2935265:04crwdnd2935265:01crwdnd2935265:02crwdne2935265:0 Asus F6A-X2 Base Replacement: crwdns2935265:04crwdnd2935265:02crwdnd2935265:02crwdne2935265:0
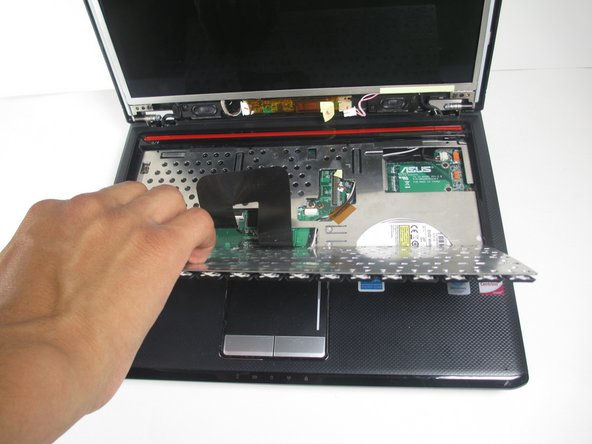
    • Flip the laptop right side up and open to reveal the keyboard.

    • In this step you will be removing the keyboard. Be gentle when removing it as the keyboard is connected to the laptop by a thin black ribbon. Yanking the keyboard out too quickly can damage the ribbon.

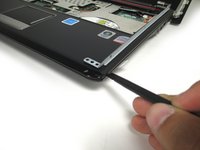
    • Insert a finger or the flat end of a spudger into the top left edge of the keyboard, underneath the 'Esc' and the 'F1-F2' keys.

    • Gently pull the keyboard towards you and lay it flat. It will make a slight popping noise as it disconnects from the laptop.

  5. Asus F6A-X2 Base Replacement: crwdns2935265:05crwdnd2935265:01crwdnd2935265:01crwdne2935265:0
    • To remove the keyboard completely, you will need to detach the ribbon from the laptop.

    • With a pair of tweezers, gently pull on each side of the white tab until it is freed from the computer.

    • Once the ribbon has been freed, put the keyboard aside in a safe place to avoid damaging it.

  6. Asus F6A-X2 Base Replacement: crwdns2935265:06crwdnd2935265:01crwdnd2935265:02crwdne2935265:0 Asus F6A-X2 Base Replacement: crwdns2935265:06crwdnd2935265:02crwdnd2935265:02crwdne2935265:0
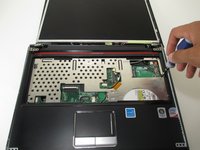
    • Remove the three 1.5 mm Phillips #1 screws from the metal guard of the laptop.

    • When reassembling, remember the screw on the extreme right of the laptop is longer than the other two.

  7. Asus F6A-X2 Base Replacement: crwdns2935265:07crwdnd2935265:01crwdnd2935265:02crwdne2935265:0 Asus F6A-X2 Base Replacement: crwdns2935265:07crwdnd2935265:02crwdnd2935265:02crwdne2935265:0
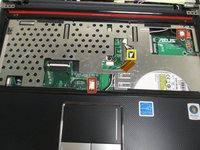
    • With a pair of tweezers, remove the three white connectors attached to the motherboard. This will give slack when disassembling the base.

    • The connectors at the top right and middle of the laptop will need to be pulled to the left.

    • The connector in between the two will need to be pulled towards the back of the laptop.

  8. Asus F6A-X2 Base Replacement: crwdns2935265:08crwdnd2935265:01crwdnd2935265:02crwdne2935265:0 Asus F6A-X2 Base Replacement: crwdns2935265:08crwdnd2935265:02crwdnd2935265:02crwdne2935265:0
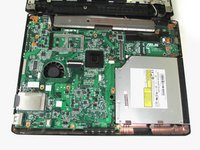
    • Insert the flat end of a spudger into the thin crack running along the side of the laptop. Gently pry open along the perimeter of the laptop to remove the base.

    • After completely prying the two bases from each other, set the top base flat against the back panel, revealing the circuit board.

crwdns2915888:0crwdne2915888:0

To reassemble your device, follow these instructions in reverse order.

Jonathan

crwdns2935283:004/24/14crwdne2935283:0

1,174 crwdns2915208:0crwdne2915208:0

crwdns2935297:011crwdne2935297:0

crwdns2915084:0crwdne2915084:0

Cal Poly, Team 10-56, Amido Spring 2014 crwdns2935289:0Cal Poly, Team 10-56, Amido Spring 2014crwdne2935289:0

CPSU-AMIDO-S14S10G56

crwdns2931471:04crwdne2931471:0

crwdns2935297:012crwdne2935297:0

crwdns2947412:00crwdne2947412:0

crwdns2917038:0crwdne2917038:0

crwdns2936625:0crwdne2936625:0:

crwdns2936751:024crwdne2936751:0 0

crwdns2936753:07crwdne2936753:0 0

crwdns2936753:030crwdne2936753:0 1

crwdns2942667:0crwdne2942667:0 93