crwdns2915892:0crwdne2915892:0
If you need to change the display for your Asus Chromebook Flip C302CA, then you will find this guide to be very helpful. An Asus Chromebook Flip C302CA is a convertible laptop that can be used both as a laptop and tablet. If the Display is damaged then it will cause what is displayed to look very off or not be able to display anything at all. This might not be a problem to someone who already knows about laptop interiors, but to someone who has no experience with laptops or repairing it can be appear very confusing, which is why this guide was made in order to help guide you through with various steps and details to make sure that you too are able to make the replacement you need.
crwdns2942213:0crwdne2942213:0
-
-
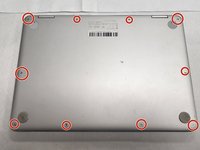
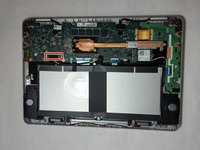
Turn the laptop over so the bottom is facing you.
-
-
-
Remove two rubber caps on the top.
-
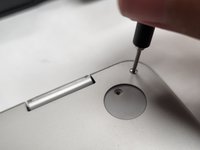
Remove the two 1 mm screws using the Phillips #00 screwdriver.
-
-
-
Remove the ten 2 mm screws from the back panel using a T5 Torx screwdriver.
-
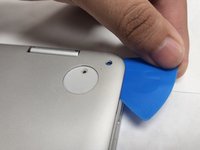
Carefully remove the back panel using an opening pick.
-
-
-
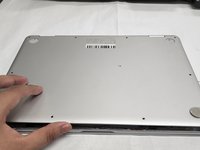
Remove the back panel from the laptop.
-
-
-
Remove the black display ports from the motherboard.
-
-
-
Remove the six 2.54 mm Phillips screws from the left and right screen hinge brackets.
-
-
-
Use heat gun to loosen up adhesive on rubber covers for screw.
-
-
-
Use prying tool to separate panel from monitor.
-
-
-
Remove this connection by pulling to separate it from the monitor.
-
-
-
Remove connection point and the entire camera assembly including wires.
-


To reassemble your device, follow these instructions in reverse order.

crwdns2935287:0crwdne2935287:0

The Citadel Military College of South Carolina, Team 1-12, Eggleston Fall 2022 crwdns2935289:0The Citadel Military College of South Carolina, Team 1-12, Eggleston Fall 2022crwdne2935289:0
CMCSC-EGGLESTON-F22S1G12
crwdns2931471:03crwdne2931471:0
crwdns2935297:03crwdne2935297:0