crwdns2915892:0crwdne2915892:0
This guide will walk you through the step by step process of removing the LED screen from the laptop. Screen removal is a multistep process that will require you to keep track of the parts taken out of the laptop. Each screw is accounted for in the steps they are removed.
crwdns2942213:0crwdne2942213:0
-
-
Remove the eight 8.0mm Phillips #0 screws on the bottom of the laptop.
-
Remove the three 6.0mm Phillips #0 screws.
-
-
-
Open the laptop.
-
Using an iFixit opening tool, pry along the edges of the keyboard.
-
Lift the keyboard and slide it gently towards you.
-
-
-
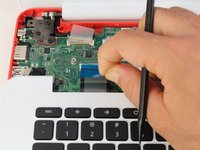
Disconnect the two ZIF connectors by prying up the locking bar with a spudger and removing the ribbon cable.
-
-
-
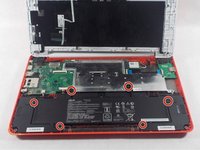
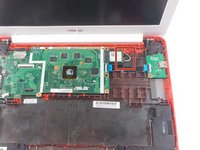
Remove the six 5.6mm Phillips #0 screws around the battery.
-
-
-
-
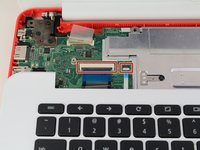
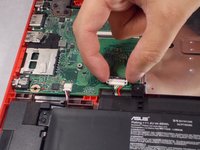
Using your thumb and index finger, pinch the multi-color cable and disconnect it from the motherboard.
-
-
-
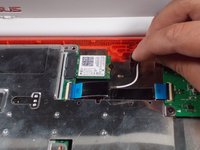
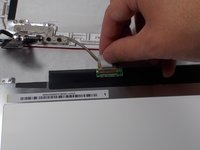
Unplug the black and white cable from the motherboard.
-
-
-
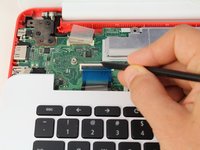
Peel back the tape covering the plug.
-
Slide the cable towards the screen and out of the input.
-
-
-
Unscrew the 6 screws (5 millimeter) on the top right and left.
-
-
-
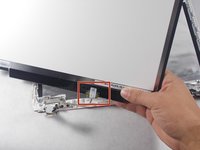
Gently lift the screen up and away from the laptop.
-
-
-
Pry off the face panel on the screen using the blue prying tool.
-
-
-
Remove the four 2mm Phillips #0 screws from the four corners of the screen.
-
-
-
Gently lift screen
-
Peel back the adhesive covering the cable.
-
Remove the cable to free the screen.
-


To reassemble your device, follow these instructions in reverse order.
crwdns2935221:0crwdne2935221:0
crwdns2935229:02crwdne2935229:0
crwdns2935287:0crwdne2935287:0

UMass Dartmouth, Team S1-G7, Simcock Fall 2017 crwdns2935289:0UMass Dartmouth, Team S1-G7, Simcock Fall 2017crwdne2935289:0
UMASSD-SIMCOCK-F17S1G7
crwdns2931471:03crwdne2931471:0
crwdns2935297:09crwdne2935297:0
crwdns2947410:01crwdne2947410:0
I used this honestly I broke the screen and some of the wires in the screen are severed. Now I know for sure where the wires go and how to deconstruct it. Thank you so much!