crwdns2933423:0crwdne2933423:0

Asus A3H Thermal Paste Replacement

crwdns2942213:0crwdne2942213:0

  1. Asus A3H Thermal Paste Replacement, Opening the back panel.: crwdns2935265:01crwdnd2935265:01crwdnd2935265:03crwdne2935265:0 Asus A3H Thermal Paste Replacement, Opening the back panel.: crwdns2935265:01crwdnd2935265:02crwdnd2935265:03crwdne2935265:0 Asus A3H Thermal Paste Replacement, Opening the back panel.: crwdns2935265:01crwdnd2935265:03crwdnd2935265:03crwdne2935265:0
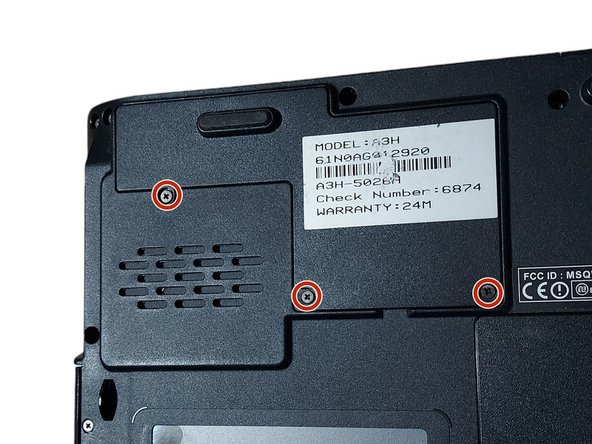
    • Unscrew the 3 screws holding the CPU cover in place.

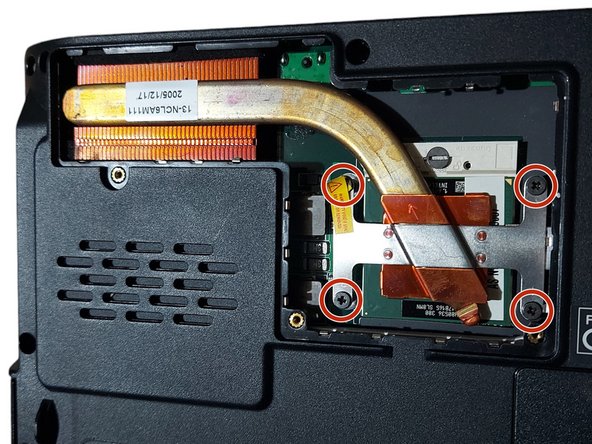
    • Unscrew the 4 screws holding the CPU heatsink.

  2. Asus A3H Thermal Paste Replacement, Replacing the thermal paste.: crwdns2935265:02crwdnd2935265:01crwdnd2935265:03crwdne2935265:0 Asus A3H Thermal Paste Replacement, Replacing the thermal paste.: crwdns2935265:02crwdnd2935265:02crwdnd2935265:03crwdne2935265:0 Asus A3H Thermal Paste Replacement, Replacing the thermal paste.: crwdns2935265:02crwdnd2935265:03crwdnd2935265:03crwdne2935265:0
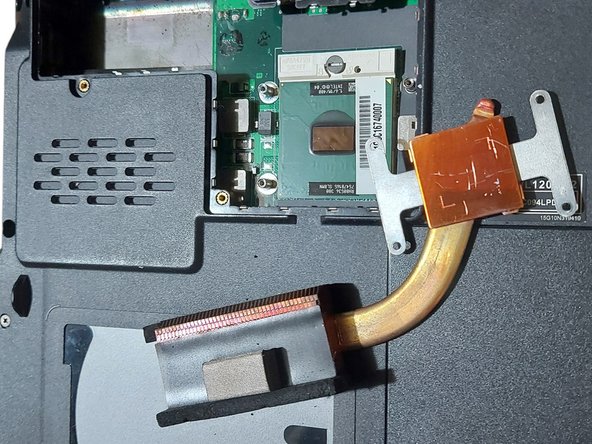
    • Clean the old thermal paste both from the cooler and the CPU. It is best to use isopropyl alcohol and cotton swabs or paper towel, but be careful not to go too hard on the CPU.

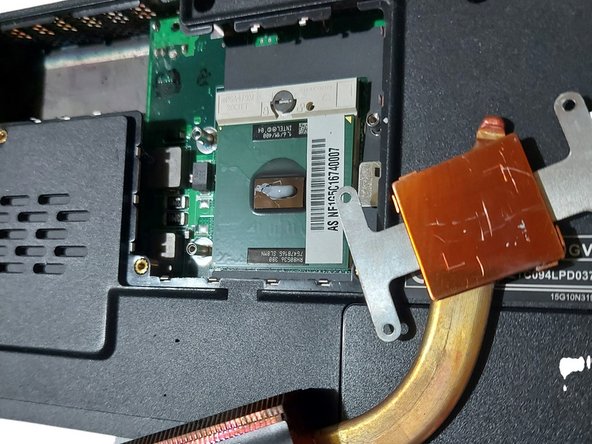
    • Don`t use too much thermal paste, just enough to cover some portion of the pad. If you have a spreader, use it. The thermal paste will apply evenly after you tighten the heatsink.

    • Last, put the heatsink back carefully and tighten the screws in order 1 -> 4 to ensure even pressure.

crwdns2915888:0crwdne2915888:0

To reassemble your device, follow these instructions in reverse order.

crwdns2935227:0crwdne2935227:0

Simeon Brankov

crwdns2935283:011/08/20crwdne2935283:0

7,297 crwdns2915208:0crwdne2915208:0

crwdns2935297:054crwdne2935297:0

crwdns2947412:00crwdne2947412:0

crwdns2917038:0crwdne2917038:0

crwdns2936625:0crwdne2936625:0:

crwdns2936751:024crwdne2936751:0 1

crwdns2936753:07crwdne2936753:0 7

crwdns2936753:030crwdne2936753:0 58

crwdns2942667:0crwdne2942667:0 299