crwdns2933423:0crwdne2933423:0
crwdns2947577:0crwdnd2947577:0crwdne2947577:0

Astro Mixamp Control Button Replacement

crwdns2869540:0crwdne2869540:0: 2,3 mil

crwdns2959988:0crwdne2959988:0

crwdns2959990:0crwdne2959990:0
4
crwdns2959992:0crwdne2959992:0
22
crwdns2959994:0crwdne2959994:0
106
crwdns2959996:0crwdne2959996:0
2.263
crwdns2955950:0crwdne2955950:0: 2

crwdns2960004:02crwdne2960004:0.

crwdns2959984:0crwdne2959984:0: 3

crwdns2959974:03crwdne2959974:0

crwdns2959986:0crwdne2959986:0: 2

crwdns2959982:02crwdne2959982:0

crwdns2955944:0crwdne2955944:0: crwdns2931287:015crwdne2931287:0
crwdns2955970:0crwdne2955970:0: crwdns2937801:0crwdne2937801:0
Astro Mixamp Control Button Replacement

crwdns2915892:0crwdne2915892:0

crwdns2959928:0crwdne2959928:0 ↓

Use this guide to remove control buttons for cleaning or replacement.

crwdns2959930:0crwdne2959930:0

crwdns2943215:0crwdne2943215:0

    1. Astro Mixamp Control Button Replacement, Panel Dial: crwdns2935265:01crwdnd2935265:01crwdnd2935265:02crwdne2935265:0 Astro Mixamp Control Button Replacement, Panel Dial: crwdns2935265:01crwdnd2935265:02crwdnd2935265:02crwdne2935265:0
      • Grip the dial tightly and pull straight off the device.

      • Repeat for the second dial

      crwdns2952109:0crwdne2952109:0

      crwdns2917038:0crwdne2917038:0

    2. Astro Mixamp Control Button Replacement: crwdns2935265:02crwdnd2935265:01crwdnd2935265:02crwdne2935265:0 Astro Mixamp Control Button Replacement: crwdns2935265:02crwdnd2935265:02crwdnd2935265:02crwdne2935265:0
      crwdns2935267:0crwdne2935267:0
      Tweezers
      $4.99
      • Using tweezers, remove the spacer nuts and washers from each dial post.

      crwdns2952109:0crwdne2952109:0

      crwdns2917038:0crwdne2917038:0

    1. Astro Mixamp Control Button Replacement, Outer Casing: crwdns2935265:03crwdnd2935265:01crwdnd2935265:02crwdne2935265:0 Astro Mixamp Control Button Replacement, Outer Casing: crwdns2935265:03crwdnd2935265:02crwdnd2935265:02crwdne2935265:0
      • Before opening your device, ensure the device is not on or connected to the charging cable.

      • Insert a plastic opening tool into the seam between the rubber foot and plastic casing.

      • Pull the rubber foot free of the plastic casing.

      crwdns2952109:0crwdne2952109:0

      crwdns2917038:0crwdne2917038:0

    2. Astro Mixamp Control Button Replacement: crwdns2935265:04crwdnd2935265:01crwdnd2935265:01crwdne2935265:0
      • Use a screwdriver to remove the screw from the rear casing.

      crwdns2952109:0crwdne2952109:0

      crwdns2917038:0crwdne2917038:0

    3. Astro Mixamp Control Button Replacement: crwdns2935265:05crwdnd2935265:01crwdnd2935265:01crwdne2935265:0
      • Gently lift the rear casing from the device.

      crwdns2952109:0crwdne2952109:0

      crwdns2917038:0crwdne2917038:0

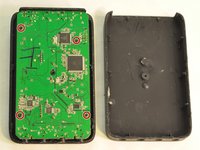
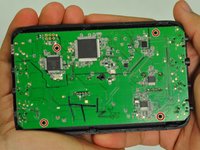
    1. Astro Mixamp Control Button Replacement, Motherboard: crwdns2935265:06crwdnd2935265:01crwdnd2935265:03crwdne2935265:0 Astro Mixamp Control Button Replacement, Motherboard: crwdns2935265:06crwdnd2935265:02crwdnd2935265:03crwdne2935265:0 Astro Mixamp Control Button Replacement, Motherboard: crwdns2935265:06crwdnd2935265:03crwdnd2935265:03crwdne2935265:0
      • Remove the four screws that hold the motherboard in place.

      • Only touch the edges of the motherboard. Touching the surface can damage the motherboard.

      crwdns2952109:0crwdne2952109:0

      crwdns2917038:0crwdne2917038:0

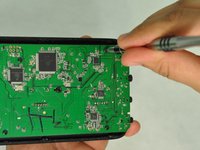
    2. Astro Mixamp Control Button Replacement: crwdns2935265:07crwdnd2935265:01crwdnd2935265:01crwdne2935265:0
      • Gently pull the motherboard from the front cover.

      crwdns2952109:0crwdne2952109:0

      crwdns2917038:0crwdne2917038:0

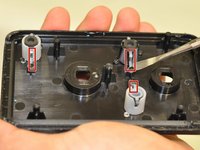
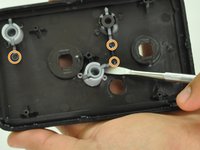
    1. Astro Mixamp Control Button Replacement, Control Button: crwdns2935265:08crwdnd2935265:01crwdnd2935265:02crwdne2935265:0 Astro Mixamp Control Button Replacement, Control Button: crwdns2935265:08crwdnd2935265:02crwdnd2935265:02crwdne2935265:0
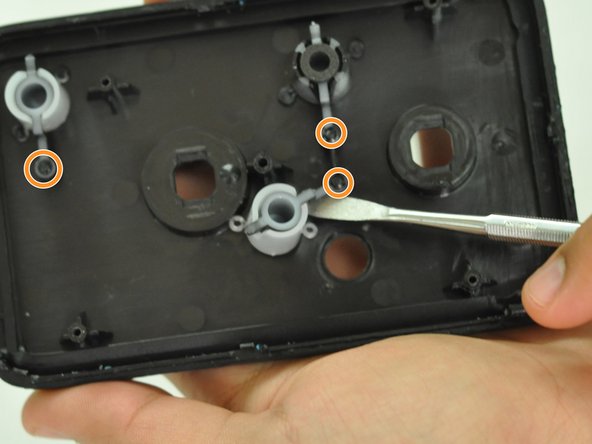
      • Gently insert a metal spudger under a control button housing.

      • Do not pry the button housing from the front panel, this can cause damage to the button.

      • Rotate the control button around the marked pin.

      crwdns2952109:0crwdne2952109:0

      crwdns2917038:0crwdne2917038:0

crwdns2915888:0crwdne2915888:0

To reassemble your device, follow these instructions in reverse order.

crwdns2935221:0crwdne2935221:0

crwdns2935229:03crwdne2935229:0

Hope Burns

crwdns2935283:010/29/16crwdne2935283:0

769 crwdns2915208:0crwdne2915208:0

crwdns2935297:05crwdne2935297:0

crwdns2947412:00crwdne2947412:0

crwdns2917038:0crwdne2917038:0

crwdns2936625:0crwdne2936625:0:

crwdns2936751:024crwdne2936751:0 4

crwdns2936753:07crwdne2936753:0 22

crwdns2936753:030crwdne2936753:0 106

crwdns2959996:0crwdne2959996:0 2,263