crwdns2933423:0crwdne2933423:0
crwdns2947577:0crwdnd2947577:0crwdne2947577:0

Astak Mole Camera Head Replacement

crwdns2869540:0crwdne2869540:0: 1,2 тыс.

crwdns2959988:0crwdne2959988:0

crwdns2959990:0crwdne2959990:0
4
crwdns2959992:0crwdne2959992:0
26
crwdns2959994:0crwdne2959994:0
84
crwdns2959996:0crwdne2959996:0
1 165
crwdns2955950:0crwdne2955950:0: 2

crwdns2960004:02crwdne2960004:0.

crwdns2959984:0crwdne2959984:0: 0

crwdns2959956:0crwdne2959956:0

crwdns2959986:0crwdne2959986:0: 0

crwdns2959958:0crwdne2959958:0

crwdns2955944:0crwdne2955944:0: crwdns2931287:010crwdne2931287:0
crwdns2955970:0crwdne2955970:0: crwdns2937803:0crwdne2937803:0
crwdns2869446:0crwdne2869446:0

crwdns2869447:0crwdne2869447:0

crwdns2862625:0crwdne2862625:0

crwdns2862626:0crwdne2862626:0

Astak Mole Camera Head Replacement

crwdns2915892:0crwdne2915892:0

crwdns2959928:0crwdne2959928:0 ↓

In order for you to replace the camera head, you will have to separate the base and the camera head by disconnecting some wires that lead from the head to the motherboard.

crwdns2959930:0crwdne2959930:0

crwdns2943215:0crwdne2943215:0

    1. Astak Mole Camera Head Replacement, Lower Case: crwdns2935265:01crwdnd2935265:01crwdnd2935265:01crwdne2935265:0
      • Remove the four bottom tabs in order to access the bottom screws.

      crwdns2952109:0crwdne2952109:0

      crwdns2917038:0crwdne2917038:0

    2. Astak Mole Camera Head Replacement: crwdns2935265:02crwdnd2935265:01crwdnd2935265:01crwdne2935265:0
      • Remove all four 14 mm Phillips #1 screws.

      crwdns2952109:0crwdne2952109:0

      crwdns2917038:0crwdne2917038:0

    3. Astak Mole Camera Head Replacement: crwdns2935265:03crwdnd2935265:01crwdnd2935265:01crwdne2935265:0
      • Remove the SD card.

      crwdns2952109:0crwdne2952109:0

      crwdns2917038:0crwdne2917038:0

    4. Astak Mole Camera Head Replacement: crwdns2935265:04crwdnd2935265:01crwdnd2935265:01crwdne2935265:0
      • Pry up the motherboard on the four points using a spudger.

      • The regular black nylon spudger should be used whenever possible, especially around sensitive internal components.

      crwdns2952109:0crwdne2952109:0

      crwdns2917038:0crwdne2917038:0

    5. Astak Mole Camera Head Replacement: crwdns2935265:05crwdnd2935265:01crwdnd2935265:01crwdne2935265:0
      • Gently pull back the motherboard to expose many of the component's wired connections.

      crwdns2952109:0crwdne2952109:0

      crwdns2917038:0crwdne2917038:0

    1. Astak Mole Camera Head Replacement, Camera Head: crwdns2935265:06crwdnd2935265:01crwdnd2935265:01crwdne2935265:0
      • Unscrew the three screws connecting the base to the camera head with the PH1 size Phillips head bit.

      • Screw measurements: Length=7.0mm.

      • The third screw can be exposed by rotating the camera head.

      • Do not force the camera head farther than it will allow you.

      crwdns2952109:0crwdne2952109:0

      crwdns2917038:0crwdne2917038:0

    2. Astak Mole Camera Head Replacement: crwdns2935265:07crwdnd2935265:01crwdnd2935265:01crwdne2935265:0
      • Unscrew indicated Phillips head screws using the PH1 Phillips head bit to free wires.

      • Screw measurements: Length=3.5mm

      crwdns2952109:0crwdne2952109:0

      crwdns2917038:0crwdne2917038:0

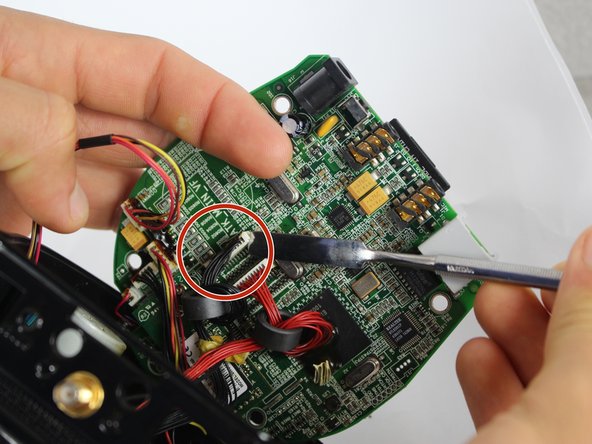
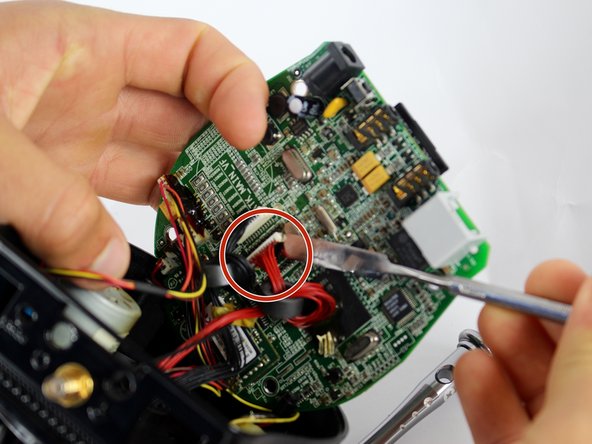
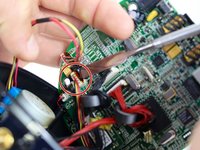
    3. Astak Mole Camera Head Replacement: crwdns2935265:08crwdnd2935265:01crwdnd2935265:03crwdne2935265:0 Astak Mole Camera Head Replacement: crwdns2935265:08crwdnd2935265:02crwdnd2935265:03crwdne2935265:0 Astak Mole Camera Head Replacement: crwdns2935265:08crwdnd2935265:03crwdnd2935265:03crwdne2935265:0
      • Separate the three indicated outputs from the motherboard with metal spudger.

      • There is electrical adhesive on the output. This can be easily separated with the metal spudger.

      • The regular black nylon spudger should be used whenever possible, especially around sensitive internal components.

      crwdns2952109:0crwdne2952109:0

      crwdns2917038:0crwdne2917038:0

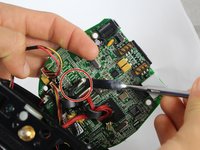
    4. Astak Mole Camera Head Replacement: crwdns2935265:09crwdnd2935265:01crwdnd2935265:01crwdne2935265:0
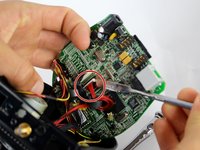
      • Separate the wire from CPU by cutting adhesive with metal spudger.

      • It is advised to reapply adhesive to wired connections during reassembly, and to re-attach wires to CPU to prevent disconnection and loose wires inside device.

      • Be careful not to damage the CPU in the process. This is not a wired connection.

      crwdns2952109:0crwdne2952109:0

      crwdns2917038:0crwdne2917038:0

crwdns2915888:0crwdne2915888:0

To reassemble your device, follow these instructions in reverse order.
crwdns2935221:0crwdne2935221:0

crwdns2862417:0crwdne2862417:0

crwdns2935293:0crwdne2935293:0

Bryan

crwdns2935283:009/15/16crwdne2935283:0

104 crwdns2915208:0crwdne2915208:0

crwdns2935295:0crwdne2935295:0

crwdns2935287:0crwdne2935287:0

USF Tampa, Team 2-2, Blackwell Fall 2016 crwdns2935289:0USF Tampa, Team 2-2, Blackwell Fall 2016crwdne2935289:0

USFT-BLACKWELL-F16S2G2

crwdns2931471:04crwdne2931471:0

crwdns2935297:072crwdne2935297:0

crwdns2947412:00crwdne2947412:0

crwdns2917038:0crwdne2917038:0

crwdns2936625:0crwdne2936625:0:

crwdns2936751:024crwdne2936751:0 4

crwdns2936753:07crwdne2936753:0 26

crwdns2936753:030crwdne2936753:0 84

crwdns2959996:0crwdne2959996:0 1,165