crwdns2915892:0crwdne2915892:0
After the LCD is removed, it looks like the webcam and microphone are right within reach. The two wires that are connecting them to the main logic board are behind a lot of the other wires and components making it a little tricky to get to their connectors and take them out. Also, since the microphone is held in by adhesives, a prying tool is absolutely essential to replace it!
crwdns2942213:0crwdne2942213:0
-
-
Lay down the display with screen side up.
-
Place the two suction cups on both sides of the top of the screen and make sure to lock them in place.
-
The glass screen is connected to the rest of the display by small magnets. Lift slowly and the screen will come right off.
-
-
-
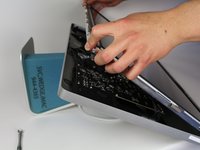
Unscrew the 12 screws around the side edges and the top of the LCD with the TR 10 Screwdriver.
-
-
-
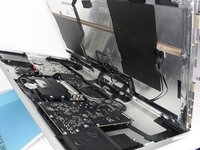
Slowly lift the LCD out from its placement and tilt it upwards.
-
-
-
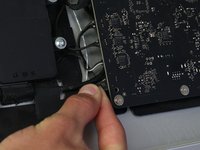
For the first of the four wires (furthest away from the wire that is held in by a screw), grab onto the connector and pull slowly.
-
-
-
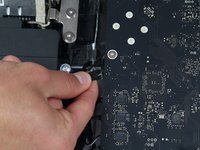
For the next connector, which is right next to the previous wire, there is a piece of tape attached to a metal bar.
-
Flip the metal bar over using the tape as a handle.
-
Next, grab onto the connector and slowly pull it from the socket in the logic board.
-
-
-
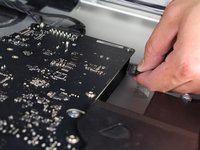
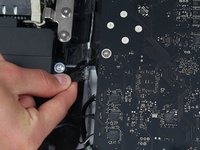
For the connector on the other side of the logic board, grab the connector from underneath and carefully pull it from the board.
-
-
-
-
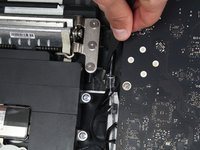
For the last wire connecting to the LCD, use your T 10 Screwdriver to remove the screw.
-
-
-
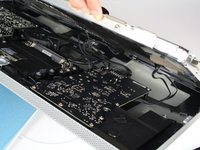
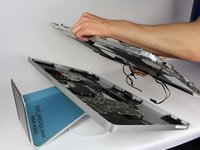
The LCD has now been fully disconnected from the casing and can be repaired/replaced!
-
-
-
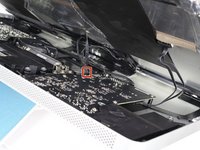
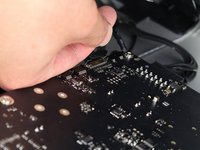
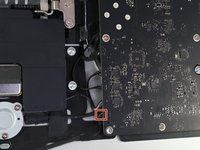
The webcam and microphone are located at the top of the device. First, follow the white microphone wire down to its connector in the logic board.
-
Carefully pull the white wire's connector from the logic board.
-
-
-
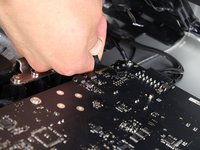
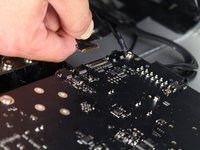
Follow the wire down from the webcam and find where it is connected into the logic board.
-
Carefully remove the connector from the logic board.
-
-
crwdns2935267:0crwdne2935267:0Tweezers$4.99
-
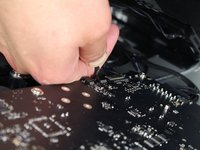
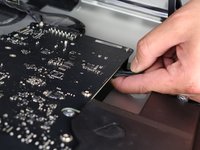
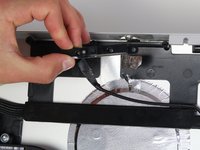
The wires are held in place by three pieces of tape. Remove the tape out of the way so that the wires are free.
-
-
-
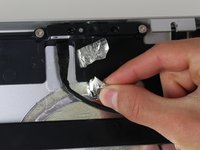
Back at the top of the device, there are two pieces of silver tape holding the webcam wires in place.
-
Again, tweezers are helpful but aren't necessary for removal of the silver tape.
-
Next, remove the tape that is holding the microphone in place.
-
-
-
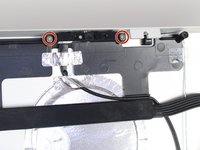
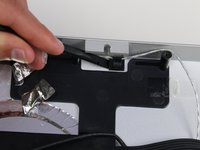
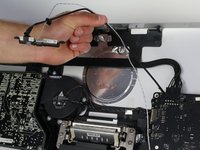
The webcam is held in with two screws and a connector
-
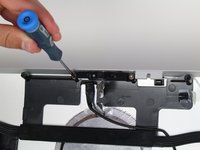
Unscrew the two screws holding the webcam in place with the TR 10 screwdriver.
-
The webcam is now free from your display!
-
-
-
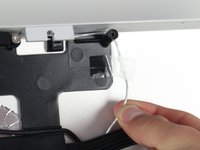
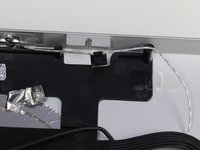
With the webcam removed, the microphone is now visible.
-
The webcam is held in place with a plastic clip that has foam adhesive stuck to the casing.
-
Use a plastic spudger to pry underneath the clip and separate the clip from the casing.
-
-
-
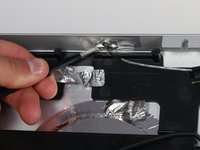
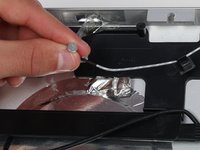
The actual microphone itself is stuck to the top of the casing using a small amount of adhesive and covered by a piece of tape.
-
Remove the piece of tape using either tweezers or your fingers to have access to the microphone.
-
Use the plastic spudger again to get underneath the small round microphone and pry it loose from the adhesive.
-
-
-
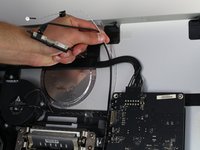
The wires for both the webcam and the microphone are tucked underneath a few other components.
-
Carefully pull the wires out up and out from the other components and your webcam and microphone can be replaced.
-


To reassemble your device, follow these instructions in reverse order.
To reassemble your device, follow these instructions in reverse order.
crwdns2935221:0crwdne2935221:0
crwdns2935229:04crwdne2935229:0
crwdns2915084:0crwdne2915084:0

Cal Poly, Team 5-11, Maness Spring 2015 crwdns2935289:0Cal Poly, Team 5-11, Maness Spring 2015crwdne2935289:0
CPSU-MANESS-S15S5G11
crwdns2931471:04crwdne2931471:0
crwdns2935297:019crwdne2935297:0