crwdns2915892:0crwdne2915892:0
This repair will need:
A T8 Torx Screwdriver.
crwdns2942213:0crwdne2942213:0
-
-
With the Generally Disassembly completed, you may proceed to floppy drive installation.
-
-
-
Remove the plastic panel at the bottom of the display.
-
-
-
Reverse the computer to access the peripheral panel in the back.
-
Remove the two T8 Torx screws on either side of the bar code panel.
-
-
-
-
Reverse the computer to have the monitor and mousepad facing you.
-
Remove the plastic panel underneath the display.
-
-
-
Remove the three T8 Torx screws securing the floppy drive to the frame.
-
-
-
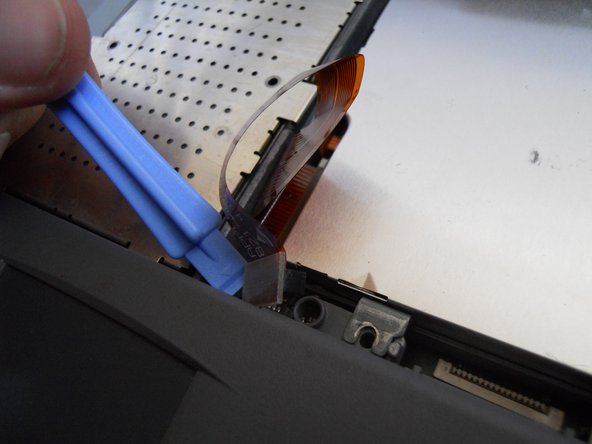
Using a spudger, lift the plastic tabs on the floppy drive securing the ribbon cable to the ribbon port.
-
-
-
Lift the defective floppy drive from the body of the computer.
-
-
-
Replace the defective drive with a new drive.
-
Follow these instructions in reverse order to reassemble the device.
-


To reassemble your device, follow these instructions in reverse order.
crwdns2935221:0crwdne2935221:0
crwdns2935229:02crwdne2935229:0

crwdns2935287:0crwdne2935287:0

Cal Poly, Team 20-66, Walters Spring 2011 crwdns2935289:0Cal Poly, Team 20-66, Walters Spring 2011crwdne2935289:0
CPSU-WALTERS-S11S20G66
crwdns2931471:04crwdne2931471:0
crwdns2935297:03crwdne2935297:0
crwdns2947410:01crwdne2947410:0
Does anyone know where I can actually find another FDD for this PowerBook? Because I think i broke mine ((