crwdns2915892:0crwdne2915892:0
This guide shows you how to replace the motherboard in your AmazonBasics BTV1 Bluetooth speaker. This replacement is easier than it sounds and can even be completed by beginners.
crwdns2942213:0crwdne2942213:0
-
-
Hold the speaker firmly and wedge a plastic opening tool in between the faceplate and the body of the speaker.
-
Move the tool back and forth along the entire perimeter of the face plate until you feel the plate loosen, then pry the plate off.
-
-
-
Using a Phillips #1 screwdriver, remove the four black 10mm screws around each of speakers.
-
Using a Phillps #1 screwdriver, remove the four black 10mm screws securing the inside panel to the case.
-
-
-
-
Tilt the case downwards until the speakers fall out of their housings.
-
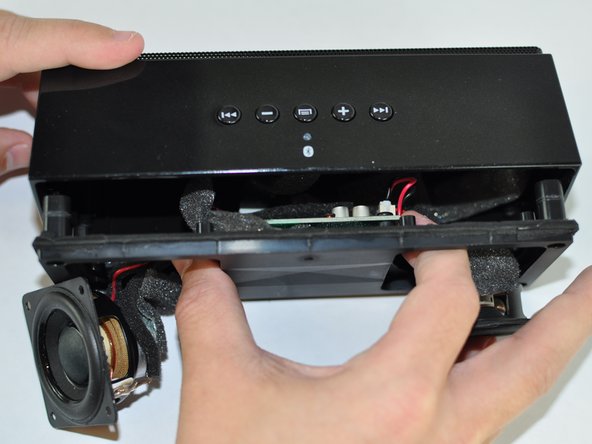
Reach your thumb and forefinger past the speakers and detach the front speaker panel from the unit.
-
-
-
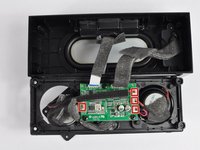
Gently pull each plastic connector from the motherboard.
-
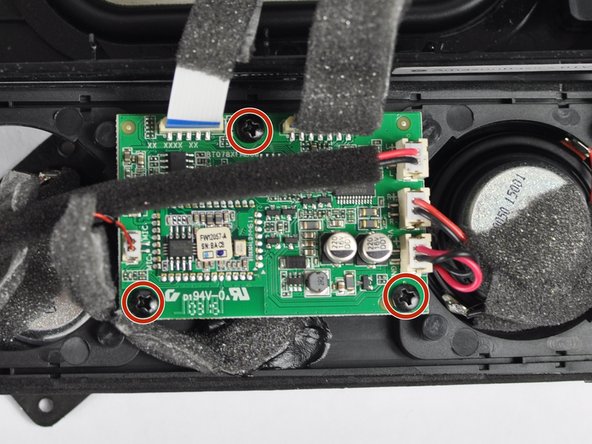
Use a Phillips #1 screwdriver to remove each of the three black 9.6mm screws from the motherboard.
-
-
-
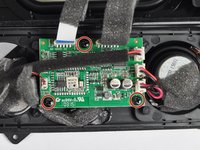
Gently pull out the two ribbon connectors to disconnect the motherboard from the case.
-


To reassemble your device, follow these instructions in reverse order.
To reassemble your device, follow these instructions in reverse order.
crwdns2935221:0crwdne2935221:0
crwdns2935229:02crwdne2935229:0
crwdns2915084:0crwdne2915084:0

USF Tampa, Team 14-2, Lacy Spring 2016 crwdns2935289:0USF Tampa, Team 14-2, Lacy Spring 2016crwdne2935289:0
USFT-LACY-S16S14G2
crwdns2931471:03crwdne2931471:0
crwdns2935297:05crwdne2935297:0