crwdns2915892:0crwdne2915892:0
The motherboard holds together all the main components for the Kindle. Without a motherboard, your Kindle will not function. With a defective motherboard, your Kindle will run into some problems. This guide will teach you how to change your Kindle's motherboard.
crwdns2942213:0crwdne2942213:0
-
-
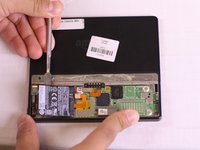
Carefully wedge the plastic opening tool between the back panel and the device to free the clips holding the back panel and the device together.
-
-
-
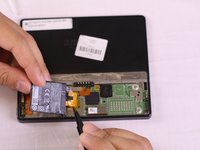
Work your way around the back panel to free all the clips.
-
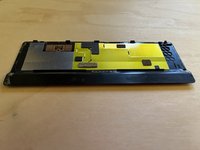
There are 5 clips on the long and thickest side of the oasis, and none on the others.
-
-
-
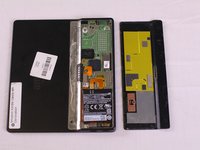
Carefully remove the back panel from the device.
-
Gently peel the back panel away from the adhesive, being mindful to keep the adhesive strip in good condition so that it can be used again.
-
-
crwdns2935267:0crwdne2935267:0Tweezers$4.99
-
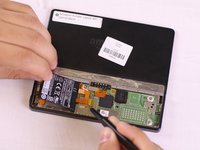
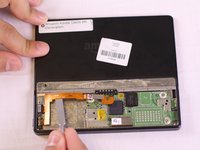
Using tweezers, lift the orange bridge connector off.
-
-
-
Gently wedge the spudger under the battery starting from the left side, and slowly work the spudger around the edge to loosen the battery from the tape. Be careful not to rip the thin foil on the back of the battery.
-
-
-
-
Lift the battery up using a spudger and use your fingers to slowly pull the battery off the adhesive.
-
-
crwdns2935267:0crwdne2935267:0Tweezers$4.99
-
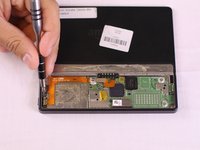
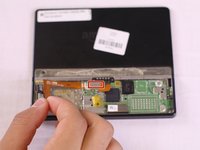
Using the tweezers, gently lift the tape off of the Power bridge connector. If a new unit comes with a new piece of tape, remove entirely, if not remove and place one corner lightly face down on a clean surface to be used again.
Heya, can you share the details for the battery?
Specs of the battery I just extracted from my Oasis: 3.7V / 245mAH / 0.91Wh
The battery also reads "Part No 58-00017 Model 223337 1ICP3/34/38". Manufacturer is DongGuan Amperex Technology Limited.
-
-
-
Once free of the adhesive and connectors, remove the old battery from the device.
where can buy this oasis battery?
One step missing…. the end of the orange power connector (the end not attached to the battery) clips into a little socket which is barely visible. You can tell when it clips in by the feel and sound. Make sure that when you put the new battery in, you first clip the connector in before you stick the tape down.
Thank you @Gary Jacobson… that’s a pretty important step that’s missing. I greatly appreciated your comment noting it.
Also, folks should be aware that the battery you get from iFixIt might come fully discharged. So if your Oasis doesn’t power-on immediately (or do anything at all) after replacing the battery, don’t despair! Plug it in, let it charge for a while, and see if it comes back to life. Mine did (after I had taken it apart twice, reseated the battery and then assumed it was dead and ordered a new one from Amazon). Sigh!
-
-
-
Locate the 2 Phillips screws (labeled PH 0) and remove screws using a screwdriver with a PH0 bit.
-
-
-
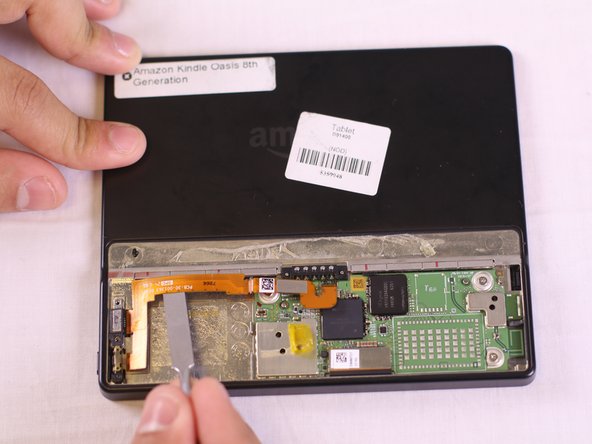
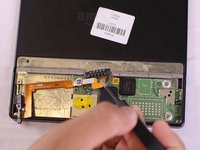
Using the metal spudger, tweezers, and your finger tips, gently lift the orange power bridge connector off of the motherboard first and then off of the kindle.
-
-
-
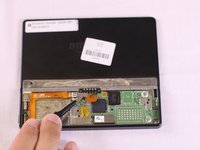
Use the tweezers to pluck the orange bridge power connector from the Kindle. The charging port and power button is attached to the connector.
-
-
-
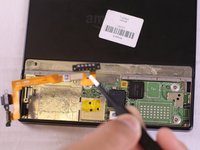
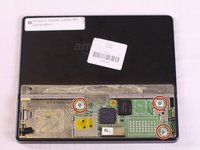
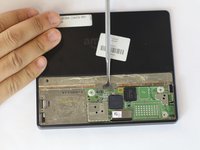
Locate the 3 Phillips screws (PH 0) on the motherboard and proceed to unscrew them using a screwdriver with a PH 0 bit.
-
-
-
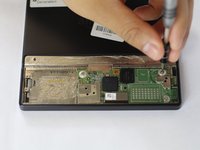
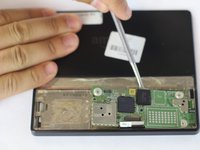
Locate the connector from the display screen on the motherboard and disconnect it with tweezers
-
-
-
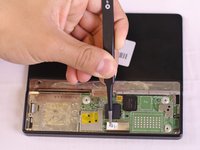
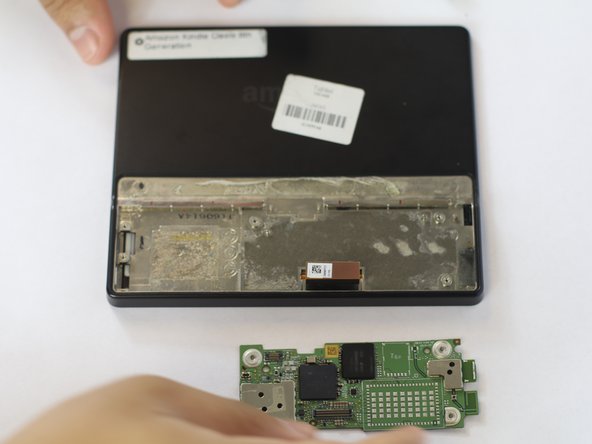
Use the metal spudger to wedge out the motherboard from the Kindle.
The mainboard is attached to the kindle with a very strong adhesive. Took some heat to soften it up before I was able to remove it.
Second the adhesive comment! I used a very sharp blade to pry the board up where shown very slightly, and introduced 99.9% IPA which softened the glue immediately.
-


To reassemble your device, follow these instructions in reverse order.
To reassemble your device, follow these instructions in reverse order.
crwdns2935221:0crwdne2935221:0
crwdns2935227:0crwdne2935227:0
crwdns2915084:0crwdne2915084:0

USF Tampa, Team S16-G5, Eyestone Fall 2017 crwdns2935289:0USF Tampa, Team S16-G5, Eyestone Fall 2017crwdne2935289:0
USFT-EYESTONE-F17S16G5
crwdns2931471:04crwdne2931471:0
crwdns2935297:016crwdne2935297:0
crwdns2947410:01crwdne2947410:0
Hola tendrá es placa base que necesito una pieza. Para ver si lo puedo reparar?
Where can I buy this battery?
[deleted] - crwdns2934203:0crwdne2934203:0
Where can I find the port pls?
Bobby Turner - crwdns2934203:0crwdne2934203:0
It would be really helpful if you could show more detail on how the backing is attached to the device, what the latching mechanism looks like in detail, and how to separate it. The technique in the photos might work on a device that has been opened a hundred times before, but on a new one, this guide doesn’t really help me to understand how to open the device.
Jesse Dhillon - crwdns2934203:0crwdne2934203:0
I couldn't get the back cover off with the tool for the life of me. I wound up using a small flathead screwdriver and gently rubber hammering it in at an angle near the lower left of the raised panel, where it appears there aren't any components to damage. Once one clip is off the rest come off pretty easy with the tool.
Aaron Olinger - crwdns2934203:0crwdne2934203:0
Agree with Aaron
Bruce McKay - crwdns2934203:0crwdne2934203:0
Plastic is difficult to fit in the gap. I used a small flat-head screwdriver to make a gap and put the plastic in. Be careful, the screwdriver should only be used to open the gap so that the board is not damaged. Also, I think it opened more flexibly because I used a hair dryer, and the adhesive part was left clean.
Rosario - crwdns2934203:0crwdne2934203:0