crwdns2915892:0crwdne2915892:0
You should replace your Kindle Fire 7th Generation battery if it dies quickly, charges slowly, or won’t turn on. To do this, open the tablet with a plastic tool, remove the old battery, connect the new one, and close it up. Replacing the battery is important because an old one can cause short battery life, slow charging, or make the device stop turning on altogether. Here are some other resources that may also help with this replacement. Video representation.
crwdns2942213:0crwdne2942213:0
-
-
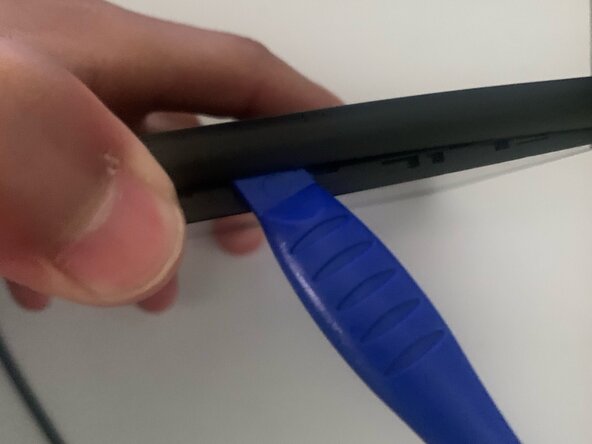
Insert the plastic prying tool along the edge of the tablet, where the back cover meets the screen's bezel.
-
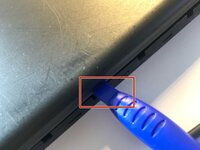
Carefully work your way around the edges to free all of the clips that secure the back cover in place.
-
-
-
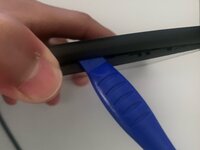
Separate the back cover from the tablet.
-
-
-
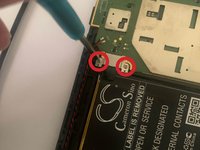
Remove the two screws that secure the battery connector cover in place with a #00 Phillips screwdriver.
-
Lift the battery connector cover off.
-
-
-
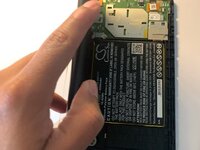
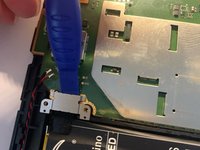
Disconnect the battery.
-
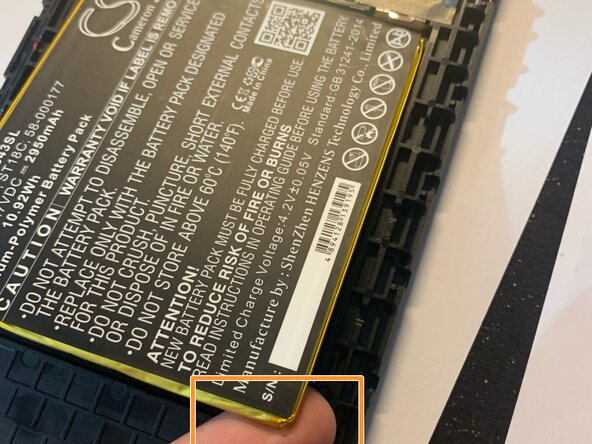
Fit the tip of the plastic opening tool under the bottom right of the battery.
-
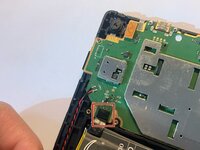
Remove the battery from the frame.
-


To reassemble your device, follow these instructions in reverse order.
To reassemble your device, follow these instructions in reverse order.
crwdns2935221:0crwdne2935221:0
crwdns2935229:03crwdne2935229:0

crwdns2915084:0crwdne2915084:0

CSU Los Angeles, Team 1-1, Briggs Fall 2023 crwdns2935289:0CSU Los Angeles, Team 1-1, Briggs Fall 2023crwdne2935289:0
CSULA-BRIGGS-F23S1G1
crwdns2931471:06crwdne2931471:0
crwdns2935297:05crwdne2935297:0