crwdns2915892:0crwdne2915892:0
In this guide, we will show you how to replace the rear-facing camera. Before you start, make sure your device is powered off.
crwdns2942213:0crwdne2942213:0
-
-
Heat the edges of the screen with a heat gun on the lowest setting by using sweeping motions from about 8-10 inches away.
-
-
-
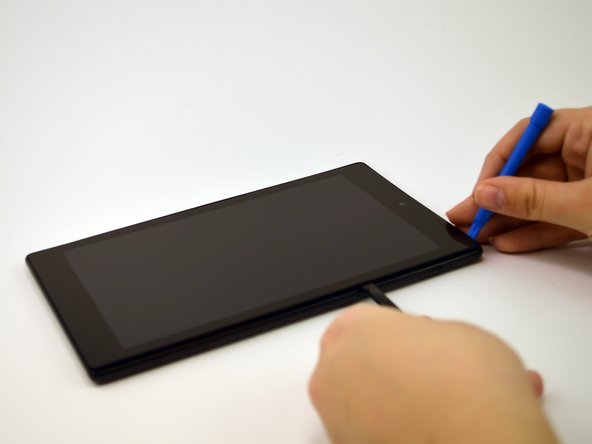
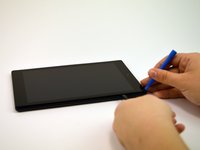
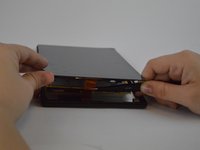
After 1-2 minutes, use a plastic opening tool to pry the screen loose. Start at the top right corner and gently pry the screen from the device.
-
-
-
-
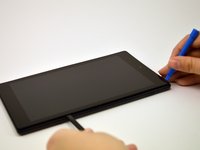
Slide a plastic opening tool and spudger along the underside of the screen using enough force to peel the screen and the adhesive strip from the other half of the device.
-
-
crwdns2935267:0crwdne2935267:0Tweezers$4.99
-
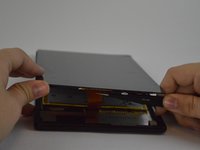
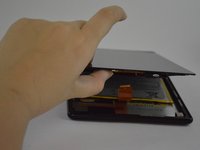
To remove the screen from the device, use tweezers to gently pull the orange cable from its connection to the screen.
-
-
crwdns2935267:0crwdne2935267:0Tweezers$4.99
-
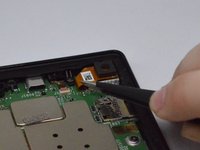
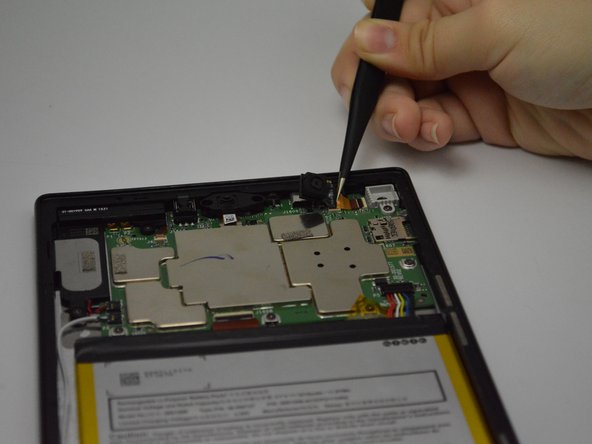
Pop the camera out of the rear-facing camera casing by carefully pulling the orange cable with the tweezers.
-
-
-
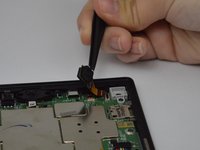
Flip up the tab on the ZIF connector at the end of the ribbon cable.
-
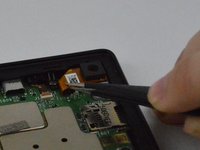
Grasp the underside of the orange cable with the tweezers and gently slide the camera out of the connector.
-


To reassemble your device, follow these instructions in reverse order.
To reassemble your device, follow these instructions in reverse order.
crwdns2935221:0crwdne2935221:0
crwdns2935229:02crwdne2935229:0
crwdns2915084:0crwdne2915084:0

USF Tampa, Team 1-3, Leahy Spring 2016 crwdns2935289:0USF Tampa, Team 1-3, Leahy Spring 2016crwdne2935289:0
USFT-LEAHY-S16S1G3
crwdns2931471:04crwdne2931471:0
crwdns2935297:017crwdne2935297:0