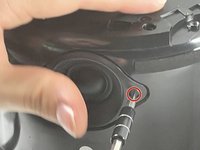
crwdns2933423:0crwdne2933423:0
crwdns2947577:0crwdnd2947577:0crwdne2947577:0

Amazon Echo Studio Tweeter Replacement

crwdns2942213:0crwdne2942213:0

    1. Amazon Echo Studio Tweeter Replacement, Power Supply Board: crwdns2935265:01crwdnd2935265:01crwdnd2935265:03crwdne2935265:0 Amazon Echo Studio Tweeter Replacement, Power Supply Board: crwdns2935265:01crwdnd2935265:02crwdnd2935265:03crwdne2935265:0 Amazon Echo Studio Tweeter Replacement, Power Supply Board: crwdns2935265:01crwdnd2935265:03crwdnd2935265:03crwdne2935265:0
      • Flip the device upside down.

      • Pry up the edge of the rubber base panel with a spudger, then pull the rest of it off by hand.

      crwdns2952109:0crwdne2952109:0

      crwdns2917038:0crwdne2917038:0

    2. Amazon Echo Studio Tweeter Replacement: crwdns2935265:02crwdnd2935265:01crwdnd2935265:03crwdne2935265:0 Amazon Echo Studio Tweeter Replacement: crwdns2935265:02crwdnd2935265:02crwdnd2935265:03crwdne2935265:0 Amazon Echo Studio Tweeter Replacement: crwdns2935265:02crwdnd2935265:03crwdnd2935265:03crwdne2935265:0
      • Use a T15 Torx screwdriver to remove the nine 3.2 mm screws.

      • Use a Torx T10 screwdriver to remove the six 2.7 mm screws.

      • After removing the screws, gently lift the base off, with care not to damage any of the connected cables.

      crwdns2952109:0crwdne2952109:0

      crwdns2917038:0crwdne2917038:0

    3. Amazon Echo Studio Tweeter Replacement: crwdns2935265:03crwdnd2935265:01crwdnd2935265:03crwdne2935265:0 Amazon Echo Studio Tweeter Replacement: crwdns2935265:03crwdnd2935265:02crwdnd2935265:03crwdne2935265:0 Amazon Echo Studio Tweeter Replacement: crwdns2935265:03crwdnd2935265:03crwdnd2935265:03crwdne2935265:0
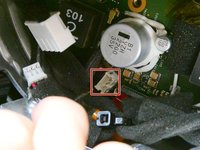
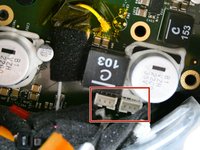
      • Before fully removing the base, remove the three attached connectors.

      crwdns2952109:0crwdne2952109:0

      crwdns2917038:0crwdne2917038:0

    4. Amazon Echo Studio Tweeter Replacement: crwdns2935265:04crwdnd2935265:01crwdnd2935265:02crwdne2935265:0 Amazon Echo Studio Tweeter Replacement: crwdns2935265:04crwdnd2935265:02crwdnd2935265:02crwdne2935265:0
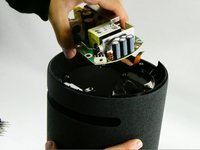
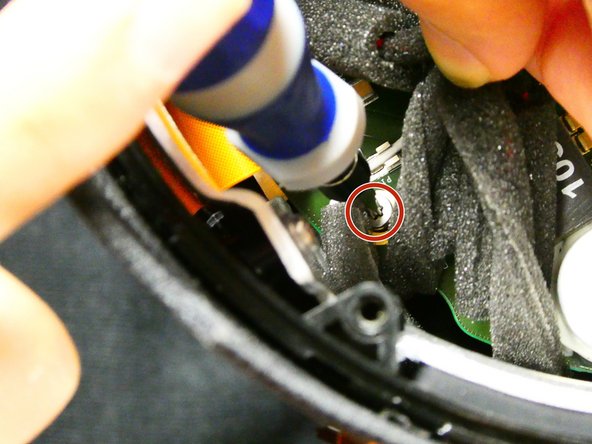
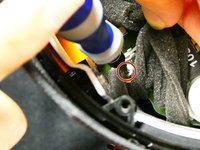
      • Now unscrew the the single 10 mm Phillips screw.

      • Remove the power supply board.

      crwdns2952109:0crwdne2952109:0

      crwdns2917038:0crwdne2917038:0

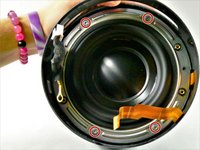
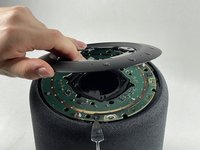
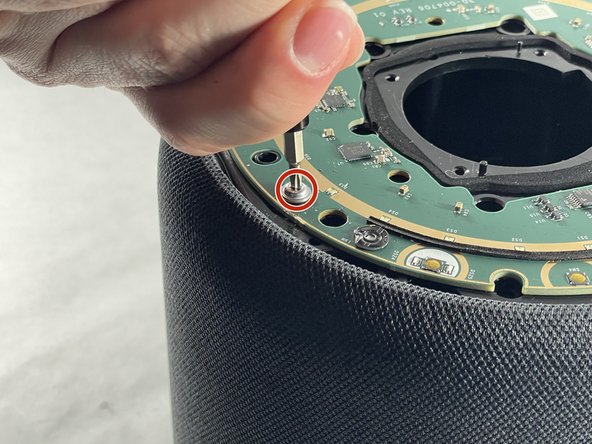
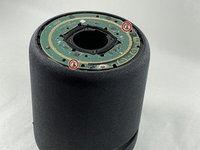
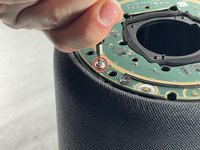
    1. Amazon Echo Studio Tweeter Replacement, Subwoofer: crwdns2935265:05crwdnd2935265:01crwdnd2935265:01crwdne2935265:0
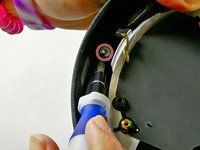
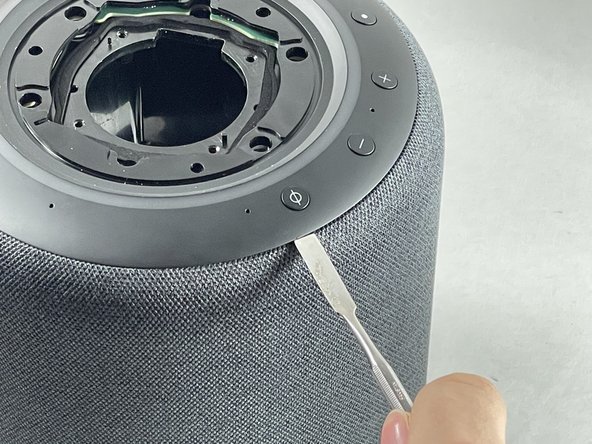
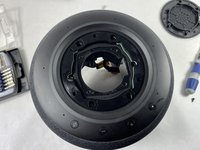
      • Remove the two screws located across from each other on the outside of the plastic ring shown.

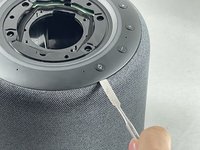
      • Remove the plastic outer ring that hugs the inside of the edges of the device.

      • This may require you to use a soft prying tool to separate it from the outer shell.

      crwdns2952109:0crwdne2952109:0

      crwdns2917038:0crwdne2917038:0

    2. Amazon Echo Studio Tweeter Replacement: crwdns2935265:06crwdnd2935265:01crwdnd2935265:03crwdne2935265:0 Amazon Echo Studio Tweeter Replacement: crwdns2935265:06crwdnd2935265:02crwdnd2935265:03crwdne2935265:0 Amazon Echo Studio Tweeter Replacement: crwdns2935265:06crwdnd2935265:03crwdnd2935265:03crwdne2935265:0
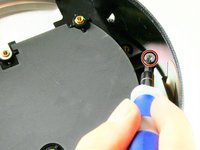
      • Remove the two 2.7 mm screws with a T10 Torx screwdriver.

      • Once the screws are removed, take the power supply's baseplate out of the unit.

      • You may need to gently pry the subwoofer's air ports from the round slots In the side of the unit.

      crwdns2952109:0crwdne2952109:0

      crwdns2917038:0crwdne2917038:0

    3. Amazon Echo Studio Tweeter Replacement: crwdns2935265:07crwdnd2935265:01crwdnd2935265:02crwdne2935265:0 Amazon Echo Studio Tweeter Replacement: crwdns2935265:07crwdnd2935265:02crwdnd2935265:02crwdne2935265:0
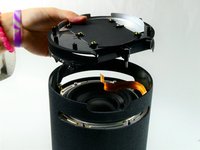
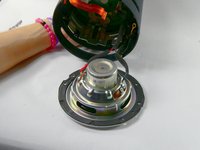
      • On the silver ring located on the outer edge of the plastic portion of the subwoofer, you will see four 2.7 mm screws. Use a Torx T10 screwdriver to remove them, in order to remove of the subwoofer.

      • Once the four screws have been removed, gently pull the subwoofer out as to not damage the wiring connecting the subwoofer to the main board inside the unit.

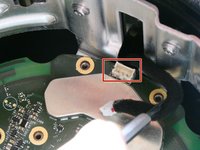
      • Follow the wires from the subwoofer to the main board and disconnect the connector attaching them.

      • Your subwoofer is now disconnected and ready to be replaced.

      crwdns2952109:0crwdne2952109:0

      crwdns2917038:0crwdne2917038:0

    1. Amazon Echo Studio Tweeter Replacement, Motherboard: crwdns2935265:08crwdnd2935265:01crwdnd2935265:02crwdne2935265:0 Amazon Echo Studio Tweeter Replacement, Motherboard: crwdns2935265:08crwdnd2935265:02crwdnd2935265:02crwdne2935265:0
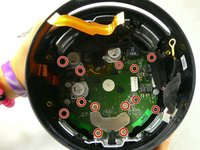
      • Remove the thirteen 9 mm Phillips #00 screws.

      • Some screws may be hidden by other components; simply hold them out of your way during screw removal.

      crwdns2952109:0crwdne2952109:0

      crwdns2917038:0crwdne2917038:0

    2. Amazon Echo Studio Tweeter Replacement: crwdns2935265:09crwdnd2935265:01crwdnd2935265:01crwdne2935265:0
      • Unfasten the Phillips 9mm screws, using the Phillips #00 Screwdriver.

      • There may be obstruction against some screws, which can be avoided by using a spudger or your hand.

      crwdns2952109:0crwdne2952109:0

      crwdns2917038:0crwdne2917038:0

    3. Amazon Echo Studio Tweeter Replacement: crwdns2935265:010crwdnd2935265:01crwdnd2935265:03crwdne2935265:0 Amazon Echo Studio Tweeter Replacement: crwdns2935265:010crwdnd2935265:02crwdnd2935265:03crwdne2935265:0 Amazon Echo Studio Tweeter Replacement: crwdns2935265:010crwdnd2935265:03crwdnd2935265:03crwdne2935265:0
      • After removing the screws, locate the four power connectors on the motherboard and detach them from the motherboard.

      crwdns2952109:0crwdne2952109:0

      crwdns2917038:0crwdne2917038:0

    4. Amazon Echo Studio Tweeter Replacement: crwdns2935265:011crwdnd2935265:01crwdnd2935265:01crwdne2935265:0
      • Remove the motherboard from the device by pulling it out.

      • Be careful to not damage any of the loose wires inside the case while removing the motherboard.

      crwdns2952109:0crwdne2952109:0

      crwdns2917038:0crwdne2917038:0

    1. Amazon Echo Studio Tweeter Replacement, Light Board: crwdns2935265:012crwdnd2935265:01crwdnd2935265:03crwdne2935265:0 Amazon Echo Studio Tweeter Replacement, Light Board: crwdns2935265:012crwdnd2935265:02crwdnd2935265:03crwdne2935265:0 Amazon Echo Studio Tweeter Replacement, Light Board: crwdns2935265:012crwdnd2935265:03crwdnd2935265:03crwdne2935265:0
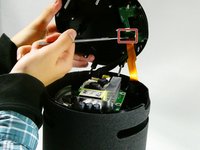
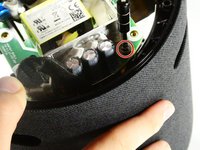
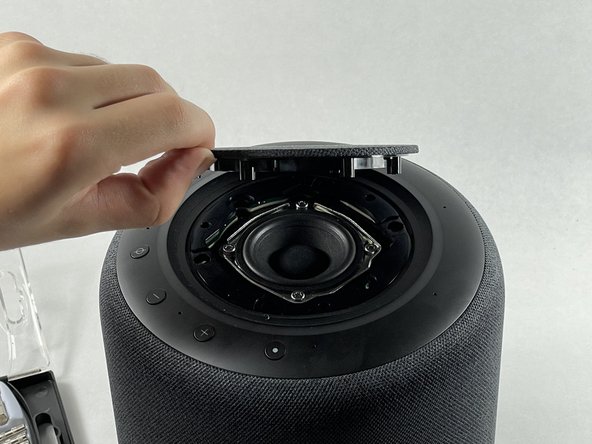
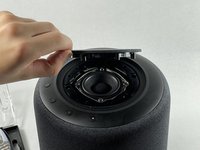
      • First, locate the six 10 mm screws at the top of the inside of the shell and unscrew them with a T10 Torx screwdriver.

      • After removing the six screws from the inside, lift the top speaker cover.

      crwdns2952109:0crwdne2952109:0

      crwdns2917038:0crwdne2917038:0

    2. Amazon Echo Studio Tweeter Replacement: crwdns2935265:013crwdnd2935265:01crwdnd2935265:03crwdne2935265:0 Amazon Echo Studio Tweeter Replacement: crwdns2935265:013crwdnd2935265:02crwdnd2935265:03crwdne2935265:0 Amazon Echo Studio Tweeter Replacement: crwdns2935265:013crwdnd2935265:03crwdnd2935265:03crwdne2935265:0
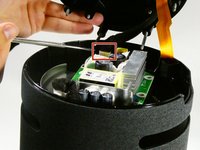
      • Lift the top plastic cover that has the buttons.

      • If you feel a lot of resistance while removing this piece, check if you removed every screw from the inside or you risk breaking this part.

      crwdns2952109:0crwdne2952109:0

      crwdns2917038:0crwdne2917038:0

    3. Amazon Echo Studio Tweeter Replacement: crwdns2935265:014crwdnd2935265:01crwdnd2935265:03crwdne2935265:0 Amazon Echo Studio Tweeter Replacement: crwdns2935265:014crwdnd2935265:02crwdnd2935265:03crwdne2935265:0 Amazon Echo Studio Tweeter Replacement: crwdns2935265:014crwdnd2935265:03crwdnd2935265:03crwdne2935265:0
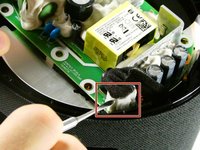
      • Remove the two 2.7 mm screws with a T10 Torx screwdriver.

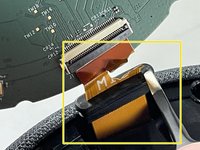
      • After the screws are removed, carefully lift the lightboard and disconnect the ribbon.

      • Make sure you do not forget to detach the ribbon from the shell, or you risk breaking it.

      crwdns2952109:0crwdne2952109:0

      crwdns2917038:0crwdne2917038:0

    1. Amazon Echo Studio Tweeter Replacement, Tweeter: crwdns2935265:015crwdnd2935265:01crwdnd2935265:03crwdne2935265:0 Amazon Echo Studio Tweeter Replacement, Tweeter: crwdns2935265:015crwdnd2935265:02crwdnd2935265:03crwdne2935265:0 Amazon Echo Studio Tweeter Replacement, Tweeter: crwdns2935265:015crwdnd2935265:03crwdnd2935265:03crwdne2935265:0
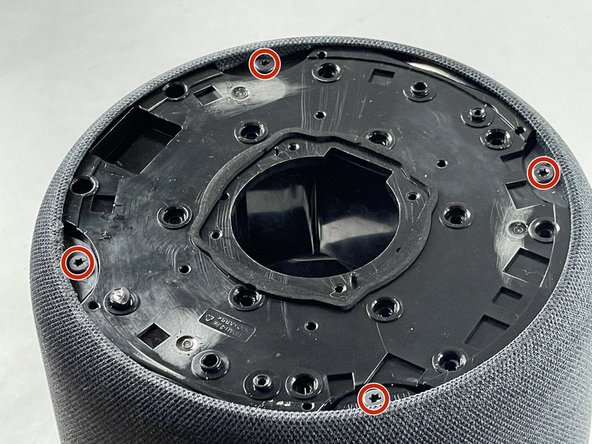
      • Remove the four 3.27 mm screws with T15 Torx driver.

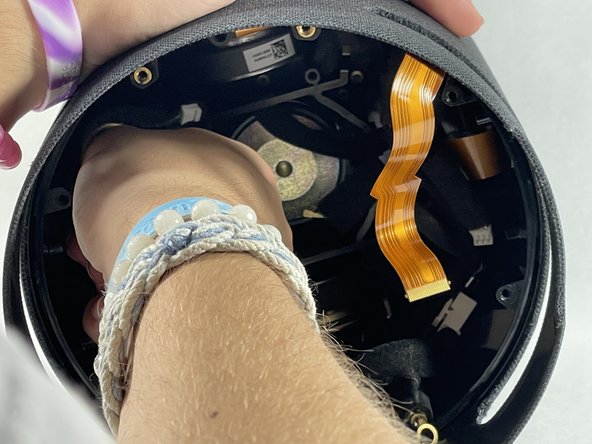
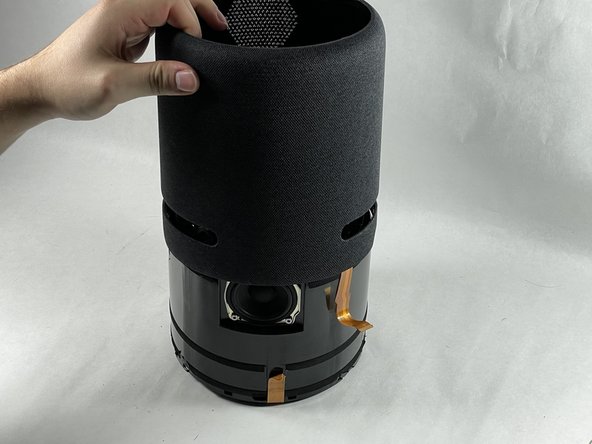
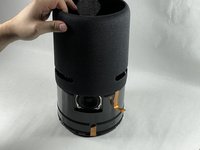
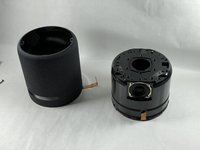
      • After removing the screws, push/pull the inner shell out of the outer shell.

      • You might need someone's help to remove the inside shell, because it is very tight inside the outer shell.

      crwdns2952109:0crwdne2952109:0

      crwdns2917038:0crwdne2917038:0

    2. Amazon Echo Studio Tweeter Replacement: crwdns2935265:016crwdnd2935265:01crwdnd2935265:03crwdne2935265:0 Amazon Echo Studio Tweeter Replacement: crwdns2935265:016crwdnd2935265:02crwdnd2935265:03crwdne2935265:0 Amazon Echo Studio Tweeter Replacement: crwdns2935265:016crwdnd2935265:03crwdnd2935265:03crwdne2935265:0
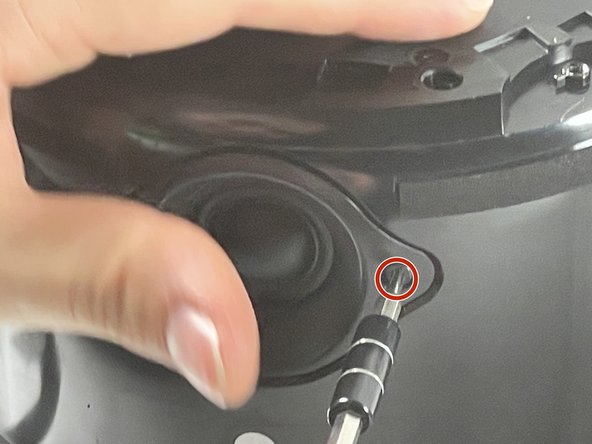
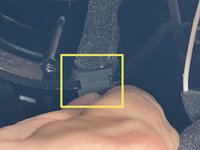
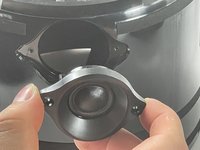
      • Remove the wire from its slot inside the shell so the tweeter can be removed.

      • Unscrew the two 3.2 mm screws holding the tweeter in place with a T15 Torx screwdriver.

      • Pull the tweeter out.

      crwdns2952109:0crwdne2952109:0

      crwdns2917038:0crwdne2917038:0

crwdns2915888:0crwdne2915888:0

To reassemble your device, follow these instructions in reverse order.

crwdns2935221:0crwdne2935221:0

crwdns2935227:0crwdne2935227:0

Filipe Oliveira

crwdns2935283:010/26/22crwdne2935283:0

339 crwdns2915208:0crwdne2915208:0

crwdns2935297:02crwdne2935297:0

crwdns2935287:0crwdne2935287:0

UMass Dartmouth, Team 2-6, Petersen Fall 2022 crwdns2935289:0UMass Dartmouth, Team 2-6, Petersen Fall 2022crwdne2935289:0

UMASSD-PETERSEN-F22S2G6

crwdns2931471:04crwdne2931471:0

crwdns2935297:072crwdne2935297:0

crwdns2947412:00crwdne2947412:0

crwdns2917038:0crwdne2917038:0

crwdns2936625:0crwdne2936625:0:

crwdns2936751:024crwdne2936751:0 2

crwdns2936753:07crwdne2936753:0 26

crwdns2936753:030crwdne2936753:0 51

crwdns2942667:0crwdne2942667:0 667