crwdns2915892:0crwdne2915892:0
Since the Amazon Echo Show 8 3rd Gen doesn't have a battery, it's essential that the power cord and the plug are working properly to power your Echo Show. If you notice that your Echo Show 8 3rd Gen isn't powering up, check if your power cord is connected to the wall and to the Echo Show, or check if the port is clean. If it still doesn't turn on, then you can follow this guide to replace your power board.
crwdns2942213:0crwdne2942213:0
-
-
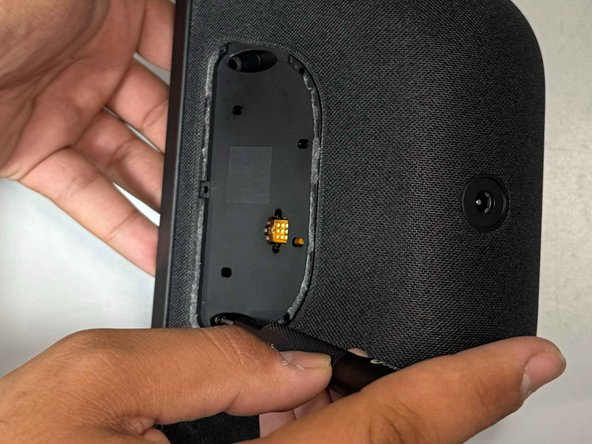
Use a prying tool to remove the rubber foot at the bottom.
-
Use an opening pick to remove the screw cover.
-
-
-
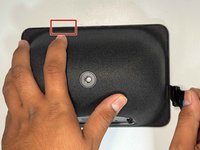
Use a Torx TR8 screwdriver to remove the two 2 cm screws.
-
-
-
-
Insert a jimmy in the gap between the display and chassis.
-
Pry around the perimeter until the back case releases.
-
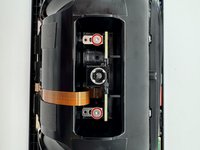
Remove the back case.
-
-
-
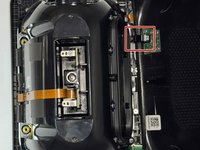
Use a Torx TR6 screwdriver to remove the two 5 mm screws that secure the power board.
-
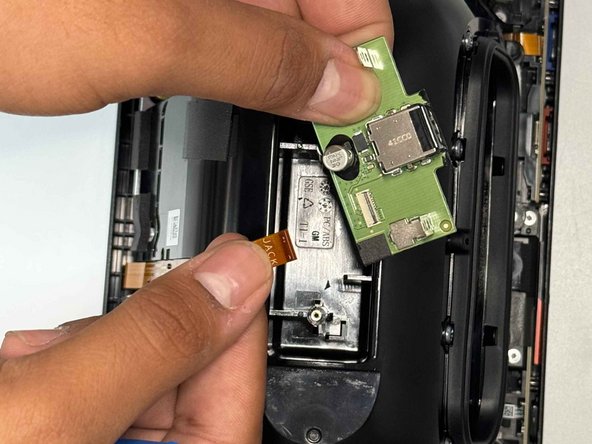
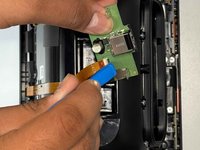
Carefully lift the board without straining the ribbon cable.
-
Using an opening tool, carefully flip up the black ZIF locking flap that secures the ribbon cable.
-
Disconnect the ribbon cable.
-


To reassemble your device, follow these instructions in reverse order.
To reassemble your device, follow these instructions in reverse order.
crwdns2935221:0crwdne2935221:0
crwdns2935229:02crwdne2935229:0

crwdns2915084:0crwdne2915084:0

University of North Texas, Team 6-5, Kilpatrick Fall 2024 crwdns2935289:0University of North Texas, Team 6-5, Kilpatrick Fall 2024crwdne2935289:0
UNT-KILPATRICK-F24S6G5
crwdns2931471:03crwdne2931471:0
crwdns2935297:010crwdne2935297:0