crwdns2933423:0crwdne2933423:0

Altec Lansing inMotion iM9 Volume and Power Buttons Replacement

crwdns2942213:0crwdne2942213:0

  1. Altec Lansing inMotion iM9 Volume and Power Buttons Replacement, Battery: crwdns2935265:01crwdnd2935265:01crwdnd2935265:01crwdne2935265:0
    • Gently push down on the two tabs at the top of the battery door.

    • While holding them down, slowly pull the door towards you.

  2. Altec Lansing inMotion iM9 Volume and Power Buttons Replacement: crwdns2935265:02crwdnd2935265:01crwdnd2935265:01crwdne2935265:0
    • Once the door is open, use your hand to pull out the four batteries.

  3. Altec Lansing inMotion iM9 Volume and Power Buttons Replacement, Volume and Power Buttons: crwdns2935265:03crwdnd2935265:01crwdnd2935265:02crwdne2935265:0 Altec Lansing inMotion iM9 Volume and Power Buttons Replacement, Volume and Power Buttons: crwdns2935265:03crwdnd2935265:02crwdnd2935265:02crwdne2935265:0
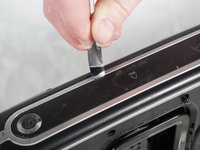
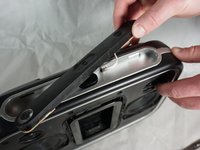
    • Pry off the control panel on top of the speaker using the metal spudger. You may need to use a lot of force.

    • Start in the middle and work your way around the perimeter.

  4. Altec Lansing inMotion iM9 Volume and Power Buttons Replacement: crwdns2935265:04crwdnd2935265:01crwdnd2935265:02crwdne2935265:0 Altec Lansing inMotion iM9 Volume and Power Buttons Replacement: crwdns2935265:04crwdnd2935265:02crwdnd2935265:02crwdne2935265:0
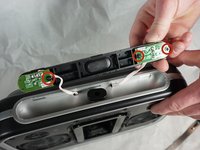
    • Using a Phillips #1 screwdriver, remove the two 7mm screws that hold the volume button circuit board to the control panel.

    • Also remove the single 7mm screw from the power button circuit board on the opposite side.

    • There will be a little plastic piece under the eject button that you can just remove and set aside.

  5. Altec Lansing inMotion iM9 Volume and Power Buttons Replacement: crwdns2935265:05crwdnd2935265:01crwdnd2935265:02crwdne2935265:0 Altec Lansing inMotion iM9 Volume and Power Buttons Replacement: crwdns2935265:05crwdnd2935265:02crwdnd2935265:02crwdne2935265:0
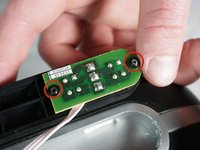
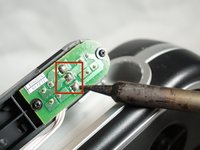
    • Desolder the three solders joints connecting the wires to the volume button circuit board.

    • Do the same to the power button circuit board on the other side (the board with only one screw).

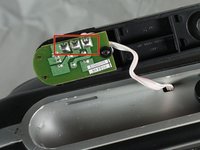
    • Pull out the wires using a lot of force.

    • If you are not familiar or comfortable with soldering, use this guide

crwdns2915888:0crwdne2915888:0

To reassemble your device, follow these instructions in reverse order.

Ben Toland

crwdns2935283:002/01/15crwdne2935283:0

101 crwdns2915208:0crwdne2915208:0

crwdns2935295:0crwdne2935295:0

crwdns2915084:0crwdne2915084:0

Cal Poly, Team 17-33, Amido Winter 2015 crwdns2935289:0Cal Poly, Team 17-33, Amido Winter 2015crwdne2935289:0

CPSU-AMIDO-W15S17G33

crwdns2931471:04crwdne2931471:0

crwdns2935297:07crwdne2935297:0

crwdns2944067:00crwdne2944067:0

crwdns2917038:0crwdne2917038:0

crwdns2936625:0crwdne2936625:0:

crwdns2936751:024crwdne2936751:0 0

crwdns2936753:07crwdne2936753:0 0

crwdns2936753:030crwdne2936753:0 2

crwdns2942667:0crwdne2942667:0 2,449