crwdns2915892:0crwdne2915892:0
If you are having an issue with your device not charging, access and replace the Micro USB charging port using this guide.
crwdns2942213:0crwdne2942213:0
-
-
Remove external rubber cover.
-
-
-
Use blue plastic opening tool to remove the external speaker face by placing it in the slight opening at the bottom.
-
Use a lever motion, push the tool down, lifting the speaker face.
-
Use fingers to grip and remove speaker face.
-
Repeat on reverse side to remove the second speaker face.
-
-
-
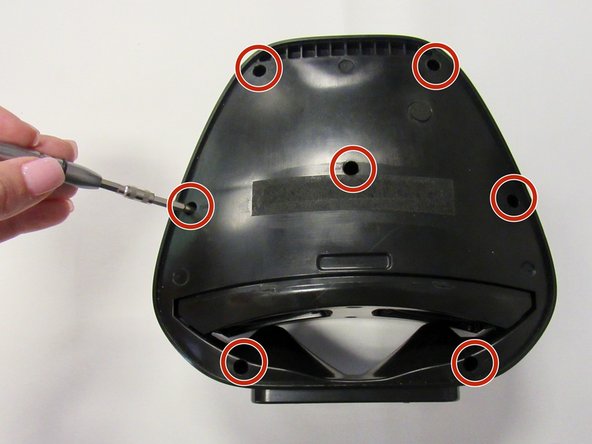
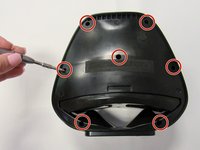
Orient speaker so volume buttons are facing away from you, and Bluetooth and power buttons are on the left-hand side.
-
Remove the seven 14mm screws using the Phillips #1 screwdriver.
-
-
-
-
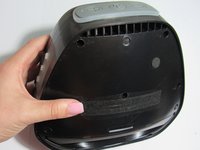
Reorient speaker so Bluetooth and power buttons are now on the right-hand side.
-
Separate the two panels along the crease.
-
Blue plastic opening tool may be needed to separate panels.
-
Remove the panel with no buttons to expose internal area of the device.
-
-
-
Remove the plactic piece containing the Micro USB port from its designated slot, found below the speakers.
-
-
-
Detach both the wires connecting the Micro USB piece to the motherboard.
-
-
-
Remove the two 10mm screws using the Phillips #0 screwdriver.
-
-
-
Remove the small black plastic piece that was held in place by the two 10 mm screws and covers the Micro USB port.
-
-
-
Use the black plastic spudger to lightly push the Micro USB piece out of the external plastic piece.
-


To reassemble your device, follow these instructions in reverse order.
To reassemble your device, follow these instructions in reverse order.
crwdns2935221:0crwdne2935221:0
crwdns2935227:0crwdne2935227:0

crwdns2915084:0crwdne2915084:0

University of Alabama, Team S1-G3, Bedsole Fall 2018 crwdns2935289:0University of Alabama, Team S1-G3, Bedsole Fall 2018crwdne2935289:0
UA-BEDSOLE-F18S1G3
crwdns2931471:03crwdne2931471:0
crwdns2935297:06crwdne2935297:0