crwdns2915892:0crwdne2915892:0
This guide will demonstrate how to install and mount an M.2 2280 solid-state drive (SSD) in an Alienware M15 – P97F.
Prior to beginning the SSD replacement, be sure to save and backup important documents, have the new M.2 SSD available, shut down your device, and unplug your laptop from the external power supply.
During the replacement process, be sure to disconnect the battery before working inside the device. It is also important to reconnect the battery after the installation of the new SSD occurs.
After the installation of the new SSD, this guide will continue with how to activate the new drive to allow users to access the new drive from a folder in the primary drive.
crwdns2942213:0crwdne2942213:0
-
-
Shut down your computer by holding the power button for five seconds.
-
Disconnect the computer from all attachments and power sources.
-
-
-
Use a Phillips #1 screwdriver to remove the six 2.4 mm screws from the bottom of the computer.
-
Also, remove the two screws located near the base of the power cord.
-
Loosen the three captive screws located closest to the touchpad.
-
Remove the back case.
-
-
-
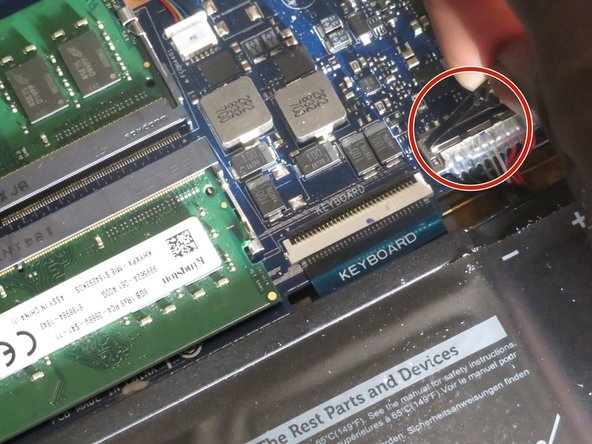
Disconnect the battery cable from the system board.
-
-
-
-
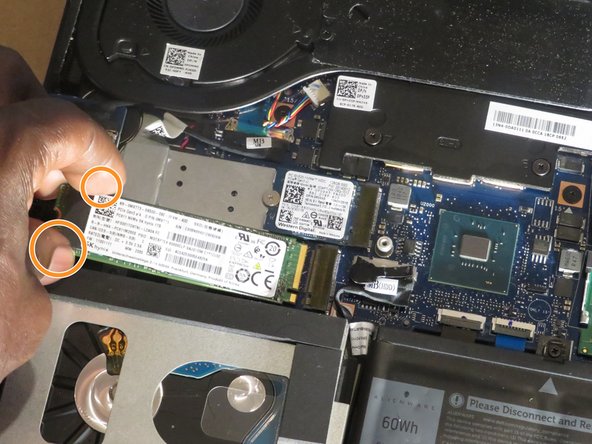
Use the Phillips #1 screwdriver to remove the single M2x25 screw that secures the solid-state drive.
-
Slide the SSD out from the socket to remove it from the system.
-
-
-
Slide the M.2 2280 solid state drive into the M.2 card slot 2.
-
Slide the M.2 2280 thermal shield onto the frame.
-
Use the Phillips #1 screwdriver to replace the M2x25 screw and secure the SSD.
-
-
-
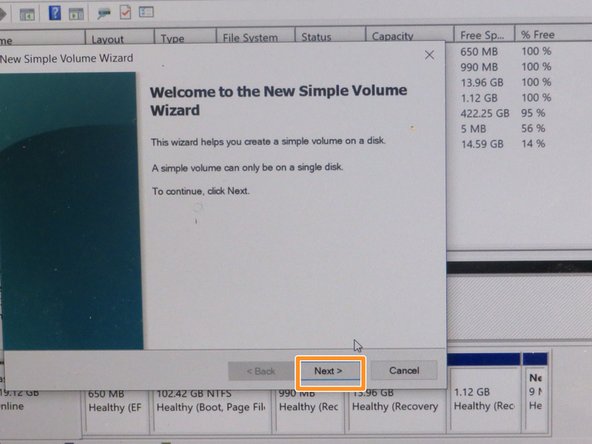
To mount the solid state drive to primary drive go to the disk management setting. Right-click the unallocated drive and then left-click on the new simple volume.
-
Welcome to the New Simple Volume Wizards: Press “Next".
-
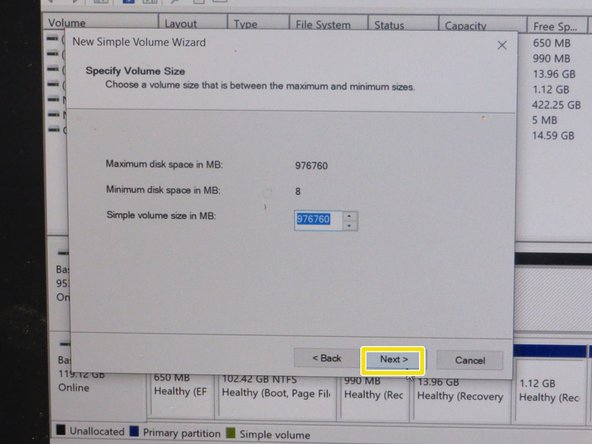
Specify Volume size: Choose the amount of memory you want to allocate (1000Mb = 1GB). Then click “Next”.
-
-
-
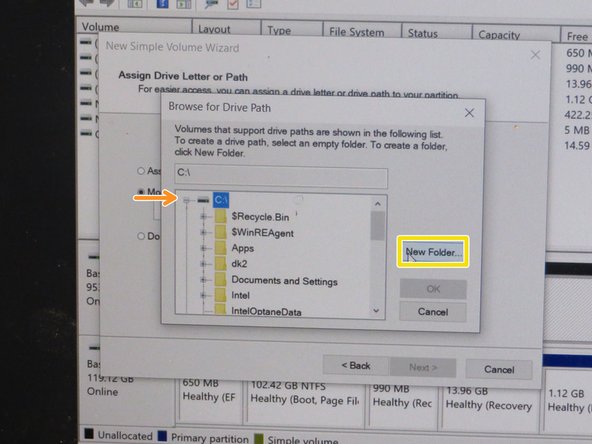
Assign Driver Letter or Path: Choose “Mount in the following empty NFTS folder” by clicking browse.
-
Now choose what drive to mount to by clicking the drive, it will enable a drop-down list.
-
Find the location on the drive that you find suitable. Then make an empty folder or place it into an empty folder. Then press “OK” then “Next”.
-
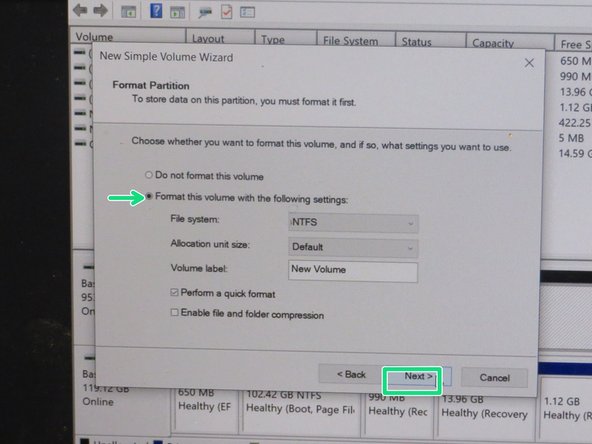
Make sure that the “Format this volume with the following settings” option is selected with default settings then click “Next”.
-
To complete the new simple volume wizard, click finish.
-


To reassemble your device, follow step 3 in reverse order until step 1.
crwdns2935287:0crwdne2935287:0

York University, Team S2-G19, Melo-Thaiss Summer 2021 crwdns2935289:0York University, Team S2-G19, Melo-Thaiss Summer 2021crwdne2935289:0
YORK-MELO-THAISS-SU21S2G19
crwdns2934841:01crwdne2934841:0
crwdns2935303:01crwdne2935303:0