crwdns2915892:0crwdne2915892:0
The motherboard is the central component of the Alienware AW610M mouse. It connects and powers all other parts. Damage, wear, or electrical failure can lead to performance issues like unresponsive clicks, erratic cursor movement, or complete power loss. Replacing the motherboard should restore full functionality and ensure reliable performance.
This guide assumes a basic familiarity with disassembling electronic devices and handling delicate components. Before starting the replacement, make sure the mouse is completely turned off as well as unplugged to avoid any accidental breakage or shortage of wires. If you are unsure about the motherboard being the source of the problem, refer back to our troubleshooting page before you continue.
crwdns2942213:0crwdne2942213:0
-
-
Power off the mouse and disconnect any wired connections.
 crwdns2952109:0crwdne2952109:0
-
-
-
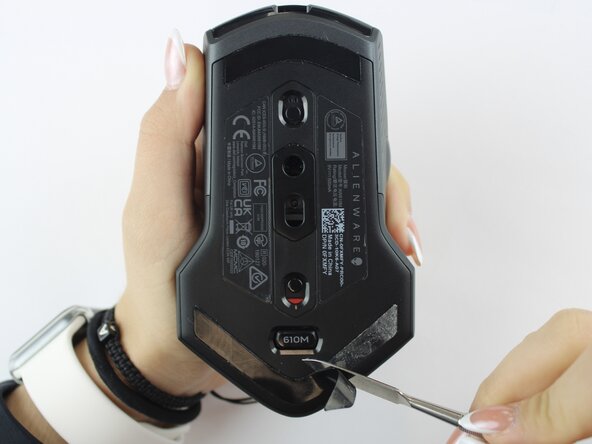
Use a spudger to gently lift and remove the old mouse feet.
-
-
-
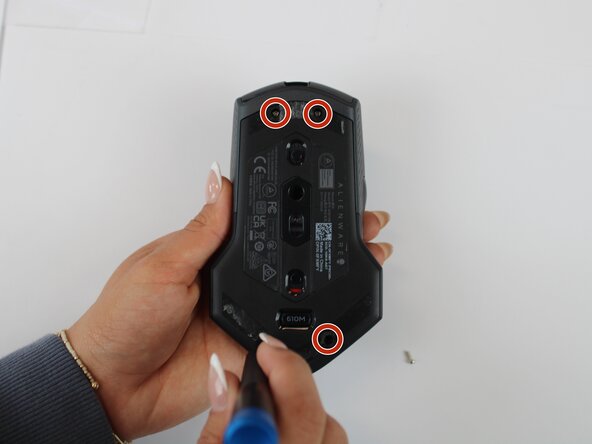
Remove the four 6.5 mm screws using a Y1 Tri-Point screwdriver.
-
-
-
-
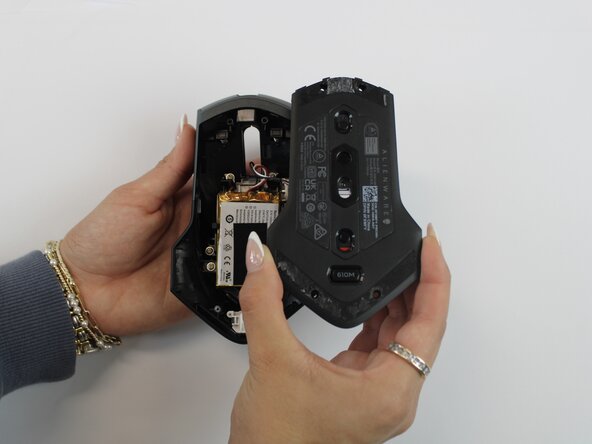
Using an opening tool, gently pry apart the two halves of the mouse case. Start at the seam and work your way around until the housing is separated.
-
-
-
Remove the battery pack inside the mouse.
-
-
-
Remove the old battery from its spot. Lift the wire connector away from the mainboard to disconnect it.
-
-
-
Remove the single 5.4 mm screw using a Phillips #1 screwdriver.
-
Detach the cable connector, and remove the scroll wheel.
-
Gently detach the last connector using your fingers.
-
-
-
Detach the blue ribbon that connects the motherboard to the shell casing.
-
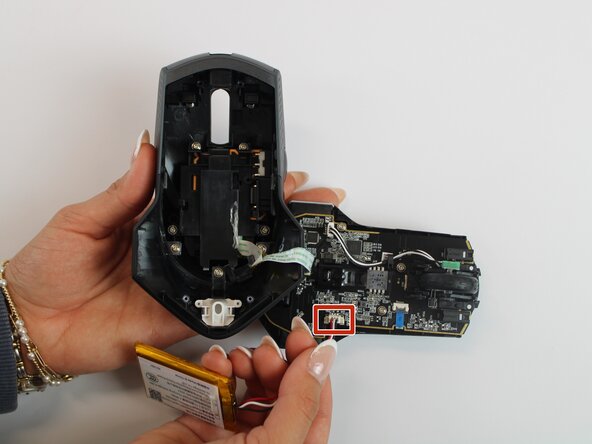
Using a Phillips #1 screw driver, remove two 5.4 mm screws to detach the motherboard from the base shell casing.
-
-
-
Gently detach the motherboard using your fingers.
-


To reassemble your device, follow these instructions in reverse order.
crwdns2935287:0crwdne2935287:0

Texas Tech, Team 46-4, Johansen Fall 2025 crwdns2935289:0Texas Tech, Team 46-4, Johansen Fall 2025crwdne2935289:0
TTU-JOHANSEN-F25S46G4
crwdns2931471:04crwdne2931471:0
crwdns2935297:05crwdne2935297:0