crwdns2933423:0crwdne2933423:0

Alienware 17 R4 Ram Replacement

crwdns2942213:0crwdne2942213:0

  1. Alienware 17 R4 Ram Replacement, Base Cover: crwdns2935265:01crwdnd2935265:01crwdnd2935265:01crwdne2935265:0
    • Use a PH1 screwdriver bit to remove the six M2.5x13 screws (2.4 mm) on the back of the laptop.

    • Use a PH1 screwdriver bit to loosen the one M2x3 screw (1.9 mm).

    • The M2x3 screw (1.9 mm) does not come out completely.

  2. Alienware 17 R4 Ram Replacement: crwdns2935265:02crwdnd2935265:01crwdnd2935265:02crwdne2935265:0 Alienware 17 R4 Ram Replacement: crwdns2935265:02crwdnd2935265:02crwdnd2935265:02crwdne2935265:0
    • Pull the base cover up to remove it.

    • If you are having trouble, insert a plastic opening tool into the divots along the laptop's edges to loosen.

    • Removing the cover may require some force.

  3. Alienware 17 R4 Ram Replacement, Hard Disk Drive (HDD): crwdns2935265:03crwdnd2935265:01crwdnd2935265:03crwdne2935265:0 Alienware 17 R4 Ram Replacement, Hard Disk Drive (HDD): crwdns2935265:03crwdnd2935265:02crwdnd2935265:03crwdne2935265:0 Alienware 17 R4 Ram Replacement, Hard Disk Drive (HDD): crwdns2935265:03crwdnd2935265:03crwdnd2935265:03crwdne2935265:0
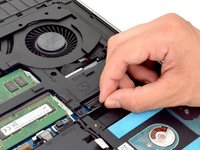
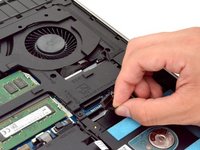
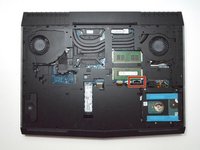
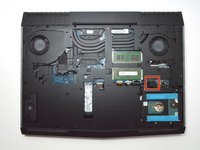
    • Disconnect the battery connector cable, located on the right side of the laptop, above the hard disk drive.

    • Once you have removed the cable, wait 5-10 minutes to allow the laptop to power down.

    • Failure to remove the battery connector cable properly may damage other parts of the laptop.

  4. Alienware 17 R4 Ram Replacement: crwdns2935265:04crwdnd2935265:01crwdnd2935265:03crwdne2935265:0 Alienware 17 R4 Ram Replacement: crwdns2935265:04crwdnd2935265:02crwdnd2935265:03crwdne2935265:0 Alienware 17 R4 Ram Replacement: crwdns2935265:04crwdnd2935265:03crwdnd2935265:03crwdne2935265:0
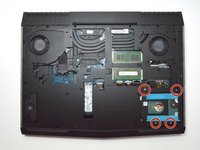
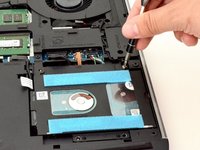
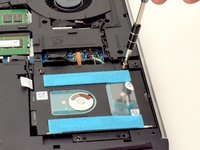
    • Use a PH1 screwdriver bit to remove the four M2.5x5 screws (2.4 mm) on the hard disk drive.

  5. Alienware 17 R4 Ram Replacement: crwdns2935265:05crwdnd2935265:01crwdnd2935265:03crwdne2935265:0 Alienware 17 R4 Ram Replacement: crwdns2935265:05crwdnd2935265:02crwdnd2935265:03crwdne2935265:0 Alienware 17 R4 Ram Replacement: crwdns2935265:05crwdnd2935265:03crwdnd2935265:03crwdne2935265:0
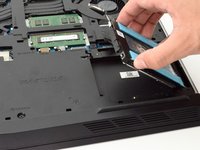
    • Gently lift the HDD cable to disconnect it from the laptop.

  6. Alienware 17 R4 Ram Replacement: crwdns2935265:06crwdnd2935265:01crwdnd2935265:02crwdne2935265:0 Alienware 17 R4 Ram Replacement: crwdns2935265:06crwdnd2935265:02crwdnd2935265:02crwdne2935265:0
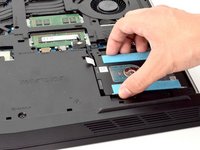
    • Pull the hard drive up to remove.

  7. Alienware 17 R4 Ram Replacement, RAM: crwdns2935265:07crwdnd2935265:01crwdnd2935265:03crwdne2935265:0 Alienware 17 R4 Ram Replacement, RAM: crwdns2935265:07crwdnd2935265:02crwdnd2935265:03crwdne2935265:0 Alienware 17 R4 Ram Replacement, RAM: crwdns2935265:07crwdnd2935265:03crwdnd2935265:03crwdne2935265:0
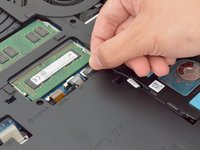
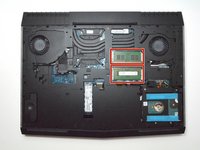
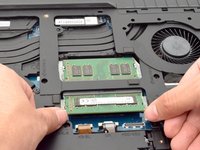
    • Move the metal sidings outward to release the RAM card.

  8. Alienware 17 R4 Ram Replacement: crwdns2935265:08crwdnd2935265:01crwdnd2935265:01crwdne2935265:0
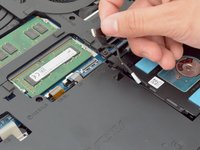
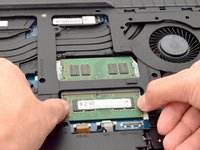
    • Slide the RAM card out towards yourself to remove it.

    • Repeat the same step for the RAM card above.

    • Slide the RAM card out carefully to avoid damaging it.

crwdns2915888:0crwdne2915888:0

To reassemble your device, follow these instructions in reverse order.

crwdns2935227:0crwdne2935227:0
Hector Mendez III

crwdns2935283:009/11/17crwdne2935283:0

1.280 crwdns2915208:0crwdne2915208:0

crwdns2935297:08crwdne2935297:0

crwdns2915084:0crwdne2915084:0

CSU Fullerton, Team S2-G4, Bruce Fall 2017 crwdns2935289:0CSU Fullerton, Team S2-G4, Bruce Fall 2017crwdne2935289:0

CSUF-BRUCE-F17S2G4

crwdns2931471:04crwdne2931471:0

crwdns2935297:09crwdne2935297:0

crwdns2944067:00crwdne2944067:0

crwdns2917038:0crwdne2917038:0

crwdns2936625:0crwdne2936625:0:

crwdns2936751:024crwdne2936751:0 0

crwdns2936753:07crwdne2936753:0 5

crwdns2936753:030crwdne2936753:0 28

crwdns2942667:0crwdne2942667:0 2,640