crwdns2915892:0crwdne2915892:0
In order to access any other laptop parts for replacements, the fan shroud will need to be removed before the plastic cover shielding the interior. This guide will show you how to remove the fan shroud.
crwdns2942213:0crwdne2942213:0
-
-
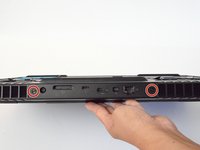
Use a PH1 screwdriver bit to remove the six M2.5x13 screws (2.4 mm) on the back of the laptop.
-
Use a PH1 screwdriver bit to loosen the one M2x3 screw (1.9 mm).
-
-
-
Pull the base cover up to remove it.
-
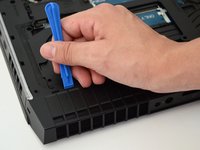
If you are having trouble, insert a plastic opening tool into the divots along the laptop's edges to loosen.
-
-
-
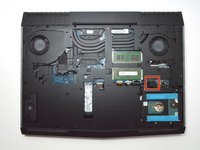
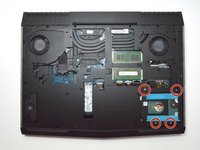
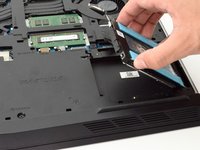
Disconnect the battery connector cable, located on the right side of the laptop, above the hard disk drive.
-
-
-
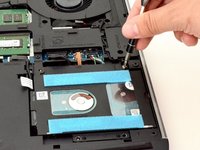
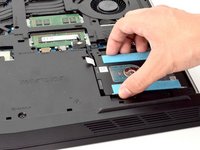
Use a PH1 screwdriver bit to remove the four M2.5x5 screws (2.4 mm) on the hard disk drive.
-
-
-
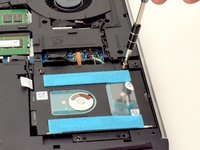
Gently lift the HDD cable to disconnect it from the laptop.
-
-
-
-
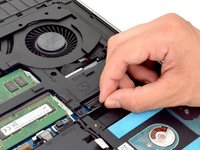
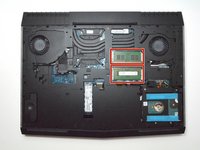
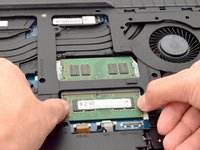
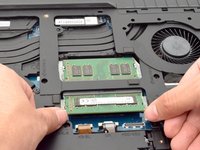
Move the metal sidings outward to release the RAM card.
-
-
-
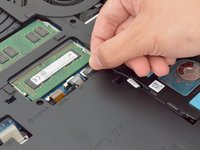
Slide the RAM card out towards yourself to remove it.
-
Repeat the same step for the RAM card above.
-
-
-
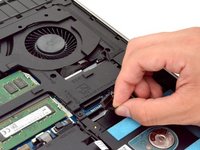
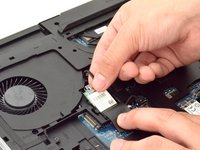
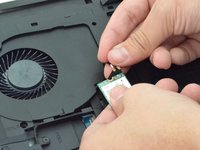
Peel back plastic cover of wi-fi card.
-
Use a PH1 screwdriver bit and remove the one M2x3 screw (1.9 mm)
-
-
-
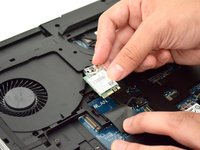
Gently undo the clips attached to the wi-fi card.
-
-
-
Locate the cables that connect the wi-fi card.
-
Gently pull upwards to remove cables and slide the wi-fi card out from its slot.
-
-
-
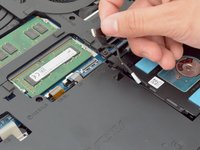
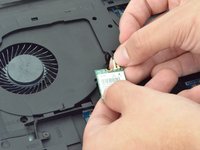
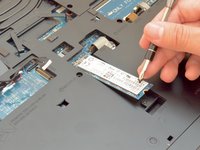
Remove the one M2x3 screw (1.9 mm) using a PH1 screwdriver bit
-
-
-
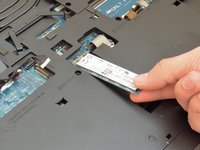
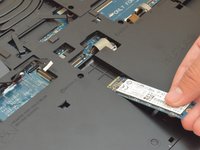
Slide the solid state drive towards yourself to prevent damage to the card.
-
-
-
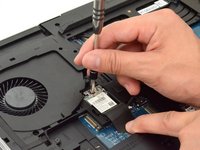
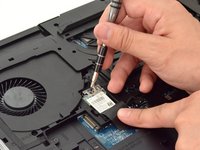
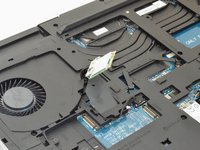
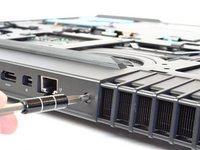
Remove the two M2.5x7 screws (2.44 mm) located on the rear panel using a PH1 screwdriver bit.
-
-
-
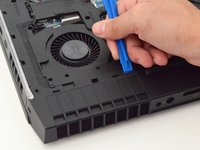
Insert the plastic opening tool under the fan shroud to slowly lift it up.
-
Repeat process on the middle and opposite side.
-
-
-
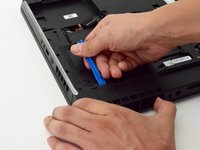
Firmly lift the plastic opening tool and pull the fan shroud towards you.
-


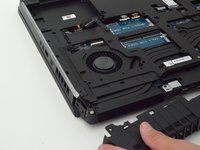
To reassemble your device, follow these instructions in reverse order.
crwdns2935221:0crwdne2935221:0
crwdns2935229:03crwdne2935229:0
crwdns2935287:0crwdne2935287:0

CSU Fullerton, Team S2-G4, Bruce Fall 2017 crwdns2935289:0CSU Fullerton, Team S2-G4, Bruce Fall 2017crwdne2935289:0
CSUF-BRUCE-F17S2G4
crwdns2931471:04crwdne2931471:0
crwdns2935297:09crwdne2935297:0