crwdns2915892:0crwdne2915892:0
This guide will teach you how to remove the battery in order to replace it.
Note: This procedure may differ from other Alienware 17” laptop models. Check to make sure your laptop is the correct model before continuing.
Note: Alienware 17 R4 notebooks have a power supply protection circuit integrated within its system board (aka motherboard) which is designed to accommodate OEM replacement battery 68Wh DP/N 44T2R (15.2V) and 99Wh DP/N 9NJM1 (11.4V).
crwdns2942213:0crwdne2942213:0
-
-
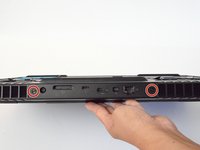
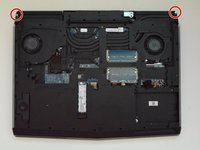
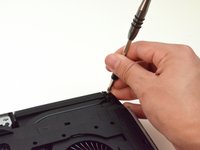
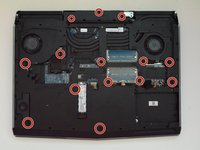
Use a PH1 screwdriver bit to remove the six M2.5x13 screws (2.4 mm) on the back of the laptop.
-
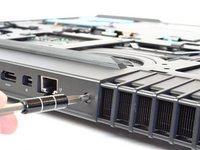
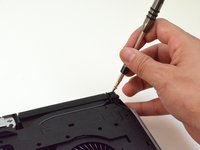
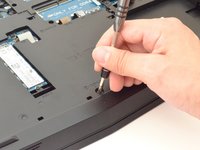
Use a PH1 screwdriver bit to loosen the one M2x3 screw (1.9 mm).
 crwdns2952109:0crwdne2952109:0
-
-
-
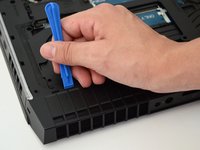
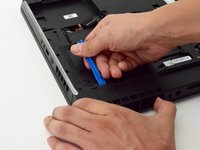
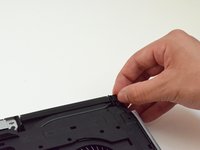
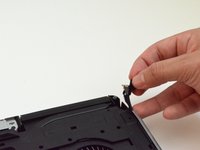
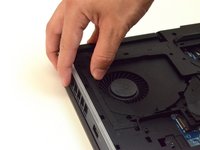
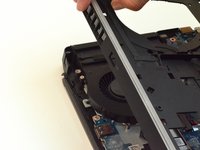
Pull the base cover up to remove it.
-
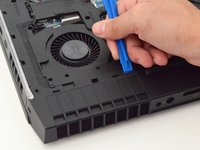
If you are having trouble, insert a plastic opening tool into the divots along the laptop's edges to loosen.
-
-
-
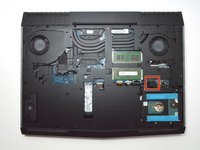
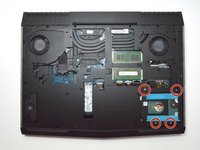
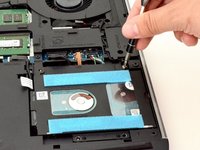
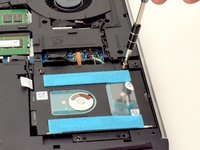
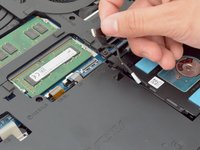
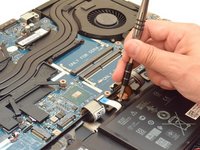
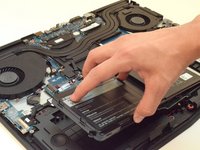
Disconnect the battery connector cable, located on the right side of the laptop, above the hard disk drive.
-
-
-
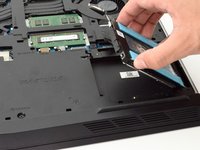
Use a PH1 screwdriver bit to remove the four M2.5x5 screws (2.4 mm) on the hard disk drive.
-
-
-
Gently lift the HDD cable to disconnect it from the laptop.
-
-
-
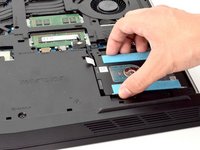
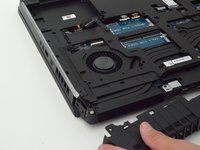
Pull the hard drive up to remove.
-
-
-
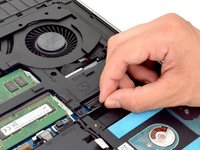
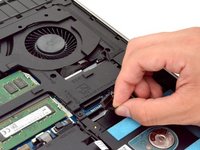
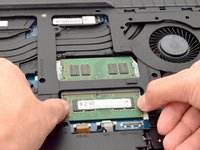
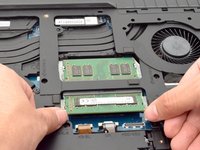
Move the metal sidings outward to release the RAM card.
-
-
-
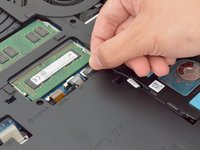
Slide the RAM card out towards yourself to remove it.
-
Repeat the same step for the RAM card above.
-
-
-
-
Peel back plastic cover of wi-fi card.
-
Use a PH1 screwdriver bit and remove the one M2x3 screw (1.9 mm)
-
-
-
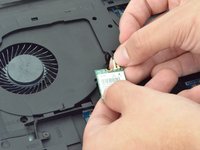
Gently undo the clips attached to the wi-fi card.
-
-
-
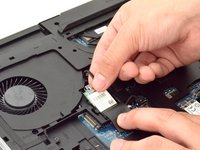
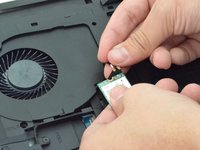
Locate the cables that connect the wi-fi card.
-
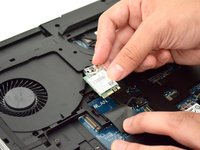
Gently pull upwards to remove cables and slide the wi-fi card out from its slot.
-
-
-
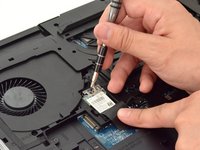
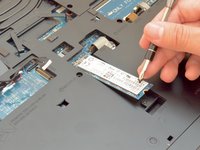
Remove the one M2x3 screw (1.9 mm) using a PH1 screwdriver bit
-
-
-
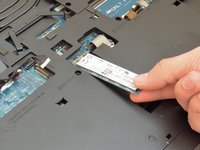
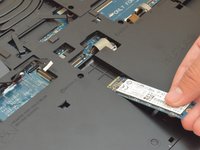
Slide the solid state drive towards yourself to prevent damage to the card.
-
-
-
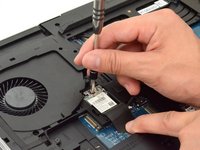
Remove the two M2.5x7 screws (2.44 mm) located on the rear panel using a PH1 screwdriver bit.
-
-
-
Insert the plastic opening tool under the fan shroud to slowly lift it up.
-
Repeat process on the middle and opposite side.
-
-
-
Firmly lift the plastic opening tool and pull the fan shroud towards you.
-
-
-
Unscrew the two M2x3 screws (1.9 mm) at the top right and top left of the laptop that hold the tron lights in place.
-
-
-
Follow the wiring to unplug the tron lights.
-
-
-
Remove the fourteen M2.5XL8' screws (2.4 mm) located in the plastic cover using the PH1 screwdriver.
-
-
-
Use the plastic opening tool to gently lift the sides of the cover.
-
-
-
Slowly lift up the plastic cover.
-
-
-
Unscrew the four M2.5 screws (2.4 mm) with a PH1 screwdriver bit.
-
-
-
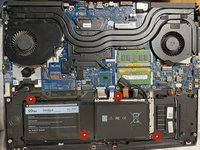
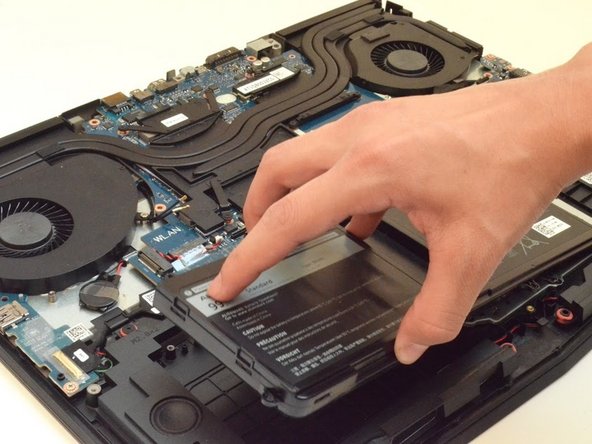
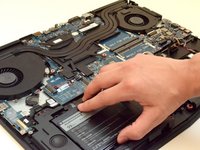
Lift the battery up to remove it.
-


To reassemble your device, follow these instructions in reverse order.
crwdns2935221:0crwdne2935221:0
crwdns2935229:032crwdne2935229:0
crwdns2935287:0crwdne2935287:0

CSU Fullerton, Team S2-G4, Bruce Fall 2017 crwdns2935289:0CSU Fullerton, Team S2-G4, Bruce Fall 2017crwdne2935289:0
CSUF-BRUCE-F17S2G4
crwdns2931471:04crwdne2931471:0
crwdns2935297:011crwdne2935297:0
crwdns2947412:09crwdne2947412:0
Very good guide, just one error, step 11 comes first then step 10. You can't lift the card before remove the screw.
alex.afnet - crwdns2934203:0crwdne2934203:0 crwdns2950251:0crwdne2950251:0
Great guide, no issues at all!
Glenn Bell - crwdns2934203:0crwdne2934203:0 crwdns2950251:0crwdne2950251:0
First time I've cracked opened up a computer in decades. This step by step guide gave me the confidence I needed! Thank you so much. It took me longer, about two hours with stopping to label screws and things but everything is up and running again. I'm so happy!
Michelle - crwdns2934203:0crwdne2934203:0 crwdns2950251:0crwdne2950251:0
I would not recommend disconnecting the wifi card. the connectors are tiny. if you screw up, best case you need a new wifi card, worst case you are going to need to replace the antenna, and that isn’t fun.
John Wohlwend - crwdns2934203:0crwdne2934203:0 crwdns2950251:0crwdne2950251:0
After the battery replacement? do we need to do anything else for calibration so that the Alienware knows that it is a fresh battery and battery cycle ... as i have heard that you need to repeat 3X the process of discharging and charging for calibration. or can we just plug and play? I am getting a new battery for mine soon. Thanks =)
Yannick Docq - crwdns2934203:0crwdne2934203:0 crwdns2950251:0crwdne2950251:0