crwdns2933423:0crwdne2933423:0

Alienware 17 R2 Hard Drive Replacement

crwdns2942213:0crwdne2942213:0

  1. Alienware 17 R2 Hard Drive Replacement, Hard Drive: crwdns2935265:01crwdnd2935265:01crwdnd2935265:01crwdne2935265:0
    • Make sure the laptop is unplugged from any power source.

    • Put the laptop facing down on a hard surface.

  2. Alienware 17 R2 Hard Drive Replacement: crwdns2935265:02crwdnd2935265:01crwdnd2935265:03crwdne2935265:0 Alienware 17 R2 Hard Drive Replacement: crwdns2935265:02crwdnd2935265:02crwdnd2935265:03crwdne2935265:0 Alienware 17 R2 Hard Drive Replacement: crwdns2935265:02crwdnd2935265:03crwdnd2935265:03crwdne2935265:0
    • Unscrew the two 6mm screws on the bottom side of the laptop.

    • Lift up the back cover and slide towards you.

  3. Alienware 17 R2 Hard Drive Replacement: crwdns2935265:03crwdnd2935265:01crwdnd2935265:02crwdne2935265:0 Alienware 17 R2 Hard Drive Replacement: crwdns2935265:03crwdnd2935265:02crwdnd2935265:02crwdne2935265:0
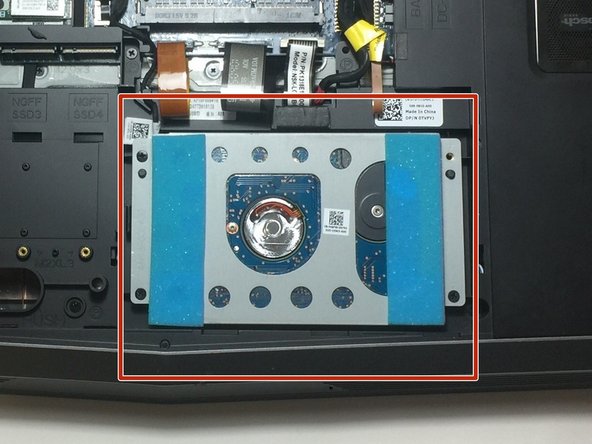
    • Locate the Hard Drive

  4. Alienware 17 R2 Hard Drive Replacement: crwdns2935265:04crwdnd2935265:01crwdnd2935265:01crwdne2935265:0
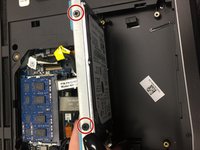
    • Remove the screws that connect the SSD Bay to the laptop

  5. Alienware 17 R2 Hard Drive Replacement: crwdns2935265:05crwdnd2935265:01crwdnd2935265:01crwdne2935265:0
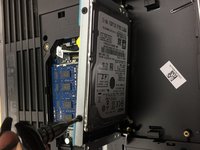
    • Unscrew the three screws holding the hard drive

  6. Alienware 17 R2 Hard Drive Replacement: crwdns2935265:06crwdnd2935265:01crwdnd2935265:02crwdne2935265:0 Alienware 17 R2 Hard Drive Replacement: crwdns2935265:06crwdnd2935265:02crwdnd2935265:02crwdne2935265:0
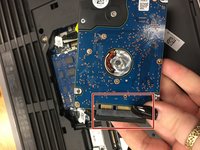
    • Unscrew the four screws on the long sides of the hard drive casing

  7. Alienware 17 R2 Hard Drive Replacement: crwdns2935265:07crwdnd2935265:01crwdnd2935265:03crwdne2935265:0 Alienware 17 R2 Hard Drive Replacement: crwdns2935265:07crwdnd2935265:02crwdnd2935265:03crwdne2935265:0 Alienware 17 R2 Hard Drive Replacement: crwdns2935265:07crwdnd2935265:03crwdnd2935265:03crwdne2935265:0
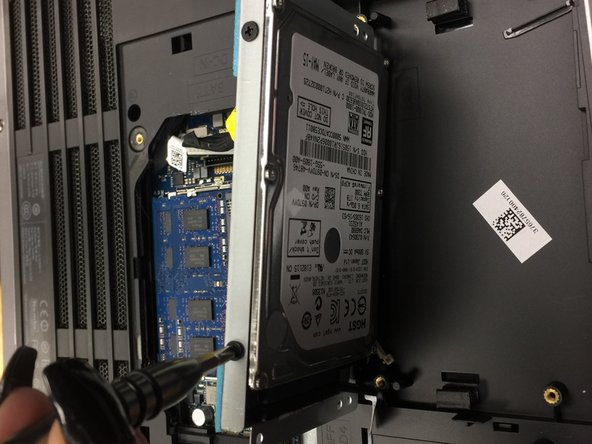
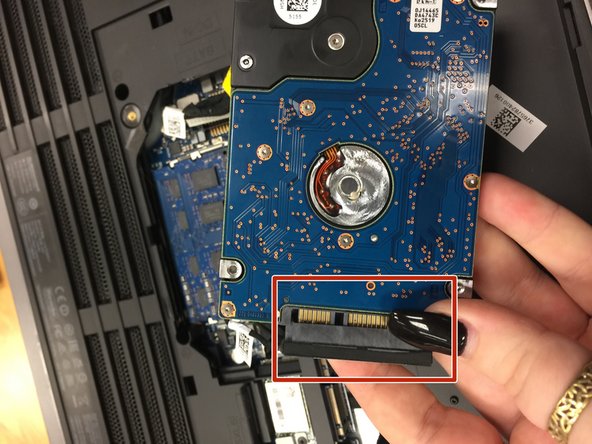
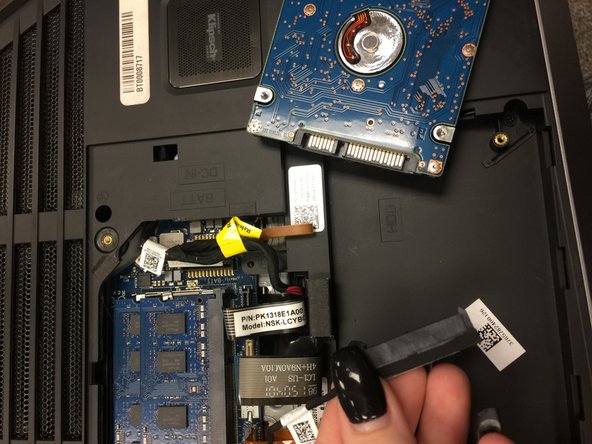
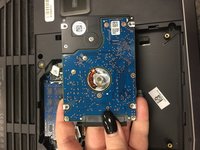
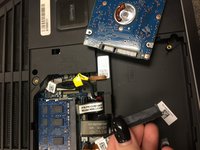
    • Now that the hard drive casing is off, carefully unplug the hard drive from the laptop

    • Your hard drive has now been successfully removed from your device

crwdns2915888:0crwdne2915888:0

To reassemble your device, follow these instructions in reverse order.

Luis Garcia

crwdns2935283:009/20/17crwdne2935283:0

402 crwdns2915208:0crwdne2915208:0

crwdns2935297:04crwdne2935297:0

crwdns2915084:0crwdne2915084:0

University of North Texas, Team S6-G4, Thomas Fall 2017 crwdns2935289:0University of North Texas, Team S6-G4, Thomas Fall 2017crwdne2935289:0

UNT-THOMAS-F17S6G4

crwdns2931471:03crwdne2931471:0

crwdns2935297:06crwdne2935297:0

crwdns2944067:00crwdne2944067:0

crwdns2917038:0crwdne2917038:0

crwdns2936625:0crwdne2936625:0:

crwdns2936751:024crwdne2936751:0 1

crwdns2936753:07crwdne2936753:0 3

crwdns2936753:030crwdne2936753:0 19

crwdns2942667:0crwdne2942667:0 1,480