crwdns2933423:0crwdne2933423:0
crwdns2947577:0crwdnd2947577:0crwdne2947577:0

Alcatel Jitterbug Smart Charging Port Replacement

crwdns2942213:0crwdne2942213:0

    1. Alcatel Jitterbug Smart Charging Port Replacement, Battery: crwdns2935265:01crwdnd2935265:01crwdnd2935265:02crwdne2935265:0 Alcatel Jitterbug Smart Charging Port Replacement, Battery: crwdns2935265:01crwdnd2935265:02crwdnd2935265:02crwdne2935265:0
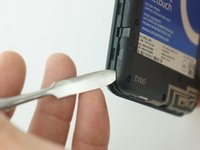
      • Pry back cover open with a medal spudger, or your fingernail, in the divot at the bottom left corner of the phone.

      • Lift open case by the corner nearest the divot and remove it from the phone.

      crwdns2952109:0crwdne2952109:0

      crwdns2917038:0crwdne2917038:0

    2. Alcatel Jitterbug Smart Charging Port Replacement: crwdns2935265:02crwdnd2935265:01crwdnd2935265:03crwdne2935265:0 Alcatel Jitterbug Smart Charging Port Replacement: crwdns2935265:02crwdnd2935265:02crwdnd2935265:03crwdne2935265:0 Alcatel Jitterbug Smart Charging Port Replacement: crwdns2935265:02crwdnd2935265:03crwdnd2935265:03crwdne2935265:0
      • Remove 13 1mm JIS screws with JIS #000 Screwdriver.

      crwdns2952109:0crwdne2952109:0

      crwdns2917038:0crwdne2917038:0

    3. Alcatel Jitterbug Smart Charging Port Replacement: crwdns2935265:03crwdnd2935265:01crwdnd2935265:02crwdne2935265:0 Alcatel Jitterbug Smart Charging Port Replacement: crwdns2935265:03crwdnd2935265:02crwdnd2935265:02crwdne2935265:0
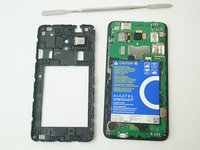
      • Gently pry off the Mid frame from the phone using a Metal Spudger.

      crwdns2952109:0crwdne2952109:0

      crwdns2917038:0crwdne2917038:0

    4. Alcatel Jitterbug Smart Charging Port Replacement: crwdns2935265:04crwdnd2935265:01crwdnd2935265:02crwdne2935265:0 Alcatel Jitterbug Smart Charging Port Replacement: crwdns2935265:04crwdnd2935265:02crwdnd2935265:02crwdne2935265:0
      crwdns2935267:0crwdne2935267:0
      Tweezers
      $4.99
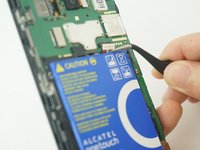
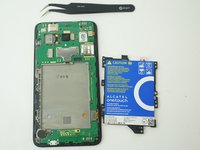
      • Use a pair of tweezers to pull the battery connector from its port.

      • Be careful not to tear the battery from its connection.

      crwdns2952109:0crwdne2952109:0

      crwdns2917038:0crwdne2917038:0

    1. Alcatel Jitterbug Smart Charging Port Replacement, Motherboard: crwdns2935265:05crwdnd2935265:01crwdnd2935265:03crwdne2935265:0 Alcatel Jitterbug Smart Charging Port Replacement, Motherboard: crwdns2935265:05crwdnd2935265:02crwdnd2935265:03crwdne2935265:0 Alcatel Jitterbug Smart Charging Port Replacement, Motherboard: crwdns2935265:05crwdnd2935265:03crwdnd2935265:03crwdne2935265:0
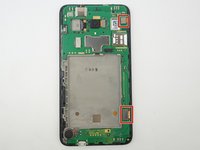
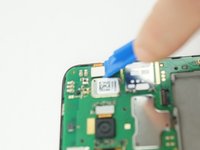
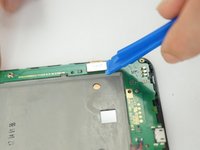
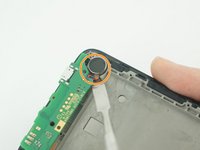
      • Use the Plastic Opening tools to gently dislodge the two connection on the top and bottom right of the phone from the inside of the phone.

      crwdns2952109:0crwdne2952109:0

      crwdns2917038:0crwdne2917038:0

    2. Alcatel Jitterbug Smart Charging Port Replacement: crwdns2935265:06crwdnd2935265:01crwdnd2935265:02crwdne2935265:0 Alcatel Jitterbug Smart Charging Port Replacement: crwdns2935265:06crwdnd2935265:02crwdnd2935265:02crwdne2935265:0
      crwdns2935267:0crwdne2935267:0
      Tweezers
      $4.99
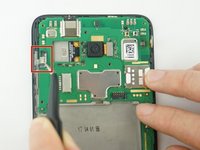
      • Use a pair of tweezers to pull the black ribbon connector from its port.

      • Use a metal Spudger to gentle remove the speaker that glued at the bottom left of the phone.

      • Be careful to avoid damage the black connector or the wire connect the speaker to motherboard.

      crwdns2952109:0crwdne2952109:0

      crwdns2917038:0crwdne2917038:0

    3. Alcatel Jitterbug Smart Charging Port Replacement: crwdns2935265:07crwdnd2935265:01crwdnd2935265:02crwdne2935265:0 Alcatel Jitterbug Smart Charging Port Replacement: crwdns2935265:07crwdnd2935265:02crwdnd2935265:02crwdne2935265:0
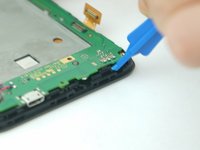
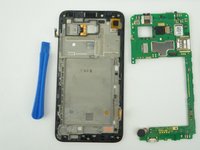
      • Using a plastic opening tool, begin to gently pry the motherboard, away from the display assembly.

      • The motherboard will freely remove.

      crwdns2952109:0crwdne2952109:0

      crwdns2917038:0crwdne2917038:0

    1. Alcatel Jitterbug Smart Charging Port Replacement, Charging Port: crwdns2935265:08crwdnd2935265:01crwdnd2935265:02crwdne2935265:0 Alcatel Jitterbug Smart Charging Port Replacement, Charging Port: crwdns2935265:08crwdnd2935265:02crwdnd2935265:02crwdne2935265:0
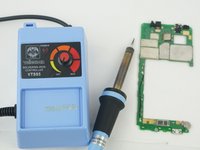
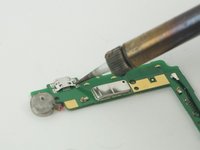
      • Flip the motherboard over and desolder the charging port pin connecting on the motherboard.

      • Once pins desolder, pull off the charging port.

      • If you need helps on solder/desolder, here is the link to the soldering skills guide.

      crwdns2952109:0crwdne2952109:0

      crwdns2917038:0crwdne2917038:0

crwdns2915888:0crwdne2915888:0

To reassemble your device, follow these instructions in reverse order.

crwdns2935221:0crwdne2935221:0

crwdns2935229:02crwdne2935229:0

Minyu Zhang

crwdns2935283:002/13/18crwdne2935283:0

181 crwdns2915208:0crwdne2915208:0

crwdns2935297:02crwdne2935297:0

crwdns2935287:0crwdne2935287:0

USF Tampa, Team S11-G4, Cheng Spring 2018 crwdns2935289:0USF Tampa, Team S11-G4, Cheng Spring 2018crwdne2935289:0

USFT-CHENG-S18S11G4

crwdns2931471:04crwdne2931471:0

crwdns2935297:060crwdne2935297:0

crwdns2947412:00crwdne2947412:0

crwdns2917038:0crwdne2917038:0

crwdns2936625:0crwdne2936625:0:

crwdns2936751:024crwdne2936751:0 0

crwdns2936753:07crwdne2936753:0 4

crwdns2936753:030crwdne2936753:0 35

crwdns2942667:0crwdne2942667:0 2,067