crwdns2915892:0crwdne2915892:0
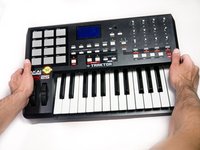
Use this guide to replace a screen that is scratched, cracked, or broken.
crwdns2942213:0crwdne2942213:0
-
-
Remove all the selector knob covers by pulling them off.
 crwdns2952109:0crwdne2952109:0
-
-
-
Using needle nose pliers, remove the washers from the four corner selector knobs.
-
-
-
Flip the device over. Using a Philips #2 screw driver, remove the fourteen 10.3 mm black screws holding the back panel in place.
-
-
-
-
Carefully flip the device to the front making sure you secure the face plate and the chassis together.
-
-
-
Rotate the device 180 degrees and carefully remove the face plate by slightly lifting the screen side towards you and then sliding the bottom out from under the keys.
-
-
-
Using a Phillips #00 screwdriver, remove the four 8.9 mm screws.
-
-
-
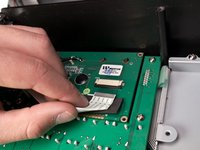
Using a Phillips #2 screwdriver, remove the one 9.8mm screw holding down the ground wire.
-
-
-
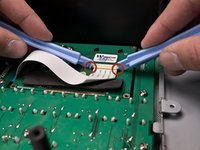
Using two plastic opening tools, slide the black locking mechanism on the ZIF connector towards you. This will remove the ribbon cable connecting the motherboard to the screen.
-
-
-
Lift the screen from either side, removing it from the board.
-


To reassemble the display, follow these instructions in reverse order.
crwdns2935221:0crwdne2935221:0
crwdns2935229:03crwdne2935229:0
crwdns2935287:0crwdne2935287:0

Cal Poly, Team 20-6, Maness Winter 2013 crwdns2935289:0Cal Poly, Team 20-6, Maness Winter 2013crwdne2935289:0
CPSU-MANESS-W13S20G6
crwdns2931471:05crwdne2931471:0
crwdns2935297:06crwdne2935297:0
crwdns2947410:01crwdne2947410:0
Where can I find a new ribbon?
Wise Professor - crwdns2934203:0crwdne2934203:0 crwdns2950251:0crwdne2950251:0