crwdns2933423:0crwdne2933423:0

Acoustic Bass Preamp Replacement

crwdns2942213:0crwdne2942213:0

  1. Acoustic Bass Preamp Replacement, Preamp: crwdns2935265:01crwdnd2935265:01crwdnd2935265:02crwdne2935265:0 Acoustic Bass Preamp Replacement, Preamp: crwdns2935265:01crwdnd2935265:02crwdnd2935265:02crwdne2935265:0
    • Use a guitar string winder to carefully remove each string.

  2. Acoustic Bass Preamp Replacement: crwdns2935265:02crwdnd2935265:01crwdnd2935265:03crwdne2935265:0 Acoustic Bass Preamp Replacement: crwdns2935265:02crwdnd2935265:02crwdnd2935265:03crwdne2935265:0 Acoustic Bass Preamp Replacement: crwdns2935265:02crwdnd2935265:03crwdnd2935265:03crwdne2935265:0
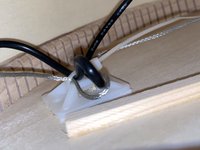
    • Look inside the bass for the preamp tuning box.

    • Once you find it, unplug the small jack.

  3. Acoustic Bass Preamp Replacement: crwdns2935265:03crwdnd2935265:01crwdnd2935265:02crwdne2935265:0 Acoustic Bass Preamp Replacement: crwdns2935265:03crwdnd2935265:02crwdnd2935265:02crwdne2935265:0
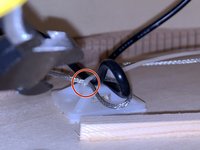
    • Cut the zip tie holding the excess length of wires in place. This is located inside the bass.

    • The zip tie is most likely right under the bridge of the bass.

    • This will allow you to disassemble all parts the wires will connect to later on in the repair.

  4. Acoustic Bass Preamp Replacement: crwdns2935265:04crwdnd2935265:01crwdnd2935265:02crwdne2935265:0 Acoustic Bass Preamp Replacement: crwdns2935265:04crwdnd2935265:02crwdnd2935265:02crwdne2935265:0
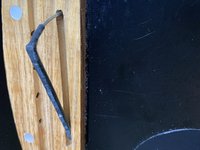
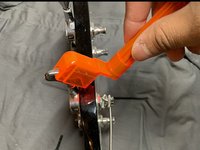
    • Pull out the pick-up stick from the bridge of the base.

  5. Acoustic Bass Preamp Replacement: crwdns2935265:05crwdnd2935265:01crwdnd2935265:02crwdne2935265:0 Acoustic Bass Preamp Replacement: crwdns2935265:05crwdnd2935265:02crwdnd2935265:02crwdne2935265:0
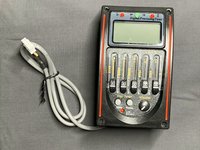
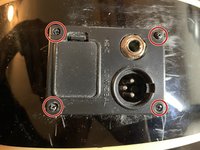
    • Look for the tuner/equalizer/preamp and carefully remove each screw using a Phillips screwdriver.

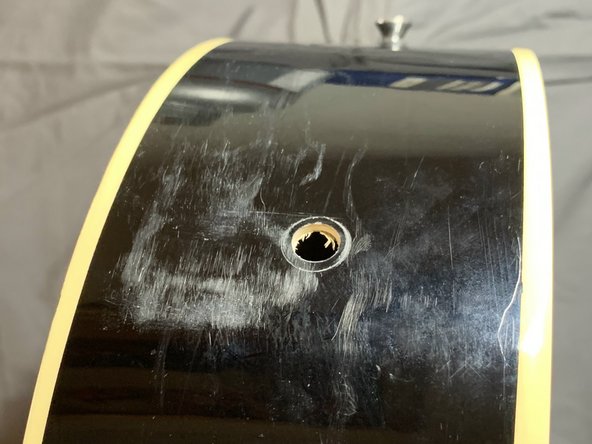
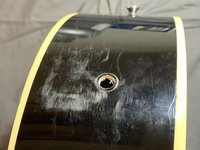
    • Once screws are removed, look for the endpin jack and remove it.

    • In the first image, the part had already fallen off. Refer to the second image if you have trouble finding the endpin jack.

  6. Acoustic Bass Preamp Replacement: crwdns2935265:06crwdnd2935265:01crwdnd2935265:03crwdne2935265:0 Acoustic Bass Preamp Replacement: crwdns2935265:06crwdnd2935265:02crwdnd2935265:03crwdne2935265:0 Acoustic Bass Preamp Replacement: crwdns2935265:06crwdnd2935265:03crwdnd2935265:03crwdne2935265:0
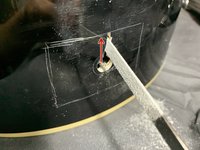
    • Place the tuner over the area you removed the previous one from.

    • Scratch a line around the opening to the area of the bottom portion of the tuner.

    • Refer to the second image for a visual reference.

    • Ensure the scratched guideline is made to the parameter of the parts behind the face of the tuner.

  7. Acoustic Bass Preamp Replacement: crwdns2935265:07crwdnd2935265:01crwdnd2935265:03crwdne2935265:0 Acoustic Bass Preamp Replacement: crwdns2935265:07crwdnd2935265:02crwdnd2935265:03crwdne2935265:0 Acoustic Bass Preamp Replacement: crwdns2935265:07crwdnd2935265:03crwdnd2935265:03crwdne2935265:0
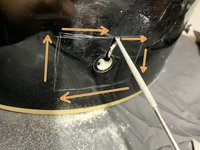
    • Using a metal file, file up and down, following the outline.

    • Continue this, going around the outline until the desired opening is made.

    • This will most likely take quite a bit of time. If you have access to a small jab saw or similar power tool it will speed up the process.

    • Do this step ideally in a well-ventilated area as the wood shaving are small, and inhalation can cause harm or injury. Wear protective gear like a face mask, and goggles/eye protection to prevent injury or pain.

  8. Acoustic Bass Preamp Replacement: crwdns2935265:08crwdnd2935265:01crwdnd2935265:03crwdne2935265:0 Acoustic Bass Preamp Replacement: crwdns2935265:08crwdnd2935265:02crwdnd2935265:03crwdne2935265:0 Acoustic Bass Preamp Replacement: crwdns2935265:08crwdnd2935265:03crwdnd2935265:03crwdne2935265:0
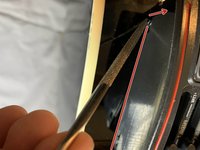
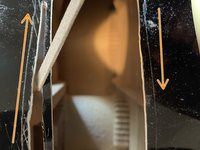
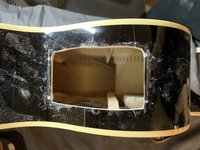
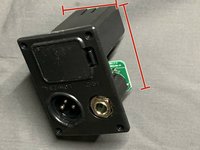
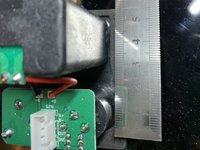
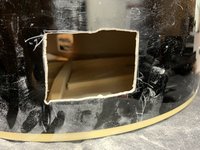
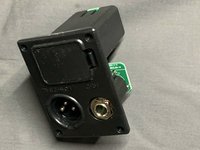
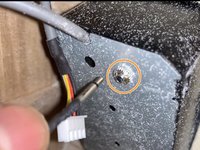
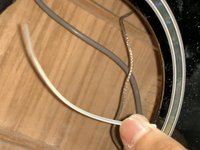
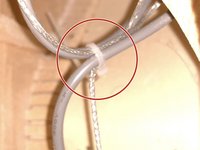
    • Get your output platform and measure, with a ruler, the perimeter of the parts under the face with the screw holes.

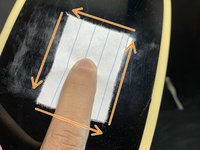
    • The second and third images show the underside of the part, measuring around the internals.

    • Once you measure each side, jot them down for Step 9.

  9. Acoustic Bass Preamp Replacement: crwdns2935265:09crwdnd2935265:01crwdnd2935265:03crwdne2935265:0 Acoustic Bass Preamp Replacement: crwdns2935265:09crwdnd2935265:02crwdnd2935265:03crwdne2935265:0 Acoustic Bass Preamp Replacement: crwdns2935265:09crwdnd2935265:03crwdnd2935265:03crwdne2935265:0
    • Use a pencil and paper to outline the measurements jotted down.

    • Cut the shape out using a pair of scissors.

    • Place the paper over the opening on the guitar and trace the perimeter of the paper.

  10. Acoustic Bass Preamp Replacement: crwdns2935265:010crwdnd2935265:01crwdnd2935265:03crwdne2935265:0 Acoustic Bass Preamp Replacement: crwdns2935265:010crwdnd2935265:02crwdnd2935265:03crwdne2935265:0 Acoustic Bass Preamp Replacement: crwdns2935265:010crwdnd2935265:03crwdnd2935265:03crwdne2935265:0
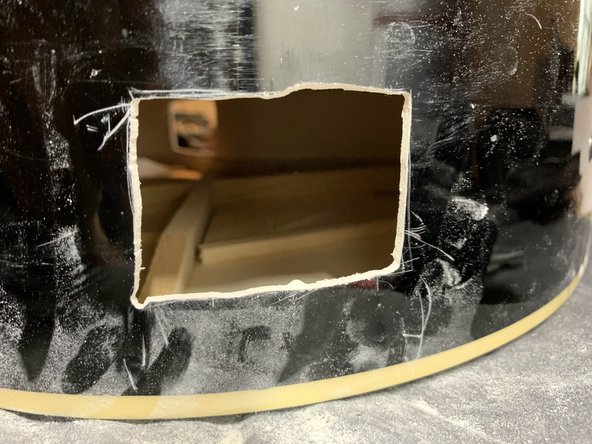
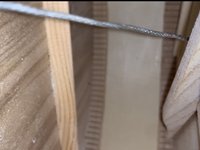
    • Insert the file into the opening and file up until you reach the outline you traced.

    • Then follow the outline until the opening is completely cut out.

    • Do this step ideally in a well-ventilated area as the wood shaving are small, and you may inhale them.

  11. Acoustic Bass Preamp Replacement: crwdns2935265:011crwdnd2935265:01crwdnd2935265:03crwdne2935265:0 Acoustic Bass Preamp Replacement: crwdns2935265:011crwdnd2935265:02crwdnd2935265:03crwdne2935265:0 Acoustic Bass Preamp Replacement: crwdns2935265:011crwdnd2935265:03crwdnd2935265:03crwdne2935265:0
    • Place the preamp into the opening and screw into place with your power drill.

    • A power drill and four screws are required in this step. This will allow you to create a hole to screw in the screws or just directly screw in the screw without drilling holes.

  12. Acoustic Bass Preamp Replacement: crwdns2935265:012crwdnd2935265:01crwdnd2935265:02crwdne2935265:0 Acoustic Bass Preamp Replacement: crwdns2935265:012crwdnd2935265:02crwdnd2935265:02crwdne2935265:0
    • Using your power drill and the other four screws, drill the screws into the output platform openings.

  13. Acoustic Bass Preamp Replacement: crwdns2935265:013crwdnd2935265:01crwdnd2935265:03crwdne2935265:0 Acoustic Bass Preamp Replacement: crwdns2935265:013crwdnd2935265:02crwdnd2935265:03crwdne2935265:0 Acoustic Bass Preamp Replacement: crwdns2935265:013crwdnd2935265:03crwdnd2935265:03crwdne2935265:0
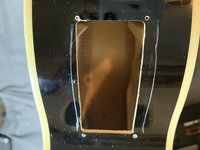
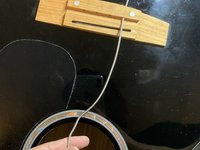
    • Get your pickup stick and insert it into the hole in the bridge.

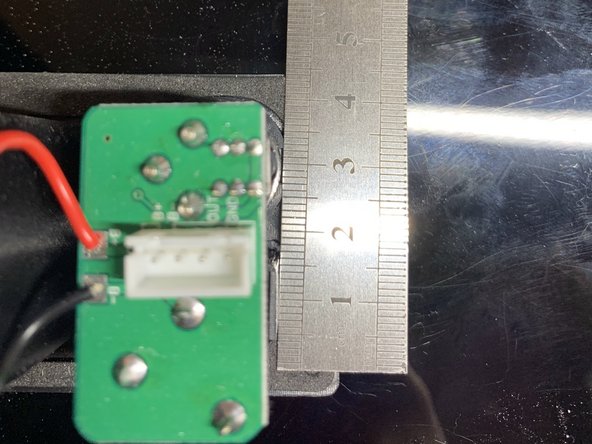
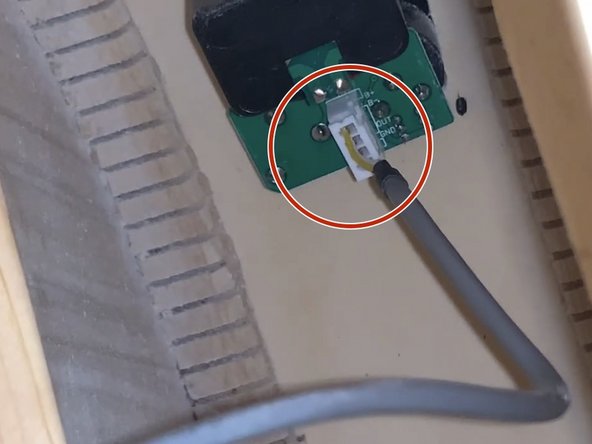
    • Look into the guitar for the end of the pick-up stick and pull it until it reaches the preamp box.

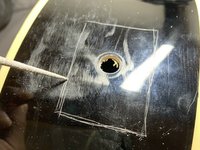
    • Plug in the pickup stick jack into the box, as seen in the fourth image.

  14. Acoustic Bass Preamp Replacement: crwdns2935265:014crwdnd2935265:01crwdnd2935265:02crwdne2935265:0 Acoustic Bass Preamp Replacement: crwdns2935265:014crwdnd2935265:02crwdnd2935265:02crwdne2935265:0
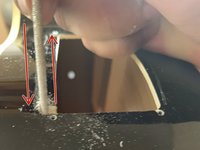
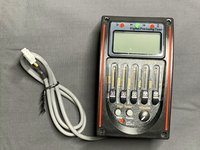
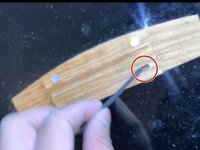
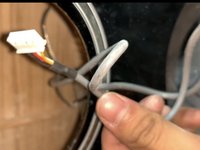
    • Look for the preamp inside the bass. You will find a wire showed in the first image.

    • Stretch your arm into the bass to reach the output platform and find where you will need to plug the wire into.

    • Ensure the wire plugs in the right way and is firmly plugged in.

  15. Acoustic Bass Preamp Replacement: crwdns2935265:015crwdnd2935265:01crwdnd2935265:02crwdne2935265:0 Acoustic Bass Preamp Replacement: crwdns2935265:015crwdnd2935265:02crwdnd2935265:02crwdne2935265:0
    • Use a zip tie to secure the extra length of wire inside the bass.

    • This step is not required but will help disguise wires and keep them tucked inside the bass.

  16. Acoustic Bass Preamp Replacement: crwdns2935265:016crwdnd2935265:01crwdnd2935265:02crwdne2935265:0 Acoustic Bass Preamp Replacement: crwdns2935265:016crwdnd2935265:02crwdnd2935265:02crwdne2935265:0
    • Replace the old strings or install new strings to the bass.

    • Use the string winder to make this step a lot faster.

crwdns2915888:0crwdne2915888:0

Congratulations! You have just retrofitted a new amp into your bass.

Had trouble with one of the steps? Leave a comment letting us know how we can help!

Juan Chavez

crwdns2935283:004/03/23crwdne2935283:0

304 crwdns2915208:0crwdne2915208:0

crwdns2935295:0crwdne2935295:0

crwdns2915084:0crwdne2915084:0

CSU Los Angeles, Team 77-86, Briggs Spring 2023 crwdns2935289:0CSU Los Angeles, Team 77-86, Briggs Spring 2023crwdne2935289:0

CSULA-BRIGGS-S23S77G86

crwdns2934841:01crwdne2934841:0

crwdns2935303:01crwdne2935303:0

crwdns2944067:00crwdne2944067:0

crwdns2917038:0crwdne2917038:0

crwdns2936625:0crwdne2936625:0:

crwdns2936751:024crwdne2936751:0 5

crwdns2936753:07crwdne2936753:0 12

crwdns2936753:030crwdne2936753:0 44

crwdns2942667:0crwdne2942667:0 430