crwdns2915892:0crwdne2915892:0
Acer Swift 3 2022 Model Number: N20C12
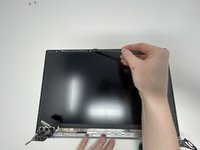
If your screen is cracked, doesn't turn on, or has any other issues, use this guide to help replace the screen. The screen is the piece of hardware that displays the graphics. Before attempting to replace it, try restarting your computer. Broken screens are a nightmare for anyone. Sending them in can put you in an unnecessary predicament, so fix it at home with the simple steps below. For more information view our troubleshooting page.
Problem: You can only do it once.
crwdns2942213:0crwdne2942213:0
-
-
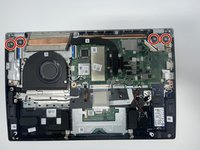
Flip the device over so the bottom panel is facing up.
 crwdns2952109:0crwdne2952109:0
-
-
-
Remove the eleven 5 mm screws from the back of the device using a TR6 Torx screwdriver.
-
-
-
Use the iFixit opening tool to pry open the back of the device.
-
Remove the bottom cover from the laptop.
-
-
-
Peel back the strip of black tape.
-
-
-
-
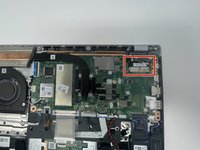
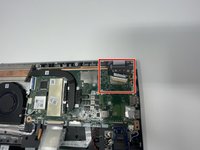
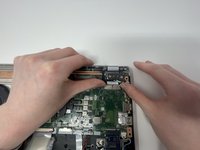
Unplug the group of wires by pulling the white plastic piece towards yourself.
-
-
-
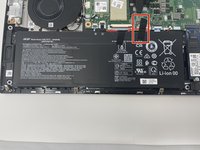
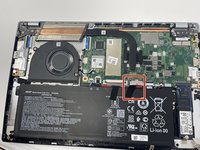
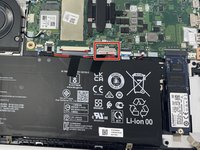
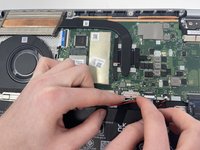
Remove the EDP Cable located on the top right by pushing away from you.
-
-
-
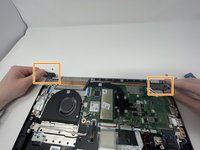
Remove the four 4.5 mm screws on the metal plates located on the top left and right hand corner using the JIS #1 screwdriver.
-
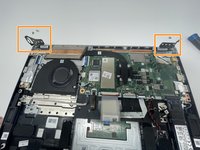
Flip up the metal plates.
-
-
-
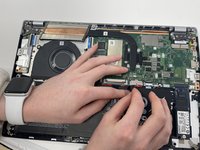
Open computer to a 90 degree angle by lifting the keyboard and sliding it out.
-
Place keyboard to the side so the screen is face up and the only thing in front of you.
-
-
-
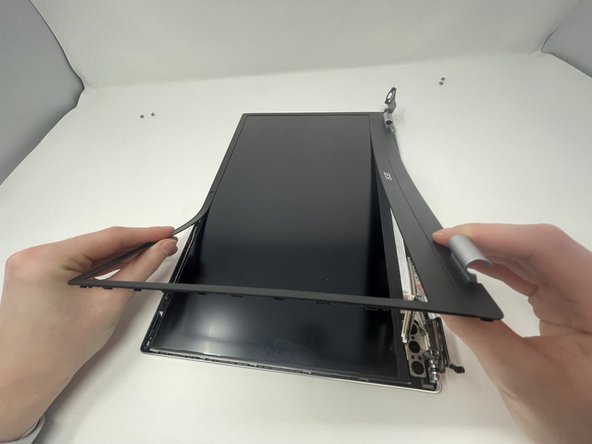
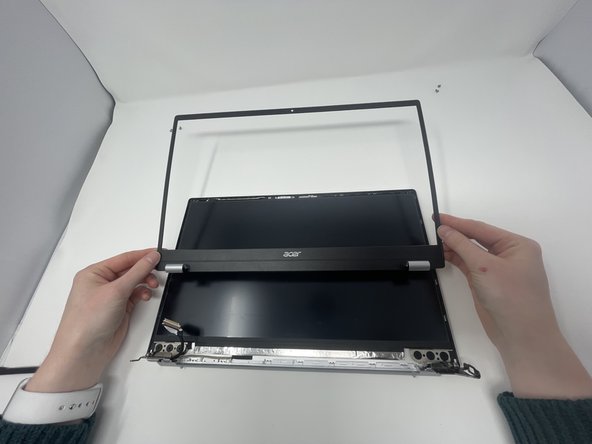
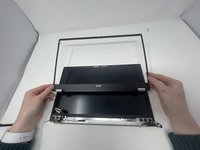
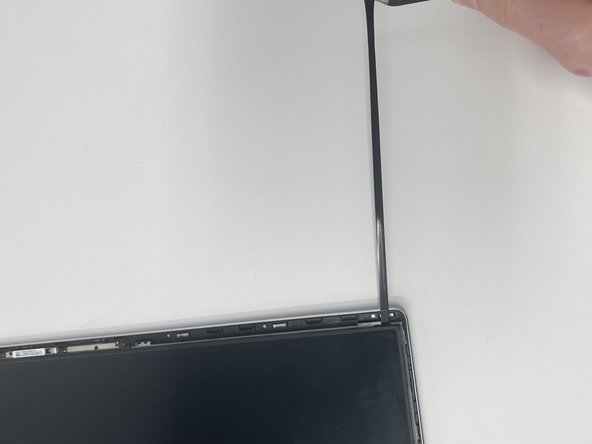
Insert the spudger between the computer screen and the black bezel.
-
Slide around the whole perimeter of screen.
-
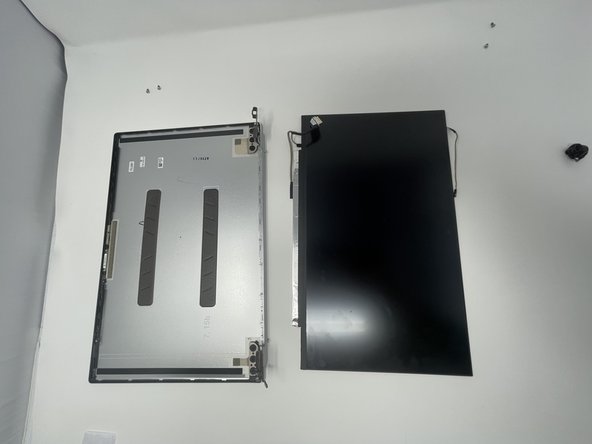
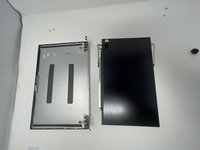
Peel the bezel off.
-
-
-
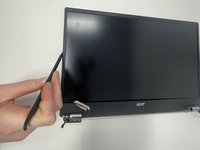
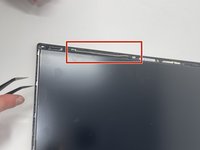
Disconnect the other end of the EDP Cable located next to the camera with the spudger.
-
-
crwdns2935267:0crwdne2935267:0Tweezers$4.99
-
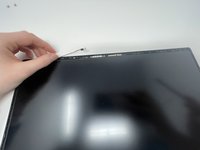
Using the curved, fine-tipped tweezers, unstick the tape from the top of the case.
-
Once the tape is unstuck, pinch it with the tweezers and pull in the opposite direction.
-
Repeat on the other side.
-


To reassemble your device, follow these instructions in reverse order.
crwdns2935221:0crwdne2935221:0
crwdns2935227:0crwdne2935227:0

crwdns2935287:0crwdne2935287:0

Utah Tech University, Team 1-2, McMurrin Fall 2022 crwdns2935289:0Utah Tech University, Team 1-2, McMurrin Fall 2022crwdne2935289:0
UTAHTECH-MCMURRIN-F22S1G2
crwdns2931471:02crwdne2931471:0
crwdns2935297:06crwdne2935297:0
crwdns2947410:01crwdne2947410:0
really good i just followed the instructions and it was easy to do.
Sanchoi Dacres - crwdns2934203:0crwdne2934203:0 crwdns2950251:0crwdne2950251:0