crwdns2933423:0crwdne2933423:0

Acer S1210 DLP Projector Colour Wheel Replacement

crwdns2942213:0crwdne2942213:0

  1. Acer S1210 DLP Projector Colour Wheel Replacement, Bulb cover removal - 1: crwdns2935265:01crwdnd2935265:01crwdnd2935265:02crwdne2935265:0 Acer S1210 DLP Projector Colour Wheel Replacement, Bulb cover removal - 1: crwdns2935265:01crwdnd2935265:02crwdnd2935265:02crwdne2935265:0
    • The bulb gets extremely hot. To avoid danger of burns, do not start disassembly until the projector has been switched off and allowed to cool for at least 30 - 40 minutes.

    • Remove 2 screws, one each side, securing the top cover.

  2. Acer S1210 DLP Projector Colour Wheel Replacement, Bulb cover removal - 2: crwdns2935265:02crwdnd2935265:01crwdnd2935265:02crwdne2935265:0 Acer S1210 DLP Projector Colour Wheel Replacement, Bulb cover removal - 2: crwdns2935265:02crwdnd2935265:02crwdnd2935265:02crwdne2935265:0
    • Release the top cover with a spudger inserted along the front edge. Lift it off from the front.

    • On reassembly, ensure that the top cover is properly located so that the peg at the rear left is pressing down into the oval hole beneath. If not, the lamp will not operate. This is a safety feature. You may need to apply pressure to the top cover above the peg as you tighten the screws.

  3. Acer S1210 DLP Projector Colour Wheel Replacement, Bulb removal: crwdns2935265:03crwdnd2935265:01crwdnd2935265:02crwdne2935265:0 Acer S1210 DLP Projector Colour Wheel Replacement, Bulb removal: crwdns2935265:03crwdnd2935265:02crwdnd2935265:02crwdne2935265:0
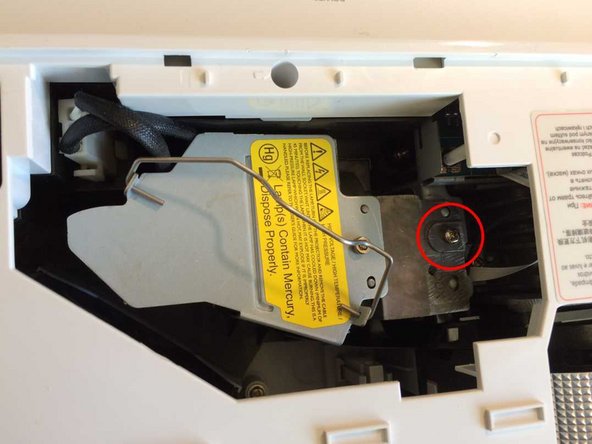
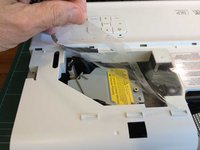
    • Remove the transparent film over the lamp, and put it aside.

    • Don't forget the transparent film on reassembly, and make sure you line it up correctly when you replace it, in particular, with the oval hole on the left lining up with the similarly shaped hole in the plastic.

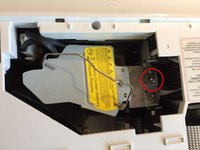
    • Lift the lamp handle. Undo the captive screw which secures the lamp. Disconnect the lamp power connector and lift out the lamp.

    • Take great care to hold the lamp only by its handle. It gets extremely hot when running, and any finger marks on the glass may reduce its life, or in the worst case, cause it to explode. Put it in a clean polythene bag in a safe place until you are ready to reinsert it.

  4. Acer S1210 DLP Projector Colour Wheel Replacement, Top cover removal - 1: crwdns2935265:04crwdnd2935265:01crwdnd2935265:03crwdne2935265:0 Acer S1210 DLP Projector Colour Wheel Replacement, Top cover removal - 1: crwdns2935265:04crwdnd2935265:02crwdnd2935265:03crwdne2935265:0 Acer S1210 DLP Projector Colour Wheel Replacement, Top cover removal - 1: crwdns2935265:04crwdnd2935265:03crwdnd2935265:03crwdne2935265:0
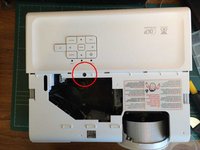
    • Remove a screw from just in front of the control buttons.

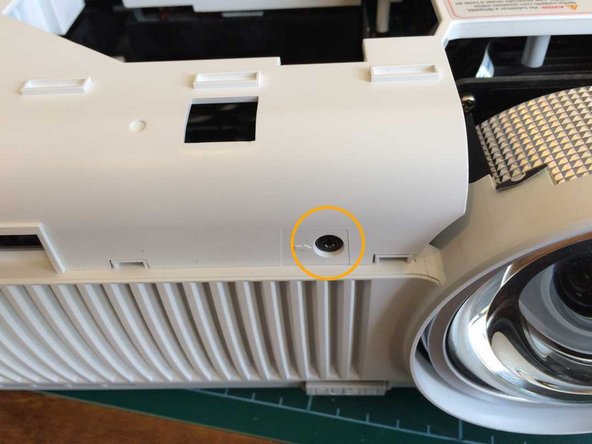
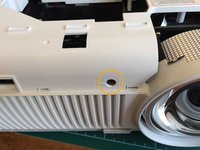
    • Remove a screw from the front just to the left of the lens.

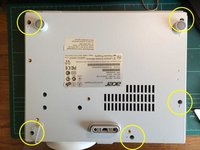
    • Turn the projector over and remove 5 recessed screws from the holes with arrows against them.

    • On reassembly, don't over-tighten the screws as they screw into plastic pillars which easily split if strained.

  5. Acer S1210 DLP Projector Colour Wheel Replacement, Top cover removal - 2: crwdns2935265:05crwdnd2935265:01crwdnd2935265:01crwdne2935265:0
    • Release the top cover by running a spudger around all 4 sides. Remove the cover.

  6. Acer S1210 DLP Projector Colour Wheel Replacement, Main board removal - 1: crwdns2935265:06crwdnd2935265:01crwdnd2935265:02crwdne2935265:0 Acer S1210 DLP Projector Colour Wheel Replacement, Main board removal - 1: crwdns2935265:06crwdnd2935265:02crwdnd2935265:02crwdne2935265:0
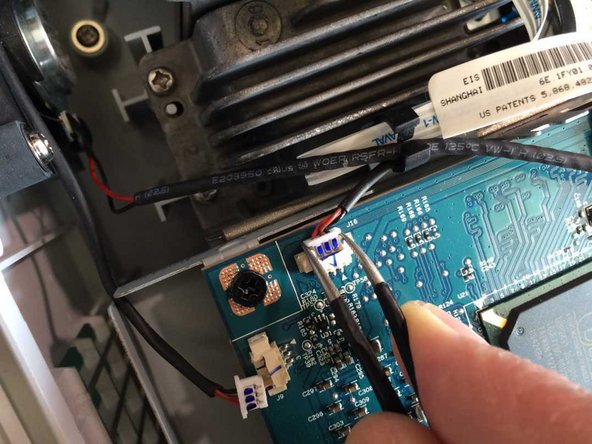
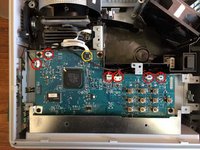
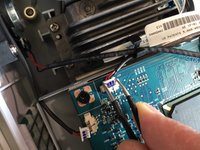
    • Disconnect 6 connectors. Do not pull them out by the wires as the wires may come out of the plugs. Instead, ease them out with a pair of tweezers as shown, or with a thumbnail on each side.

    • Gently pull the ribbon cable out of its socket.

    • On reassembly, note that the ribbon cable fits in its socket with the conductors uppermost. If you fit it the wrong way the colour wheel will fail to spin up and the Lamp LED will flash.

  7. Acer S1210 DLP Projector Colour Wheel Replacement, Main board removal - 2: crwdns2935265:07crwdnd2935265:01crwdnd2935265:03crwdne2935265:0 Acer S1210 DLP Projector Colour Wheel Replacement, Main board removal - 2: crwdns2935265:07crwdnd2935265:02crwdnd2935265:03crwdne2935265:0 Acer S1210 DLP Projector Colour Wheel Replacement, Main board removal - 2: crwdns2935265:07crwdnd2935265:03crwdnd2935265:03crwdne2935265:0
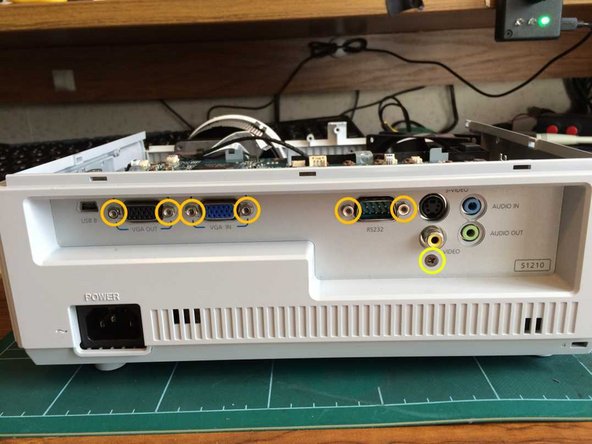
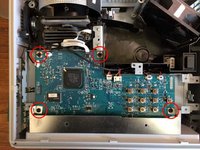
    • Remove 4 screws securing the main board.

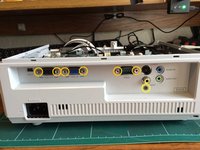
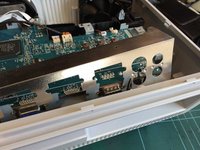
    • Remove 6 binding posts on the VGA and serial sockets with a 3/16in or 5mm socket or spanner, a small adjustable spanner, or if you have none of those, a pair of pliers.

    • Remove a screw from below the phono video socket.

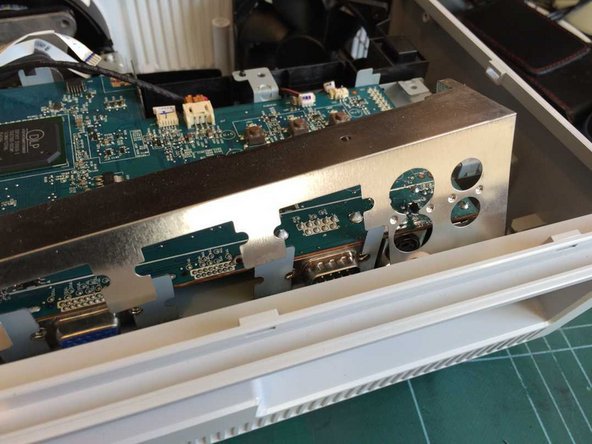
    • Angle the rear panel backwards in order to remove it. Remove also the metal screen.

  8. Acer S1210 DLP Projector Colour Wheel Replacement, Main board removal - 3: crwdns2935265:08crwdnd2935265:01crwdnd2935265:01crwdne2935265:0
    • Gently lift the main board off the optical assembly and power supply connectors, and put it aside.

    • On reassembly, take care not to trap any of the cables between the main board and the metal plate beneath.

  9. Acer S1210 DLP Projector Colour Wheel Replacement, Metal plate removal - 1: crwdns2935265:09crwdnd2935265:01crwdnd2935265:03crwdne2935265:0 Acer S1210 DLP Projector Colour Wheel Replacement, Metal plate removal - 1: crwdns2935265:09crwdnd2935265:02crwdnd2935265:03crwdne2935265:0 Acer S1210 DLP Projector Colour Wheel Replacement, Metal plate removal - 1: crwdns2935265:09crwdnd2935265:03crwdnd2935265:03crwdne2935265:0
    • A long magnetic screwdriver is very helpful for this step, and almost essential for reassembly.

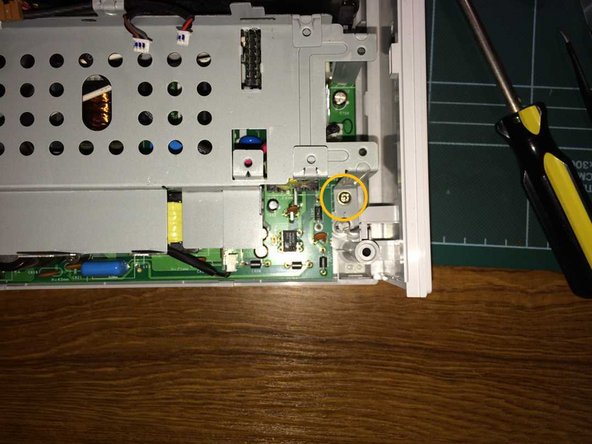
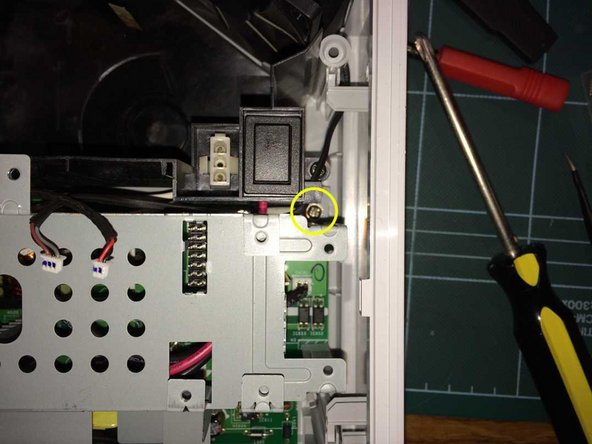
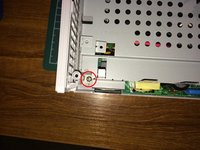
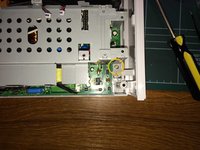
    • Remove a screw and toothed lock washer from the rear left of the metal plate.

    • Remove a screw from the rear right of the metal plate.

    • Remove a screw from the front right of the metal plate.

    • Reassembly is easier if you remove the right hand side panel. Release 2 clips along the bottom edge with a spudger then lift.

  10. Acer S1210 DLP Projector Colour Wheel Replacement, Metal plate removal - 2: crwdns2935265:010crwdnd2935265:01crwdnd2935265:01crwdne2935265:0
    • Remove a black screw from the front of the metal plate engaging with the optical assembly. This may be hidden by the wires passing through the adjacent wire clip.

    • Lift out the metal plate.

    • On reassembly, ensure that all the cables connecting to the main board are positioned roughly in the right places and none are trapped under the metal plate.

  11. Acer S1210 DLP Projector Colour Wheel Replacement, Optical assembly removal: crwdns2935265:011crwdnd2935265:01crwdnd2935265:02crwdne2935265:0 Acer S1210 DLP Projector Colour Wheel Replacement, Optical assembly removal: crwdns2935265:011crwdnd2935265:02crwdnd2935265:02crwdne2935265:0
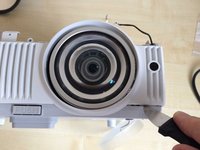
    • Remove the front panel by releasing 3 clips along the bottom, using a spudger, then angling it forwards.

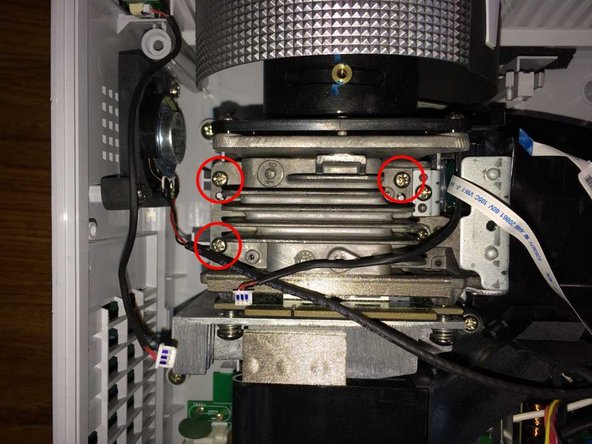
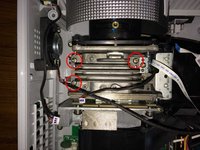
    • Remove 3 screws on the top of the optical assembly. On the right, do not remove the adjacent screw securing the colour wheel assembly.

    • Lift out the complete optical assembly.

  12. Acer S1210 DLP Projector Colour Wheel Replacement, Colour wheel assembly removal: crwdns2935265:012crwdnd2935265:01crwdnd2935265:02crwdne2935265:0 Acer S1210 DLP Projector Colour Wheel Replacement, Colour wheel assembly removal: crwdns2935265:012crwdnd2935265:02crwdnd2935265:02crwdne2935265:0
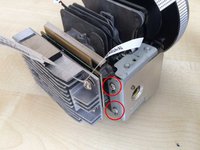
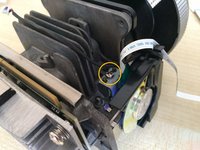
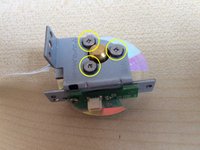
    • Remove 2 screws on the side of the colour wheel guard and remove the guard.

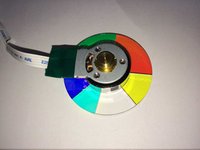
    • The colour wheel is now exposed. It is made of thin glass and could quite easily be broken by heavy handling. Take care not to get finger marks or any other contamination on it as it has very intense light shining on it which could burn them in.

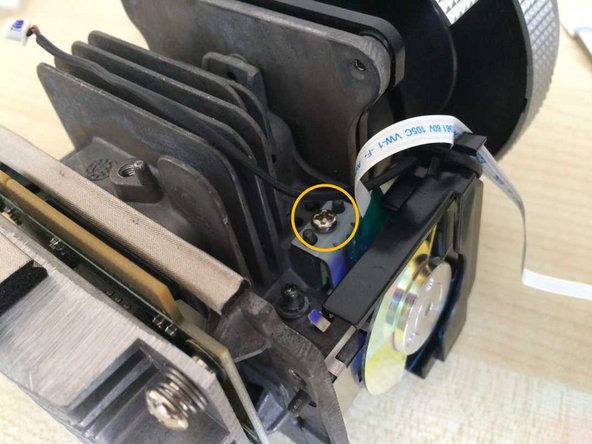
    • Remove a screw above and behind the colour wheel, and remove the wheel assembly.

  13. Acer S1210 DLP Projector Colour Wheel Replacement, Colour wheel removal: crwdns2935265:013crwdnd2935265:01crwdnd2935265:03crwdne2935265:0 Acer S1210 DLP Projector Colour Wheel Replacement, Colour wheel removal: crwdns2935265:013crwdnd2935265:02crwdnd2935265:03crwdne2935265:0 Acer S1210 DLP Projector Colour Wheel Replacement, Colour wheel removal: crwdns2935265:013crwdnd2935265:03crwdnd2935265:03crwdne2935265:0
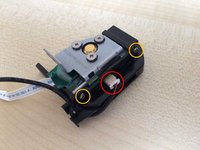
    • Disconnect the rotary position sensor cable.

    • Remove 2 small screws and remove the black plastic piece.

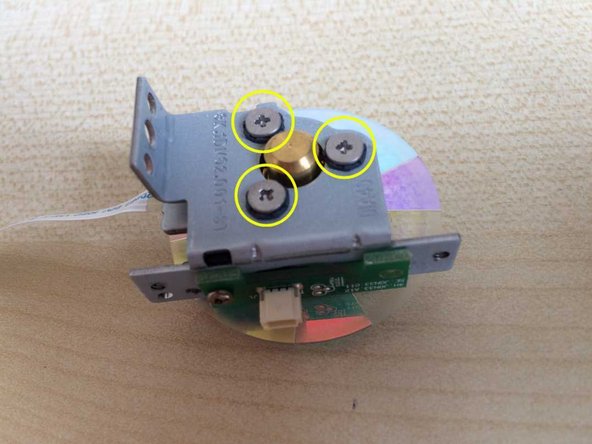
    • Remove 3 screws and lift them out of their rubber grommets.

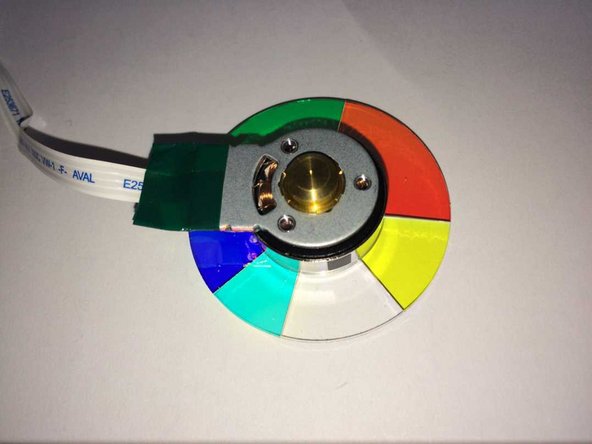
    • Holding it by the ribbon cable, rotate the bare colour wheel through 90 degrees in order to remove it.

    • No further disassembly is feasible, and the bearing is not accessible for lubrication. Flicking the edge with a finger, the wheel should spin completely freely.

crwdns2915888:0crwdne2915888:0

To reassemble your device, follow these instructions in reverse order.

Philip Le Riche

crwdns2935283:002/18/14crwdne2935283:0

30,068 crwdns2915208:0crwdne2915208:0

crwdns2935297:047crwdne2935297:0
crwdns2915084:0crwdne2915084:0

Restart Project crwdns2935289:0Restart Projectcrwdne2935289:0

Community

crwdns2931471:018crwdne2931471:0

crwdns2935297:0481crwdne2935297:0

crwdns2944067:00crwdne2944067:0

crwdns2917038:0crwdne2917038:0

crwdns2936625:0crwdne2936625:0:

crwdns2936751:024crwdne2936751:0 0

crwdns2936753:07crwdne2936753:0 1

crwdns2936753:030crwdne2936753:0 22

crwdns2942667:0crwdne2942667:0 1,418