crwdns2933423:0crwdne2933423:0

Acer Predator Helios 300 Battery Replacement

crwdns2942213:0crwdne2942213:0

  1. Acer Predator Helios 300 Battery Replacement, Battery: crwdns2935265:01crwdnd2935265:01crwdnd2935265:03crwdne2935265:0 Acer Predator Helios 300 Battery Replacement, Battery: crwdns2935265:01crwdnd2935265:02crwdnd2935265:03crwdne2935265:0 Acer Predator Helios 300 Battery Replacement, Battery: crwdns2935265:01crwdnd2935265:03crwdnd2935265:03crwdne2935265:0
    • Before you start make sure the laptop is grounded.

    • Make sure the laptop is powered off.

    • If the laptop is not turned off, there is a risk of electric shock when replacing the battery.

    • Close the cover of the laptop, then turn the laptop upside down so the back is facing up.

  2. Acer Predator Helios 300 Battery Replacement: crwdns2935265:02crwdnd2935265:01crwdnd2935265:03crwdne2935265:0 Acer Predator Helios 300 Battery Replacement: crwdns2935265:02crwdnd2935265:02crwdnd2935265:03crwdne2935265:0 Acer Predator Helios 300 Battery Replacement: crwdns2935265:02crwdnd2935265:03crwdnd2935265:03crwdne2935265:0
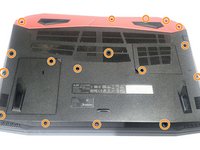
    • Remove all the screws from the back panel with a Phillips #0 screwdriver.

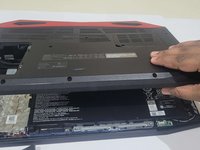
    • Remove the hard drive screw using a Phillips #0 screwdriver.

    • Use the panel tool to pop the storage hard disk open.

  3. Acer Predator Helios 300 Battery Replacement: crwdns2935265:03crwdnd2935265:01crwdnd2935265:03crwdne2935265:0 Acer Predator Helios 300 Battery Replacement: crwdns2935265:03crwdnd2935265:02crwdnd2935265:03crwdne2935265:0 Acer Predator Helios 300 Battery Replacement: crwdns2935265:03crwdnd2935265:03crwdnd2935265:03crwdne2935265:0
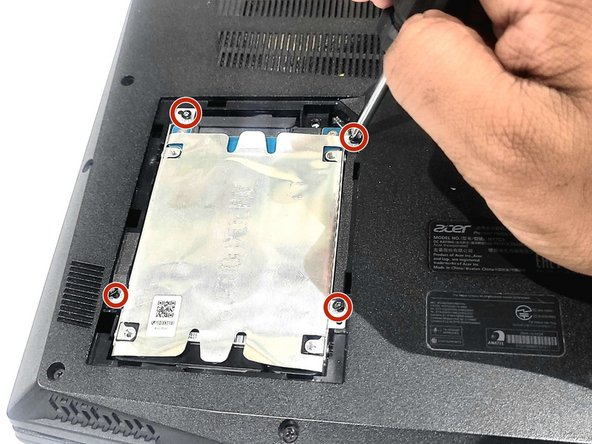
    • Remove the four screws mounted near the storage hard disk using a Phillips #0 screwdriver.

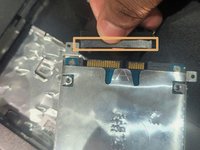
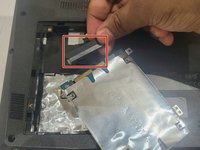
    • Disconnect the cable connected to the storage hard disk.

  4. Acer Predator Helios 300 Battery Replacement: crwdns2935265:04crwdnd2935265:01crwdnd2935265:03crwdne2935265:0 Acer Predator Helios 300 Battery Replacement: crwdns2935265:04crwdnd2935265:02crwdnd2935265:03crwdne2935265:0 Acer Predator Helios 300 Battery Replacement: crwdns2935265:04crwdnd2935265:03crwdnd2935265:03crwdne2935265:0
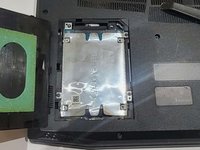
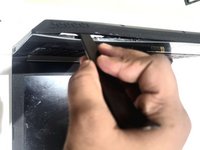
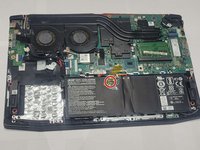
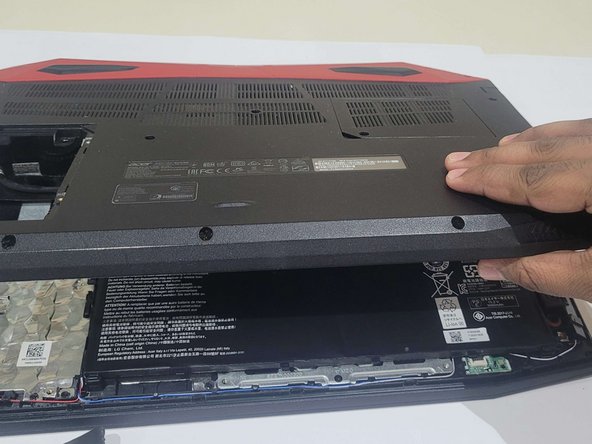
    • Use the panel tool to remove the back cover.

    • Slowly open the clips attached to the back cover, and store the cover safely.

  5. Acer Predator Helios 300 Battery Replacement: crwdns2935265:05crwdnd2935265:01crwdnd2935265:03crwdne2935265:0 Acer Predator Helios 300 Battery Replacement: crwdns2935265:05crwdnd2935265:02crwdnd2935265:03crwdne2935265:0 Acer Predator Helios 300 Battery Replacement: crwdns2935265:05crwdnd2935265:03crwdnd2935265:03crwdne2935265:0
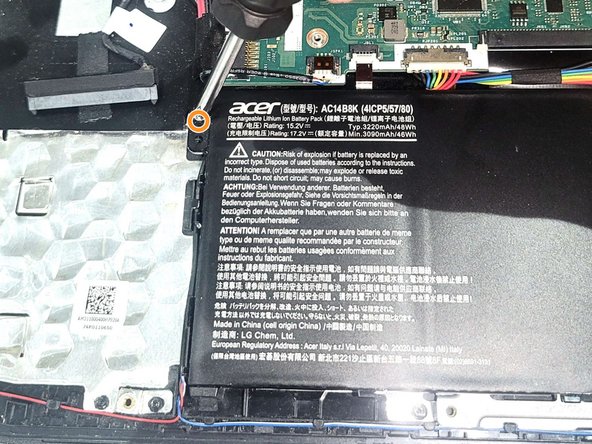
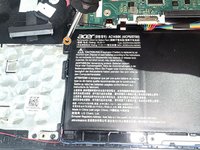
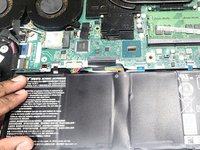
    • Remove the tape holding the battery wires in.

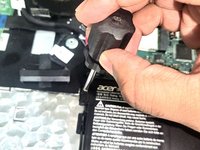
    • Remove the two screws mounted next to the battery using a Phillips #0 screwdriver.

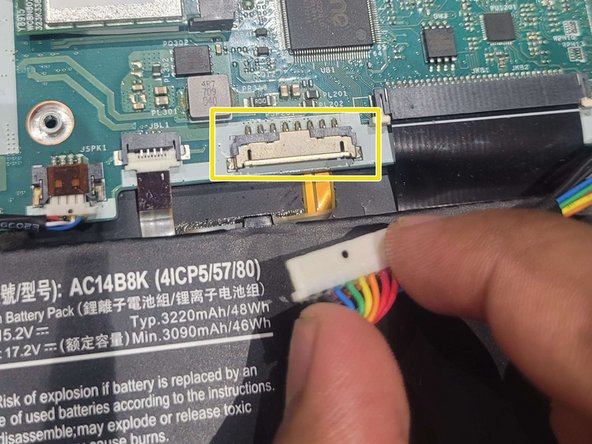
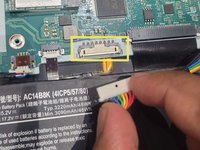
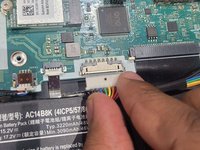
    • Disconnect the battery cable from the motherboard slowly.

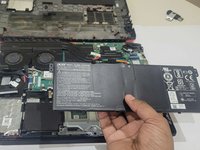
    • Remove the old battery.

  6. Acer Predator Helios 300 Battery Replacement: crwdns2935265:06crwdnd2935265:01crwdnd2935265:03crwdne2935265:0 Acer Predator Helios 300 Battery Replacement: crwdns2935265:06crwdnd2935265:02crwdnd2935265:03crwdne2935265:0 Acer Predator Helios 300 Battery Replacement: crwdns2935265:06crwdnd2935265:03crwdnd2935265:03crwdne2935265:0
    • The battery is a Household Hazardous Waste, so be sure to follow your city's laws and dispose of them properly.

    • Connect the new battery connector to the motherboard and screw it back with the screwdriver.

  7. Acer Predator Helios 300 Battery Replacement: crwdns2935265:07crwdnd2935265:01crwdnd2935265:02crwdne2935265:0 Acer Predator Helios 300 Battery Replacement: crwdns2935265:07crwdnd2935265:02crwdnd2935265:02crwdne2935265:0
    • Align the back cover with the laptop properly and click it with all the clips.

  8. Acer Predator Helios 300 Battery Replacement: crwdns2935265:08crwdnd2935265:01crwdnd2935265:03crwdne2935265:0 Acer Predator Helios 300 Battery Replacement: crwdns2935265:08crwdnd2935265:02crwdnd2935265:03crwdne2935265:0 Acer Predator Helios 300 Battery Replacement: crwdns2935265:08crwdnd2935265:03crwdnd2935265:03crwdne2935265:0
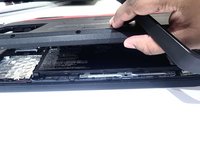
    • Insert the storage disk back in.

    • Connect it with the cable first and then fit it inside the missing space.

    • Fasten the remaining screws using a screwdriver.

crwdns2935217:0crwdne2935217:0

crwdns2935229:02crwdne2935229:0

Sidharth Rajeev

crwdns2935283:009/20/23crwdne2935283:0

211 crwdns2915208:0crwdne2915208:0

crwdns2935295:0crwdne2935295:0

crwdns2915084:0crwdne2915084:0

York University, Team O-30, O'Regan Winter 2024 crwdns2935289:0York University, Team O-30, O'Regan Winter 2024crwdne2935289:0

YORK-O'REGAN-W24SOG30

crwdns2934841:01crwdne2934841:0

crwdns2935303:01crwdne2935303:0

crwdns2947412:00crwdne2947412:0

crwdns2917038:0crwdne2917038:0

crwdns2936625:0crwdne2936625:0:

crwdns2936751:024crwdne2936751:0 7

crwdns2936753:07crwdne2936753:0 58

crwdns2936753:030crwdne2936753:0 216

crwdns2942667:0crwdne2942667:0 3,050