crwdns2915892:0crwdne2915892:0
This guide will walk you through the process of replacing a dying or dead fan in an Acer Nitro 5 AN515-53-55G9. If your computer produces excessive heat or noise during compute intensive tasks like gaming, it’s likely indicative of a problem with the computer’s fan. It may also help to clean your existing fan by removing it as shown in this guide and blowing out any dust buildup. If replacing the fan does not solve your issues, you may be able to further address any heat management issues by reapplying the thermal paste in your heatsink.
crwdns2942213:0crwdne2942213:0
-
-
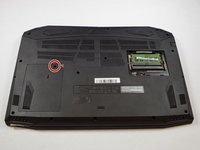
Flip the laptop upside down so that the bottom is facing up.
-
-
-
Using a Phillips #0 screwdriver, remove the 9 mm screw located in the bottom left corner of the RAM tray cover.
-
Using a plastic opening tool, remove the RAM tray cover.
-
-
-
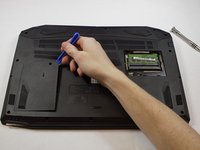
Remove the screw from the hard drive cover on the left side of the laptop with a Phillips #0 screwdriver.
-
Lift up the tray covering using a spudger.
-
-
-
-
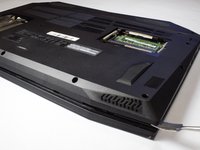
Use the Phillips #0 screwdriver to remove the fourteen 9 mm screws holding the back cover in place.
-
Remove the hard drive (if applicable) from the slot prior to removing the back cover.
-
-
-
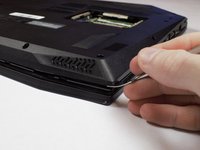
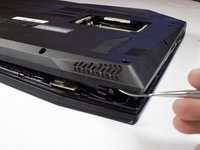
Carefully remove the back shell from the device by prying at the creases with a spudger around all the edges.
-
-
-
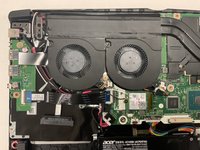
Lift the back cover off once all the clips have been disengaged.
-
-
-
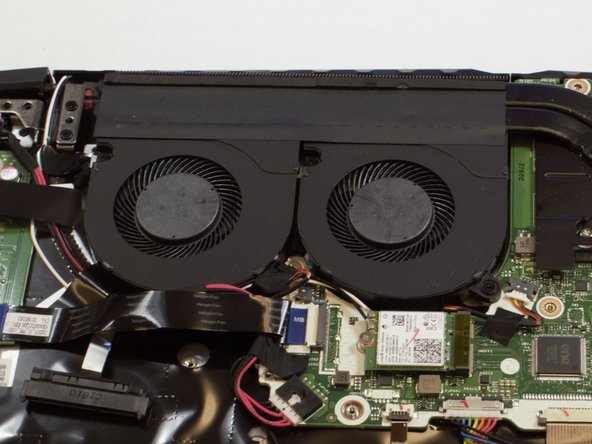
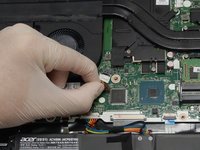
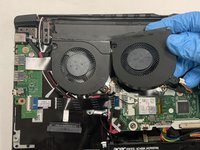
Using your fingers, slide out the two fan cables from their connectors on the motherboard.
-
-
-
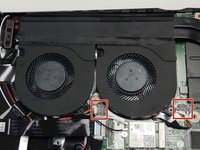
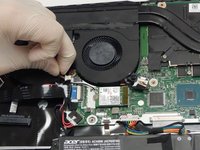
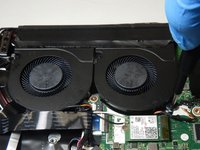
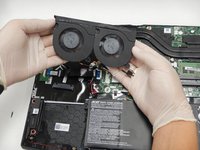
Use the Phillips #0 screwdriver to remove the four 9 mm screws holding the fan assembly in place.
-


To reassemble your device, follow these instructions in reverse order.
crwdns2935221:0crwdne2935221:0
crwdns2935229:05crwdne2935229:0
crwdns2935287:0crwdne2935287:0

The Citadel Military College of South Carolina, Team S2-G11, Eggleston Fall 2020 crwdns2935289:0The Citadel Military College of South Carolina, Team S2-G11, Eggleston Fall 2020crwdne2935289:0
CMCSC-EGGLESTON-F20S2G11
crwdns2931471:03crwdne2931471:0
crwdns2935297:06crwdne2935297:0
crwdns2947412:06crwdne2947412:0
Sometime after Step 3 but before Step 5, you HAVE TO unscrew and remove the hard drive. If you do not, you will inadvertently pull the drive’s cable out of its connector on the motherboard when you remove the back cover.
This happened to me, and I spent a good hour freaking out that I had trashed the computer.
After looking closely at the motherboard, I was finally able to find that connector. It is underneath the connector to the USB board, and it’s easy enough to reconnect it once you also disconnect the cable to the USB board.
But you will save yourself a WHOLE LOT of trouble if you carefully remove the hard drive first before you remove the back cover.
I pulled the drive’s cable out of the motherboard connector. I think I plugged it back incorrectly but now I can’t find the drive on my computer. Do I have to somehow boot the drive up or is it just plugged in incorrectly?
Jerry Di -
I freaked out reading your comment because i couldn't find my hard drive. Then i realized that i have a ssd and it's not installed at that spot.
When it said that to just pull out the fans it never told me that i had to remove the tape and now I’m scared to take the tape off is this needed?
Where would i get a new fan