crwdns2915892:0crwdne2915892:0
Follow this step-by-step guide to replace the front camera for the Acer Iconia One 8 (B1-850). Before beginning, be sure to power off your device and remove it from any external source of power.
crwdns2942213:0crwdne2942213:0
-
-
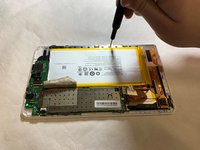
Begin by opening the back panel.
-
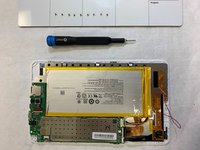
Wedge a plastic opening tool in between the front and back shell and gently separate.
-
-
-
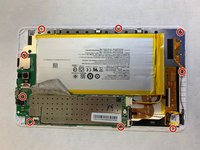
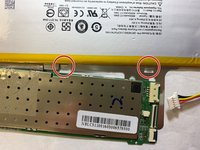
Peel back all pieces of tape indicated in picture.
-
-
-
Disconnect all cables from the device.
-
-
-
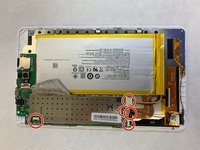
Remove the nine 3mm screws using the Phillips #000 screwdriver.
-
-
-
-
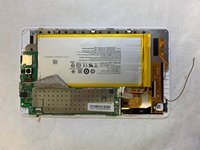
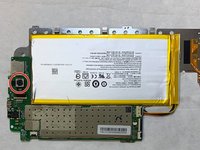
Remove and separate the back plating (top) from the glass screen (bottom).
-
-
-
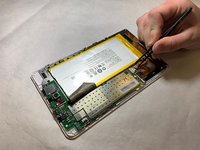
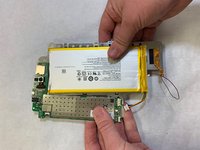
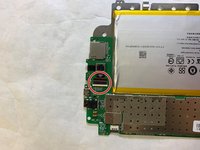
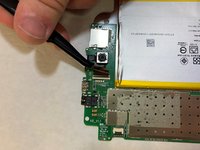
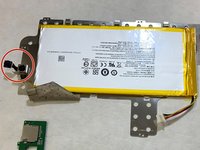
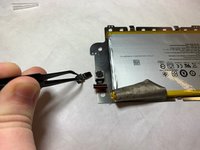
Disconnect the metal tabs connecting the battery to the motherboard frame.
-
-
-
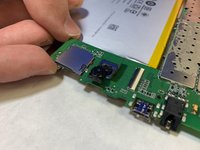
Disconnect the cable for the back camera.
-
-
-
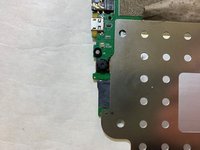
Flip the metal plating to reveal the front camera.
-
-
crwdns2935267:0crwdne2935267:0Tweezers$4.99
-
Use tweezers to carefully remove the front camera from the adhesive on the motherboard.
-
-
-
Flip the device back over.
-
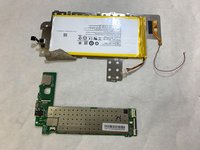
Remove the motherboard from the metallic frame by feeding the back camera and front camera cable through the port.
-
Remove the front camera from the device.
-
-
-
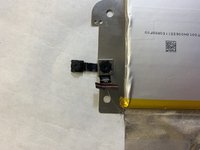
Separate the front-facing camera from the back camera.
-


To reassemble your device, follow these instructions in reverse order.
crwdns2935287:0crwdne2935287:0

IUPUI, Team S1-G2, Stella Fall 2019 crwdns2935289:0IUPUI, Team S1-G2, Stella Fall 2019crwdne2935289:0
IUPUI-STELLA-F19S1G2
crwdns2931471:03crwdne2931471:0
crwdns2935297:03crwdne2935297:0