crwdns2915892:0crwdne2915892:0
Replacing a motherboard is usually a last resort option as the motherboard is where all the data and files are in a Chromebook. Only replace a Chromebook motherboard if you are certain it is a motherboard that is malfunctioning.
crwdns2942213:0crwdne2942213:0
-
-
Using a Phillips screwdriver, remove all eleven 7.0 mm screws from the bottom of the Chromebook.
-
-
-
Find the seam along the edge of the device.
-
Wedge a finger into the groove and separate the panel from the device. If necessary, use a spudger.
-
-
-
Remove the two 4.5 mm Phillips screws located at the sides of the battery.
-
-
-
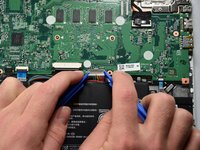
Grip the battery connection using two plastic opening tools.
-
Carefully but firmly, pry the connector from its socket by pulling it towards the battery.
-
-
-
Lift the battery out by pulling upward.
-
-
-
-
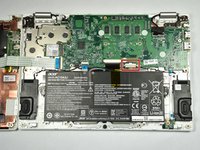
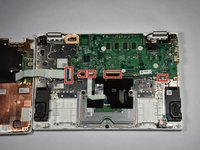
Orient the laptop so the motherboard side is further away from you in a landscape position.
-
Use the flat end of the spudger to lift the the ZIF connector retaining flaps securing the three small ribbon cables.
-
-
-
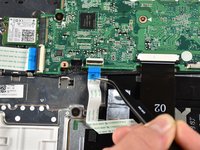
Pull out the locking mechanism of the touchpad ZIF connector with the narrow end of the spudger.
before removing the cable note that unlike ever other ZIF connector on the board, this one has the cable passing over the locking bar. The latch became detached on mine.
-
-
crwdns2935267:0crwdne2935267:0Tweezers$4.99
-
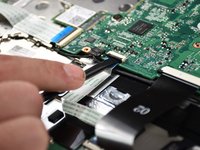
Using tweezers, pull the five ribbon cables near the bottom of the motherboard from their sockets.
-
Using tweezers, pull the single cable near the top left of the motherboard from its socket.
-
-
-
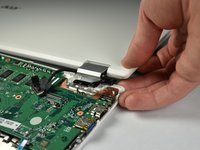
Remove the screen connector from the motherboard by pulling directly upward on the black tabs.
Anyone know what happens if you snap the ribbon cable above this connector? Screen still works, just wondered what the purpose was.
I pulled on it because another video told me to. Was fuming.
-
-
-
Remove the 2.0 mm screw from the Wi-Fi card.
-
-
-
Slide the Wi-Fi card out from the port with tweezers.
-
-
-
Remove the two 4.5 mm screws and a 2.0 mm screw from the middle of the motherboard.
-
-
-
Unscrew the two 4.5 mm screws from the top right metal tab connected to the motherboard.
-
Lift the right corner upward to remove the metal tabs from the motherboard
-
-
-
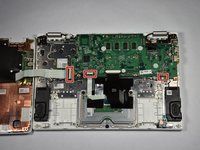
Lift the motherboard upward to completely remove it from the base.
-


To reassemble your device, follow these instructions in reverse order.
To reassemble your device, follow these instructions in reverse order.
crwdns2935221:0crwdne2935221:0
crwdns2935229:09crwdne2935229:0
crwdns2915084:0crwdne2915084:0

Cal Poly, Team S23-G2, Livingston Spring 2017 crwdns2935289:0Cal Poly, Team S23-G2, Livingston Spring 2017crwdne2935289:0
CPSU-LIVINGSTON-S17S23G2
crwdns2931471:04crwdne2931471:0
crwdns2935297:012crwdne2935297:0
crwdns2947410:01crwdne2947410:0
Pls my laptop engine got damage were should visit to fixed it