crwdns2915892:0crwdne2915892:0
Before doing this replacement make sure that you have a correct 2.5" hard drive to use. The original drive is a 500 GB hard drive, but any size could be used as a replacement.
crwdns2942213:0crwdne2942213:0
-
-
Remove the nine 4mm screws with a PH0 screwdriver.
-
Remove the two 6mm screws with a PH0 screwdriver.
-
-
-
Remove the black rubber tab on the back of the computer
-
Remove the 4mm screw hidden underneath the black tab with a PH0 screwdriver.
-
-
-
Orient the computer upside down, with the hinges facing away from you.
-
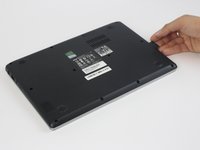
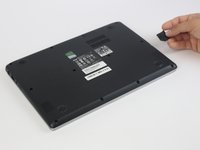
Find the black plastic piece in the SD card slot on the right side of the computer.
-
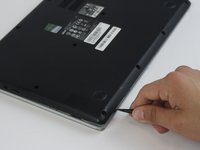
Remove the plastic piece by sliding it out of the SD card slot.
-
-
-
-
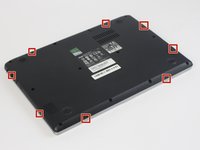
Insert a spudger at these eight locations to disengage the plastic tabs from the housing cover, and pry apart.
-
Continue around the entire perimeter of the cover with the spudger.
-
-
-
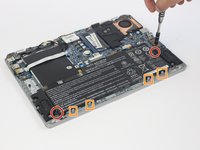
Remove the two 4mm screws using a PH0 screwdriver.
-
Depress the tabs holding the battery with a spudger.
-
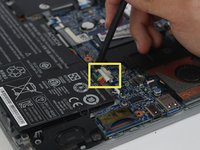
Disconnect the battery connector from the motherboard using a spudger.
-
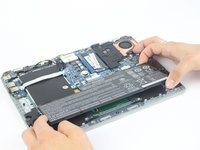
Pull the battery up and away from the laptop to remove.
-
-
-
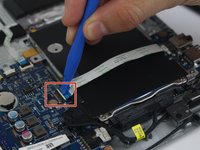
Use a plastic opening tool to pop the latch up on the ZIF connector up.
-
Pull out the ribbon cable to disconnect it from one side.
-
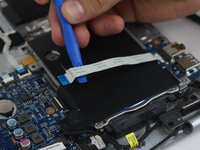
Remove the black isolation pad.
-
-
-
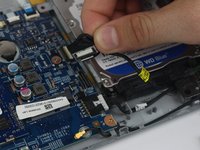
Disconnect the data connector from the motherboard using a plastic opening tool.
-
-
-
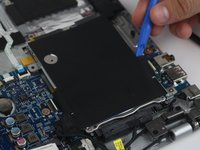
Remove three 4mm Phillips #0 screws.
-
Remove hard drive with rail attached from laptop.
-
-
-
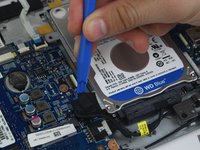
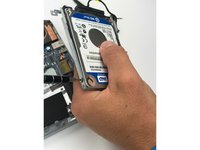
Remove the four 3mm Phillips #0 screws located on the side of the rails.
-
Separate the hard drive from the mounting rail.
-


To reassemble your device, follow these instructions in reverse order.
To reassemble your device, follow these instructions in reverse order.
crwdns2935221:0crwdne2935221:0
crwdns2935229:02crwdne2935229:0
crwdns2915084:0crwdne2915084:0

USF Tampa, Team S16-G1, Boczar Spring 2018 crwdns2935289:0USF Tampa, Team S16-G1, Boczar Spring 2018crwdne2935289:0
USFT-BOCZAR-S18S16G1
crwdns2931471:05crwdne2931471:0
crwdns2935297:010crwdne2935297:0
crwdns2947410:01crwdne2947410:0
What would be the correct hard drive upgrade. Something to make this laptop faster mines the 500gb the processor is and dual core prossee a4-1250