crwdns2942213:0crwdne2942213:0
-
-
Remove the single screw with a Phillips #0 screwdriver.
-
Use a plastic opening tool on the upper part of the panel to remove it and access the RAM.
-
-
-
After the panel has been removed, locate the RAM. It should be on the lower right.
-
There are pins around the RAM that need to be pulled back. After the pins are removed, pull the RAM chip towards you to remove it.
-
-
-
Remove the eleven screws that hold that back panel to the laptop using a J0 Phillips screwdriver bit.
-
-
-
crwdns2935267:0crwdne2935267:0Tweezers$3.99
-
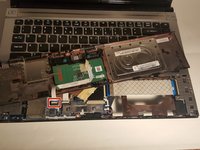
Place the laptop in the upright position, the lower front touchpad panel should be easily detatched at this point.
-
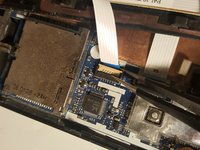
Remove the lower front touchpad panel by using an angled tweezers to disconnect the only wired tape connected to the motherboard.
-
-
-
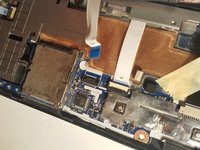
Next, disconnect the 4 wired tapes of the keyboard from the motherboard just like we did with the lower front touchpad panel.
At this step 3 additianal screws have to be removed on the lower left, middle and right side (which are also visible on the image but not marked) before the keyboard cover can be removed!
-
-
-
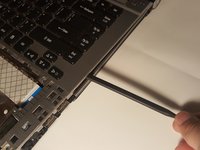
Finally, using an opening tool, gently pry along the edge of the keyboard to separate it from the laptop.
-
-
-
The battery will be on the side closest to the screen.
-
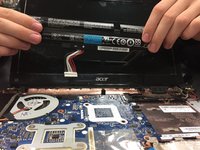
Gently lift it out. It will still be attached by white, red, and black wires.
-
-
-
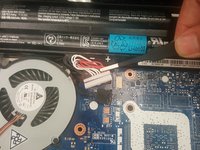
Pull the white plug, it should easily detach.
-
Remove the battery from the device.
There are 3 screws holding the keyboard that need to be removed. One at the small ribbon on the left; one at the large ribbon on the right and one in the centre of these two. This step is not shown in the teardown. Failure to do this will damage the keyboard
-


To reassemble your device, follow these instructions in reverse order. When reattaching the back panel, make sure to pry out the pwr on/off slide switch near the center. The back panel switches it off when closing, and there is no other way to avoid it.
To reassemble your device, follow these instructions in reverse order. When reattaching the back panel, make sure to pry out the pwr on/off slide switch near the center. The back panel switches it off when closing, and there is no other way to avoid it.
crwdns2935221:0crwdne2935221:0
crwdns2935229:03crwdne2935229:0
crwdns2915084:0crwdne2915084:0

University of North Texas, Team S3-G6, Thompson Fall 2017 crwdns2935289:0University of North Texas, Team S3-G6, Thompson Fall 2017crwdne2935289:0
UNT-THOMPSON-F17S3G6
crwdns2931471:04crwdne2931471:0
crwdns2935297:05crwdne2935297:0
crwdns2947410:01crwdne2947410:0
Great instructions but there is one step missing. There are three more screws holding the key board on. Once you remove the mouse they are under that part. Other than that thanks.
This was gr8! What would we do without ifixit?! Thanks!
pendarvis brooklyn - crwdns2934203:0crwdne2934203:0