crwdns2915892:0crwdne2915892:0
This guide will show you how to replace the hard drive in your Acer Aspire R7-371T-72CF.
crwdns2942213:0crwdne2942213:0
-
-
Turn off your laptop and disconnect the power adapter.
-
Locate and remove all 12 Phillips #00 6mm screws on the backside of the laptop.
-
-
-
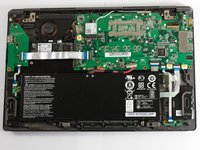
Using your prying tool, carefully remove the back panel.
-
-
-
-
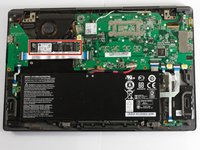
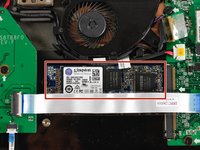
Locate the hard drive, as shown to the left. This can be identified by its location underneath the cooling fan and above the ribbon cable (the long horizontal white strip).
-
-
-
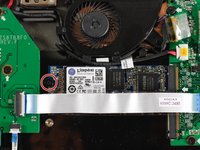
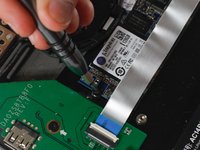
Remove the Phillips #00 4mm securing screw using your screwdriver.
-
-
-
Remove the hard drive by pulling towards the side that was secured by the screw.
-


To reassemble your device, follow these instructions in reverse order.
To reassemble your device, follow these instructions in reverse order.
crwdns2935221:0crwdne2935221:0
crwdns2935229:03crwdne2935229:0
crwdns2915084:0crwdne2915084:0

Cal Poly, Team S8-G5, Banghart Fall 2017 crwdns2935289:0Cal Poly, Team S8-G5, Banghart Fall 2017crwdne2935289:0
CPSU-BANGHART-F17S8G5
crwdns2931471:05crwdne2931471:0
crwdns2935297:06crwdne2935297:0