crwdns2915892:0crwdne2915892:0
Here is the guide to help you locate the Hard Drive to begin the replacement. Tools you will need to remove the screws is a PH0 sized Phillips screwdriver, anti-static wrist strap, and a metal spudger.
crwdns2942213:0crwdne2942213:0
-
-
Flip the laptop over on its front, so that the back is facing up.
-
Unscrew the twelve 19.05 mm PH#0 screws.
-
-
crwdns2935267:0crwdne2935267:0Anti-Static Wrist Strap$7.95
-
At the left front corner of the laptop, under the intel sticker, press the sharp end of a metal spudger between the keyboard and the back cover to pry it apart.
-
Put on an anti-static wrist strap and connect the metal clip at the other end to any piece of metal you can identify on the laptop.
-
-
-
-
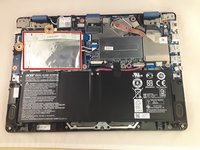
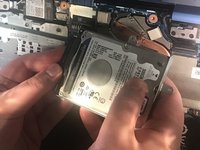
Locate the big silver aluminum square on the left side of the back of the laptop. This is the hard drive to the computer.
-
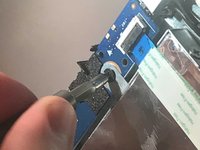
Remove the two 12.7 mm PH#0 screws.
-
-
-
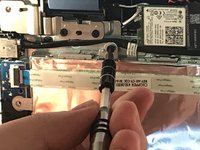
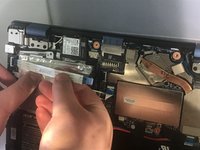
Lift and disconnect right flap of the white ribbon that runs across the hard Drive.
-
Detach the cable that is located right where you disconnected the ribbon.
-
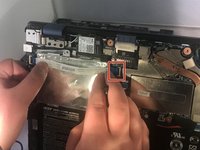
Remove the Hard Drive
-


To reassemble your device, follow these instructions in reverse order.
To reassemble your device, follow these instructions in reverse order.
crwdns2935221:0crwdne2935221:0
crwdns2935229:09crwdne2935229:0

crwdns2915084:0crwdne2915084:0

Eastern Washington University, Team S1-G2, Carnegie Fall 2017 crwdns2935289:0Eastern Washington University, Team S1-G2, Carnegie Fall 2017crwdne2935289:0
EWU-CARNEGIE-F17S1G2
crwdns2931471:04crwdne2931471:0
crwdns2935297:05crwdne2935297:0
crwdns2947412:04crwdne2947412:0
What do I do if there isn’t a hard drive in there? It says it has a 36GB SSD eMMC Form Factor internal storage, but the HDD rack/mount is empty.
Thanks!
Okay………………after I perform the above steps, what happens? Power up and all is well? How much “HDD” space do I then have? There is no parts list. Will I need some sort of external drive? When I finish this, I would like to have at least 80G of storage space. More if possible. Please reply to <<n4ctf@hotmail.com>> Thanks to all
Opened the computer and found all of the above. I have a 500Gb SSD purchased from Crucial Memory. There is no way to connect this SSD as it stands now. Do I need to purchase some kind of adapter? Is there a connector to be soldered to the mother board? I upgraded the RAM to 8Gb. TREMENDOUS improvement. Even tried installing apps/programs to an external drive. It all worked OK but not that much of an increase in internal storage. I don’t need a bunch of statements. I need a solution or direct me to where I can obtain a fix. Thanks
For the unlucky users (like me) with the eMMC version, you can install a SATA drive only if you solder the missing components on the motherboard and buy the missing SATA cable. I found this article where they successfully added a HD, with the parts list. Only 4 capacitors and a connector is missing, but they are SMD ones, good soldering skills needed.