crwdns2915892:0crwdne2915892:0
Describes how to replace the RAM in the netbook.
crwdns2942213:0crwdne2942213:0
-
-
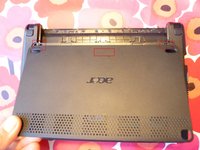
Put the netbook, so the back side is upwards.
-
-
-
Push the right lock to the right so the red filed is visible on the left.
-
-
-
Now move the left lock which is spring loaded to the leftand keep it there. Then with the other hand remove the battery by pulling down.
-
When reassembeling the new battery push it up into the netbook and do lock the right by moving it to the left so the red field disappears.
-
-
-
Open the lid othe the netbook. Use the Jimmy from the upper left corner of the keyboard. Put it between the keyboard and th casing and move it to the right. It might help to use a metal spudger to push in the pins holding the keyboard in place.
-
Then move down along the sides where there is one pin on each side. After that twist the keyboard towards you.
-
-
-
-
Now open the brown connector so the flat cable is loose. Then you can remove the keyboard.
-
-
-
Remove the 5 screws marked with "Door".
-
-
-
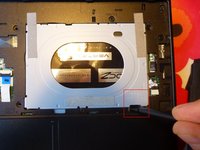
Use a spudger or flat screwdriver to push down the hatch where it is marked "Door release".
-
Now you can carfully remove the hatch.
-
When reassembling the hatch look that the noses are aimed at the appropriate holes in the case, then you can press down the rest of the hatch onto the netbook.
-
-
-
Put the netbook with the bottom up.
-
-
-
With a spudger push the arms holding the memory in place outwards to release the memory.
-
-
-
Lift the memory and pull it out.
-
According to Intel's data sheets the CPU can not use more then 2GB of RAM.
-
When installing the memory first push it into the slot and then press it down onto the motherboard.
-


To reassemble your device, follow these instructions in reverse order.
To reassemble your device, follow these instructions in reverse order.
crwdns2935221:0crwdne2935221:0
crwdns2935229:05crwdne2935229:0
crwdns2934873:0crwdne2934873:0
100%


crwdns2934885:0crwdne2934885:0 crwdns2934875:0crwdne2934875:0
crwdns2934877:0crwdne2934877:0 ›
